
Enter Glen Coe... Conquering Curved Ridge on my first visit!
I had an inkling that I was a bit of a scrambler, having downclimbed the summit chimney of Cir Mhor and summited the Cobbler solo in snow a few years back... after this walk it was confirmed, I love it and I want more!
When I was 5 years old I visited Glen Coe when passing through driving from Loch Ness back to Glasgow, around that time in 1982 the likes of Adam and the Ants were on Top of the Pops. The night before this walk an old TOTP was on TV and it was exactly the same one I remember vividly from this time in my childhood! It was meant to be...
This crazy adventure began while on holiday in Fuerteventura in the middle of June, having texted Iain some pics of a Volcano walk, a few days later I received a simple message...
"Weather looking good for next week so i'm gonna pencil in curved ridge for Saturday the 30th if you fancy it?"
It was a simple and easy reply...
"Nice one aye count me in!"
I spent the final evenings of my holiday reading up on Curved Ridge and doing my homework so I knew what to expect... which was airy scrambling and breathtaking exposure! A big thanks to houdi and others for reports like An Idiot's Guide to Curved Ridge that were very helpful to prepare with.
Back home a few days later and a mention of our plans to another walking partner Michele soon meant we would be travelling up there as a party of 3 and in style with Iain taking the Subaru.
A strange thing happened though, the stars aligned, fate brought me full circle to 1982 and after a few months of doing smaller hills and walks I really needed an epic day out... yet I wasn't worried in the slightest, in fact I was absolutely buzzing at the prospect of srambling up the north face of Stob Dearg! Any initial fears or worries were strangely absent...
Although it would only be my 15th Munro, a childhood spent climbing trees and rocks along with a few years hillwalking experience meant I felt more than ready to up the game ahead of my scrambling exam, in fact I would later be cursing everyone I know since childhood for not taking me scrambling up the mountains sooner!
The night before excitement was at fever pitch as Iain, Michele and I texted walk reports and pics to each other so of course none of us got the early night we wanted. An early rise and collection soon saw us in the west end for a breakfast and sandwiches for later pitstop on the way and the drive up to Glen Coe took no time at all thanks to being in the blue beast.
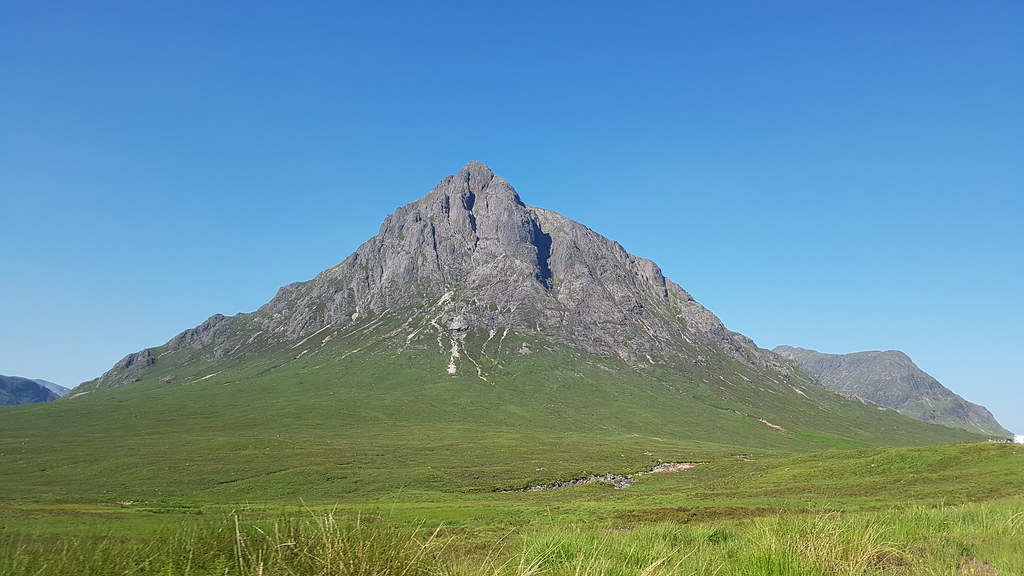
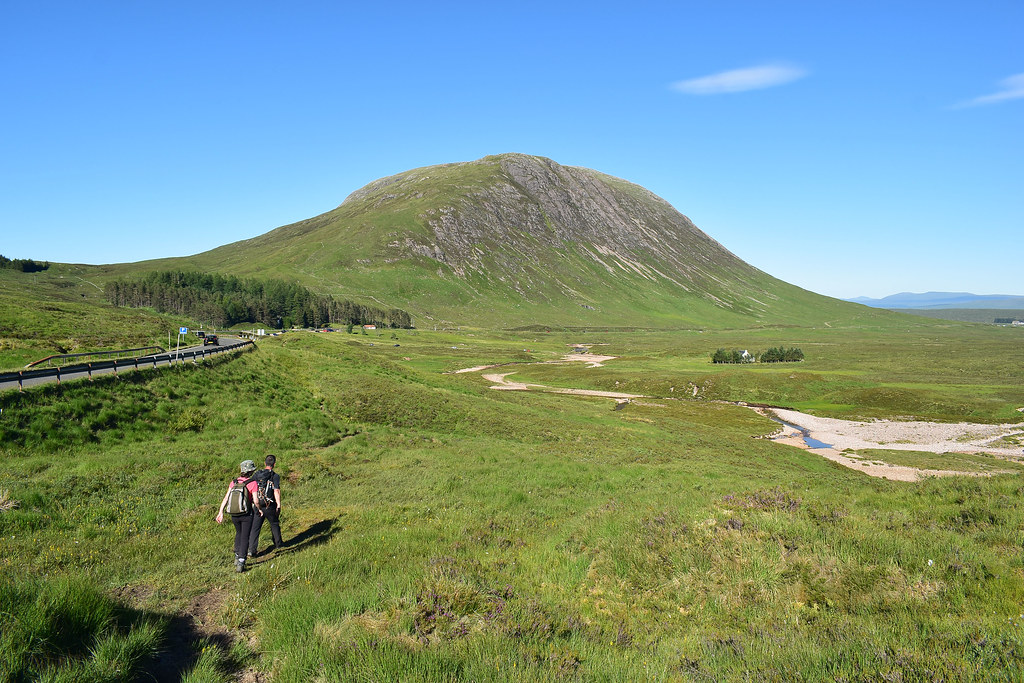
I had asked Iain if he didn't mind driving for this one as since it was my first trip into the Glen I wanted to be able to soak in the arrival and see what we had in store as the Buachaille Etive Mor loomed ever closer...
 DSC_1800 20180630_094708 by Chris Mac, on Flickr
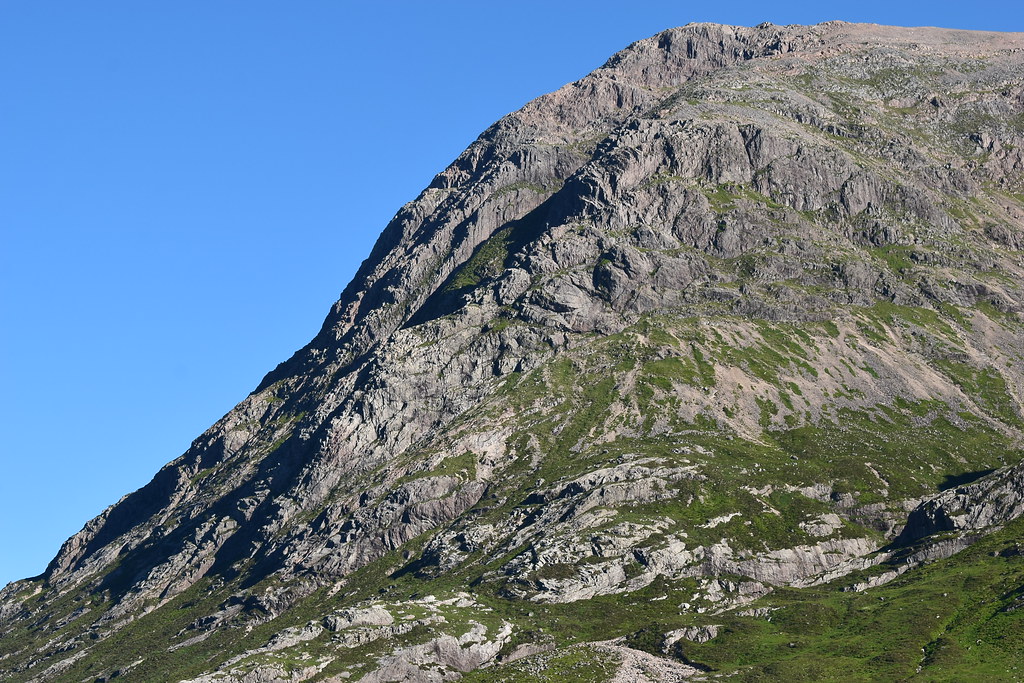
Curved Ridge, from the summit go down, turn left and you'll find the large slab of Rannoch Wall with Crowberry Tower sticking out at the top, the ridge goes from the bottom of Rannoch Wall and curves up around it to the left then back again towards the summit as shown so well in houdi's report:
 DSC_1801 20180630_094745 by Chris Mac, on Flickr
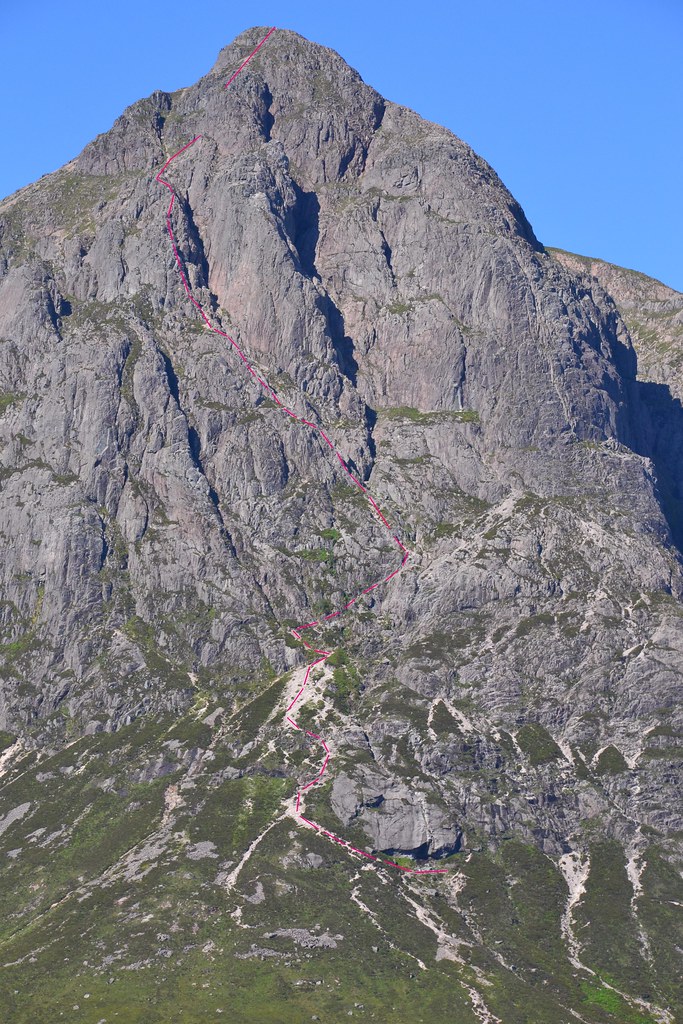
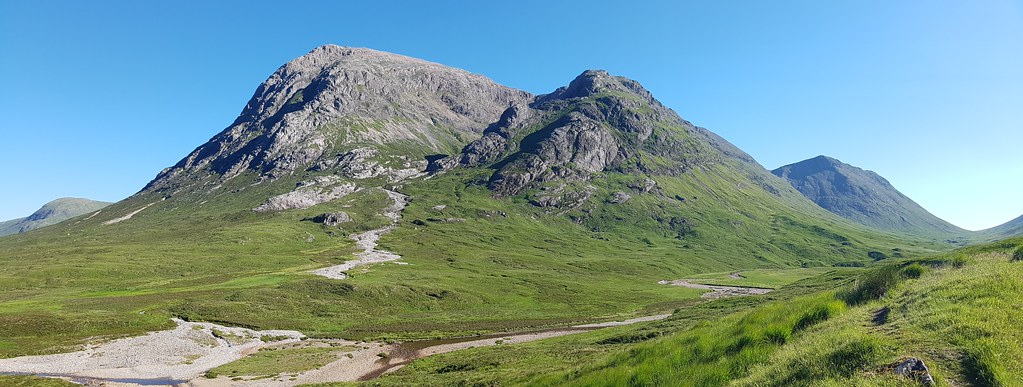
This image by jwramsay in his report was very useful in showing the route, except we wouldn't go behind Crowberry Tower and would instead continue up to the end of Curved Ridge:
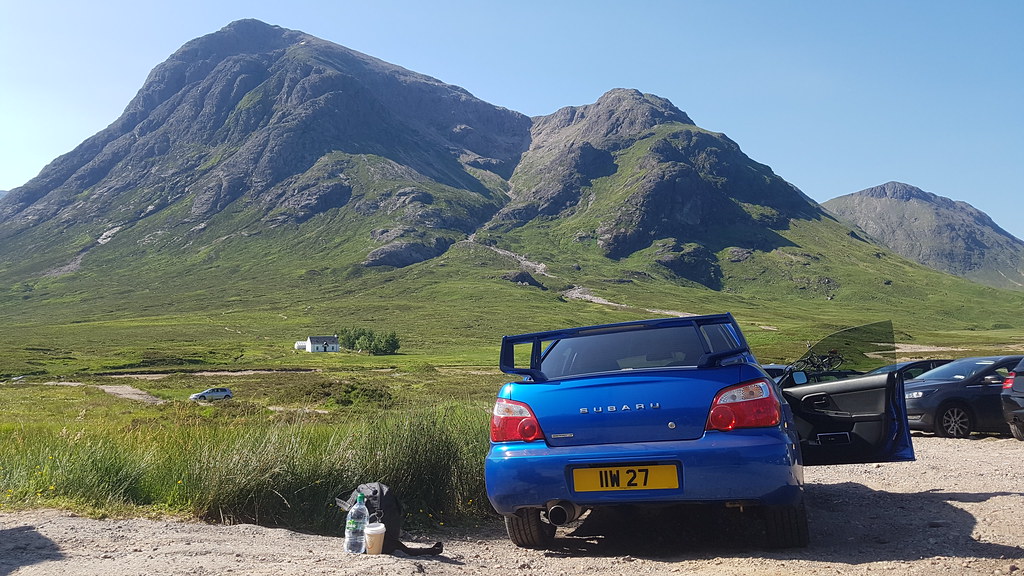
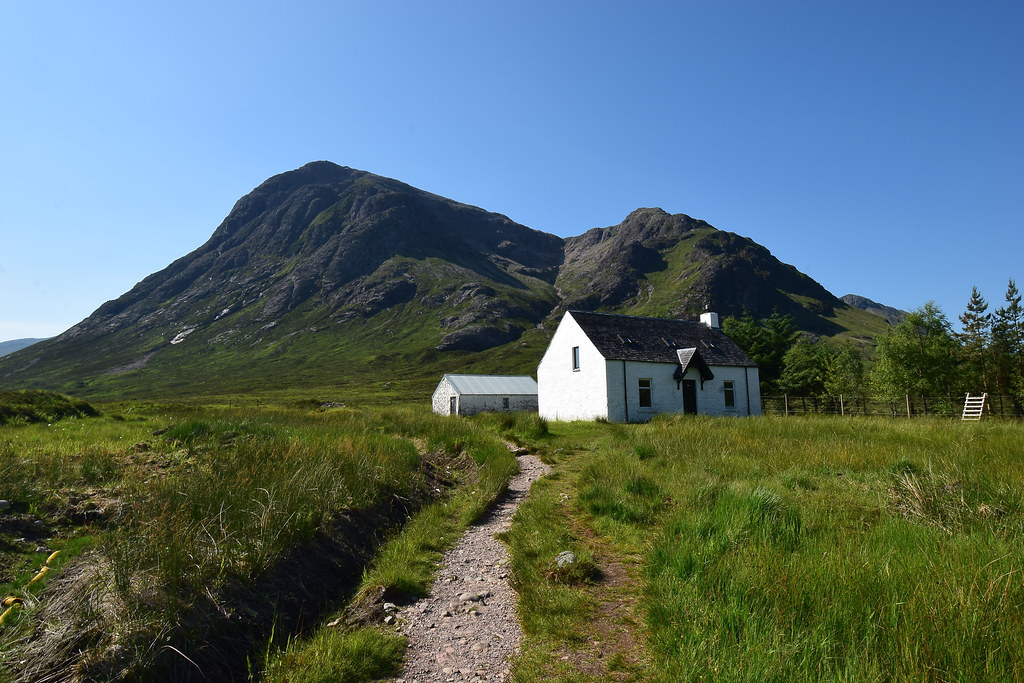
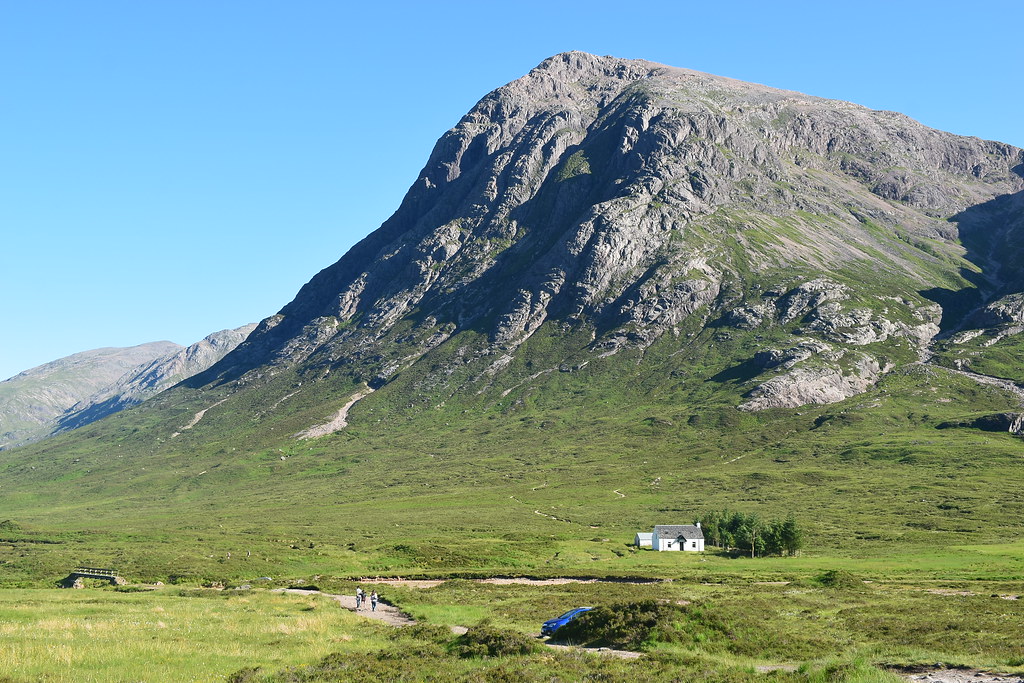
We parked just before 10am and got ready, the conditions were absolutely perfect:
 DSC_1802 20180630_095247(0) by Chris Mac, on Flickr
No tourist route for us thanks, we'll be going left when we reach the fork in the path:
 DSC_1819 by Chris Mac, on Flickr
The path climbs gradually up the hillside and around the base of Stob Dearg:
 DSC_1829 by Chris Mac, on Flickr
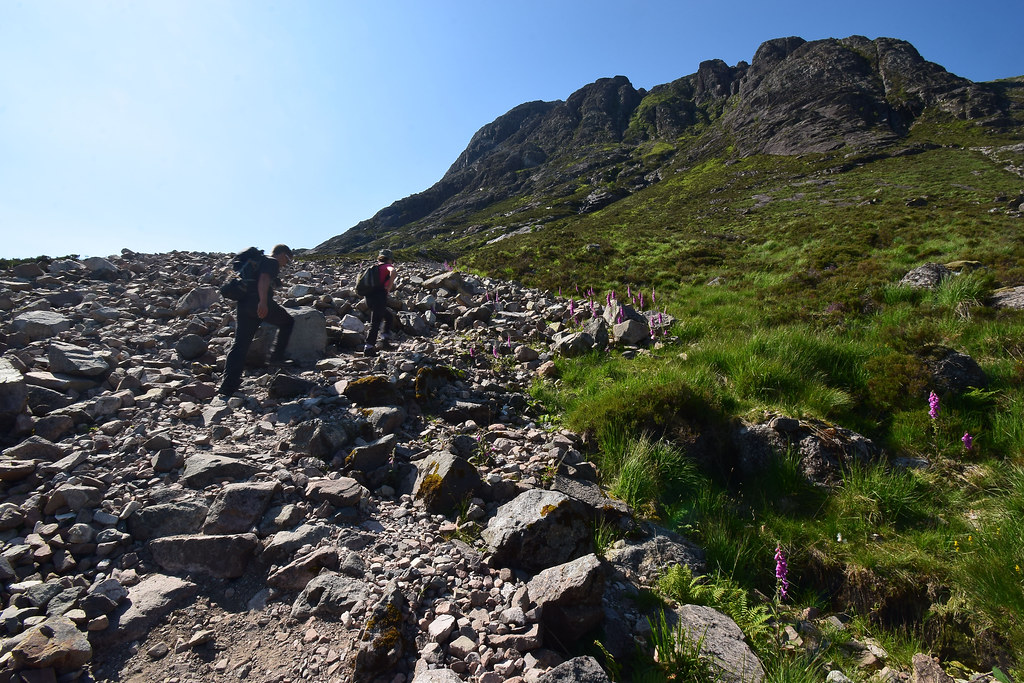
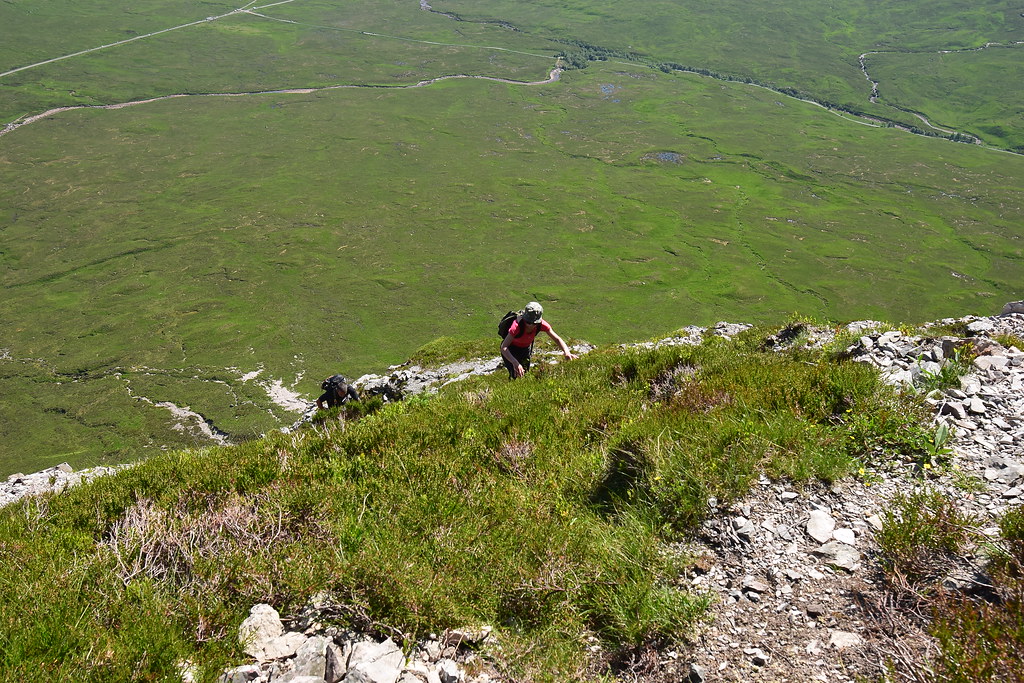
We're soon at some of the scree fields and making our way towards and across Great Gully:
 DSC_1838 by Chris Mac, on Flickr
 DSC_1847 by Chris Mac, on Flickr
Check out the smiles, this would be a constant feature during the walk!
 DSC_1855 by Chris Mac, on Flickr
We continue around on the path towards Stob a' Ghlais Choire and Creise:
 DSC_1862 by Chris Mac, on Flickr
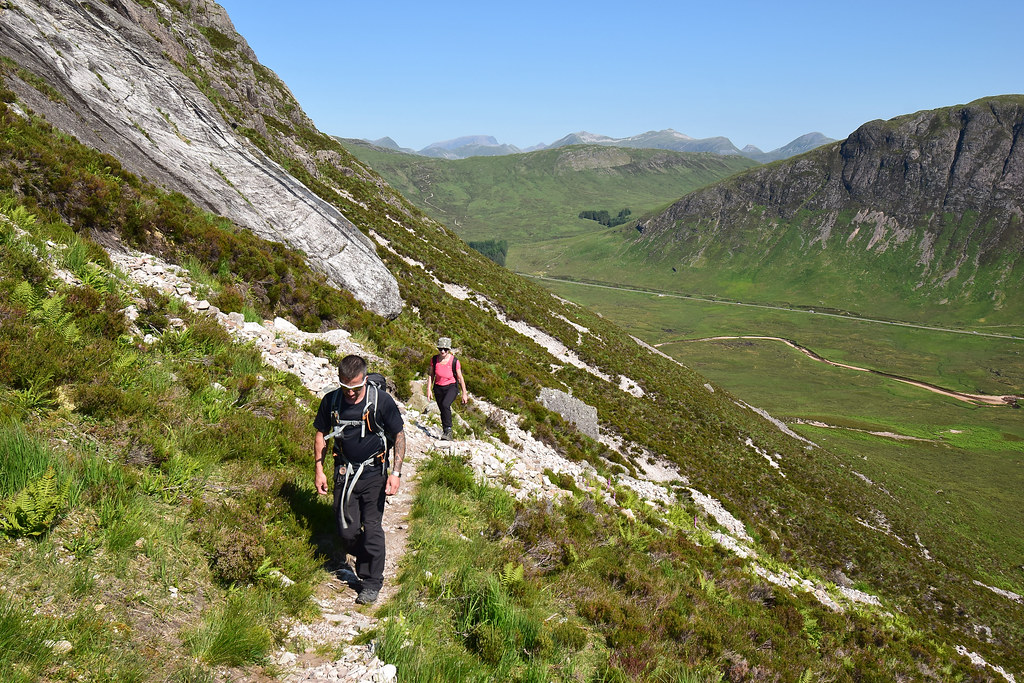
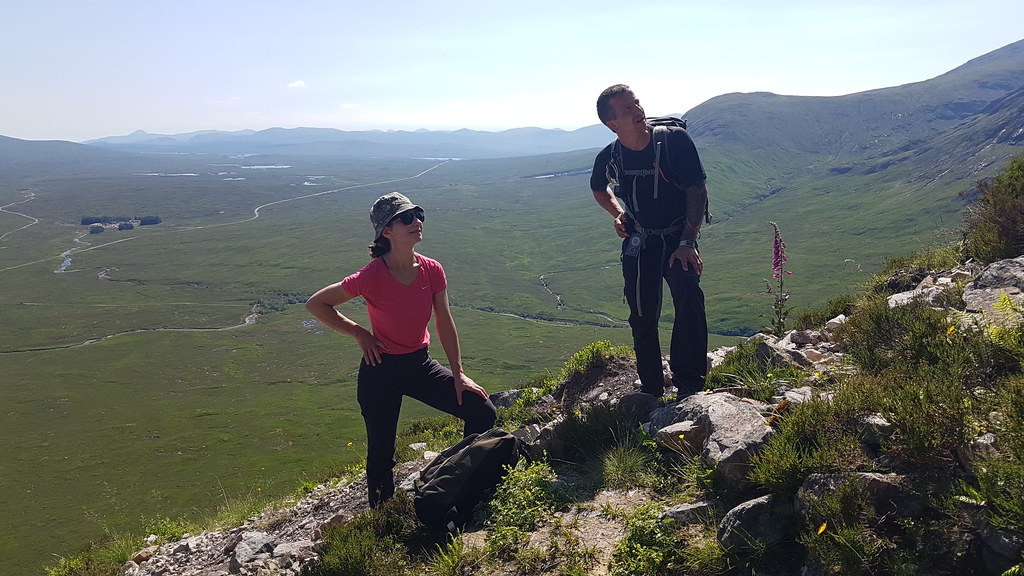
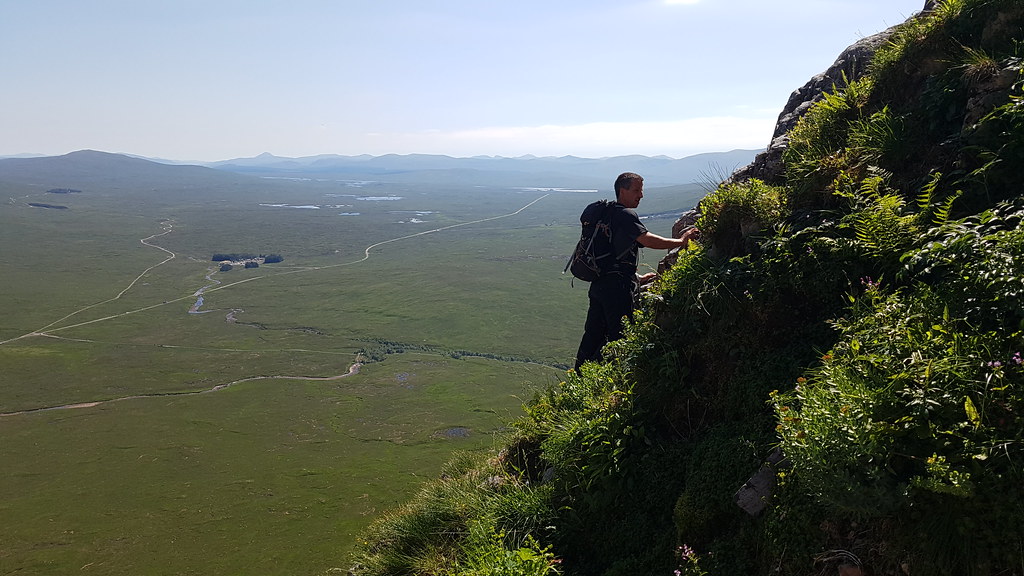
Still gaining height gradually as we pass the water slab, it was a very warm day already and behind us the view is opening up to Ben Nevis, Binnein Mor and the other Mamores:
 DSC_1868 by Chris Mac, on Flickr
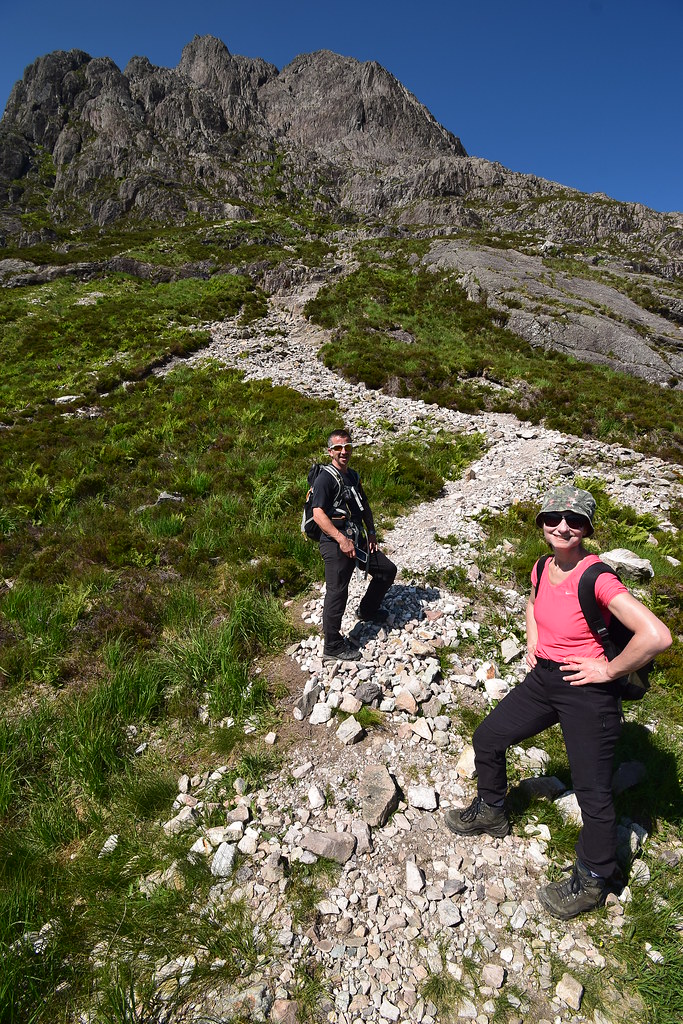
At the start of the scree/path, let's do this... please note that this shot is with a wide angle lens so the background is not quite so far away, it towers above you and this shot is also pointing upwards at an angle, it's much more intimidating being at the bottom looking up than appears in this shot!
 DSC_1879 by Chris Mac, on Flickr
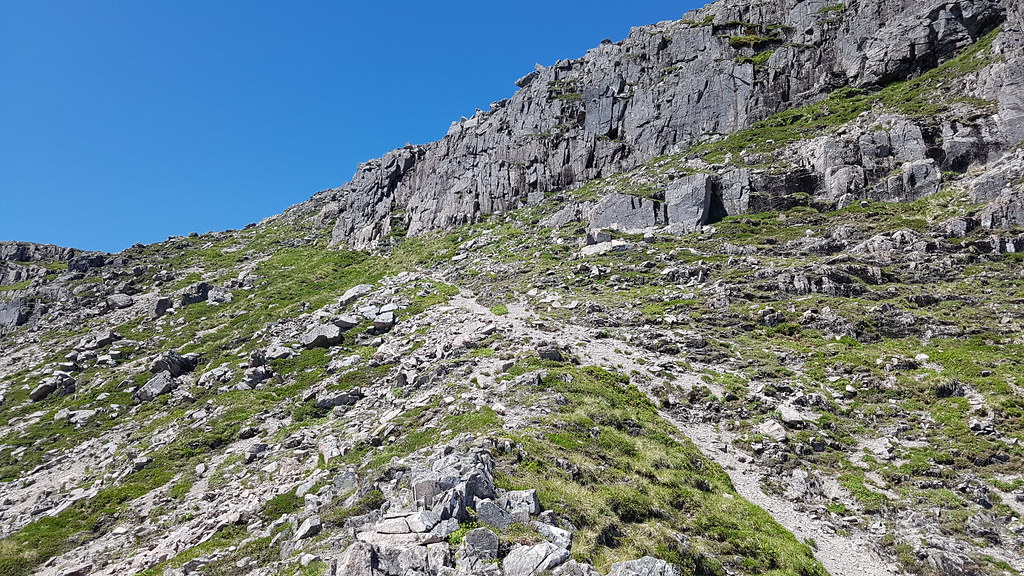
We're now heading up the scree path:
 DSC_1880 20180630_105450 by Chris Mac, on Flickr
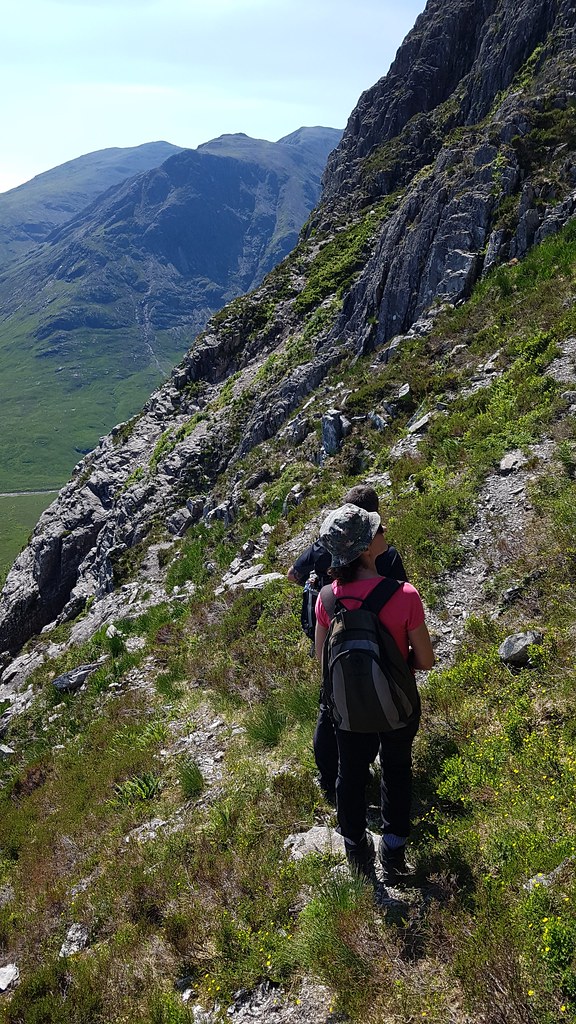
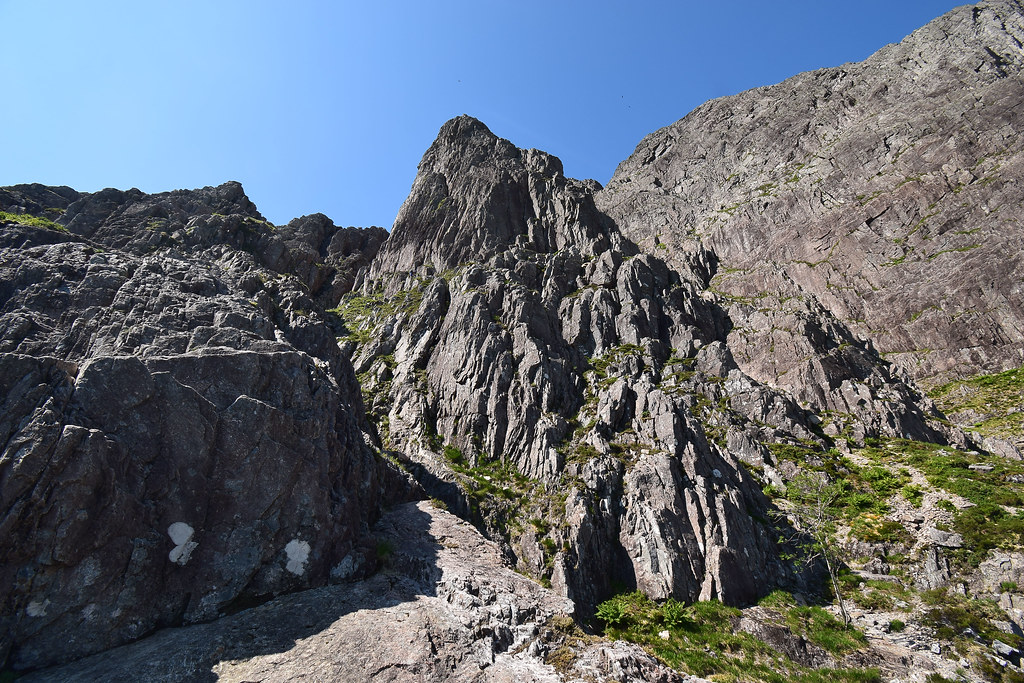
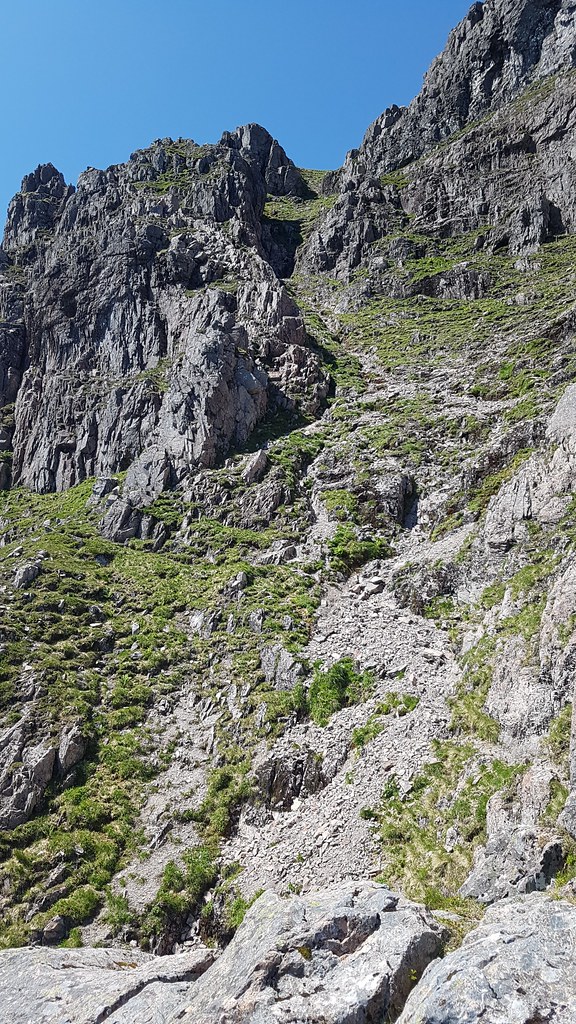
A pause to view the way ahead and do some routefinding:
 DSC_1880 20180630_105910 by Chris Mac, on Flickr
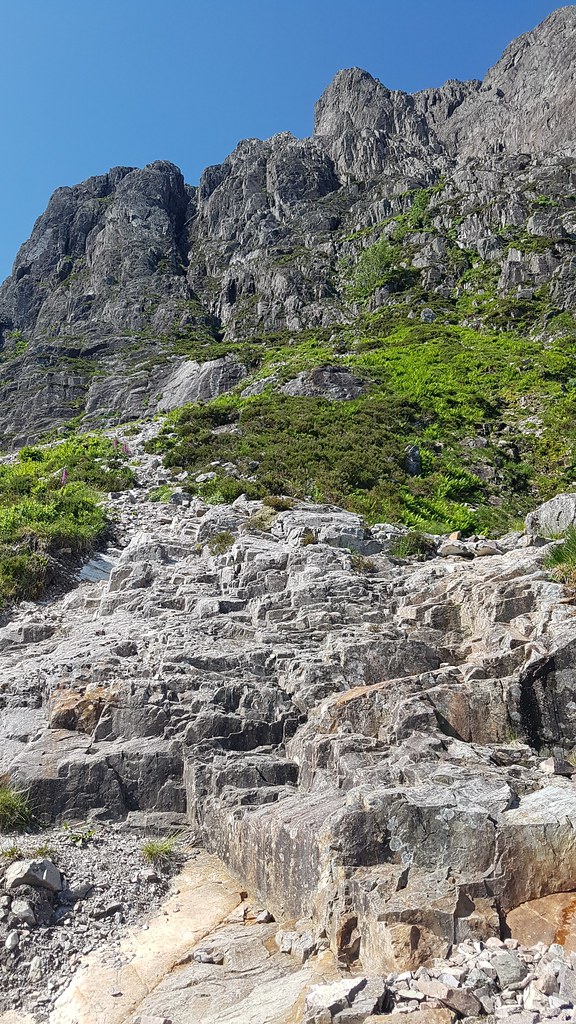
The way ahead, this shot is taken looking up the way!
 DSC_1881 20180630_105927 by Chris Mac, on Flickr
Having climbed Curved Ridge about 4 years ago Iain was in the lead, although it would turn out that his memory from 4 years ago wasn't as fresh as he hoped!
 DSC_1882 2018-06-30 11.05.13 by Chris Mac, on Flickr
We reviewed the route notes which said head to the right which we did as I took the lead:
 DSC_1883 2018-06-30 11.13.12 by Chris Mac, on Flickr
Still gaining height and it's getting steeper...
 DSC_1884 by Chris Mac, on Flickr
Something was wrong, an assessment of the situation told us we were a bit too far along to the right:
 DSC_1889 20180630_111924 by Chris Mac, on Flickr
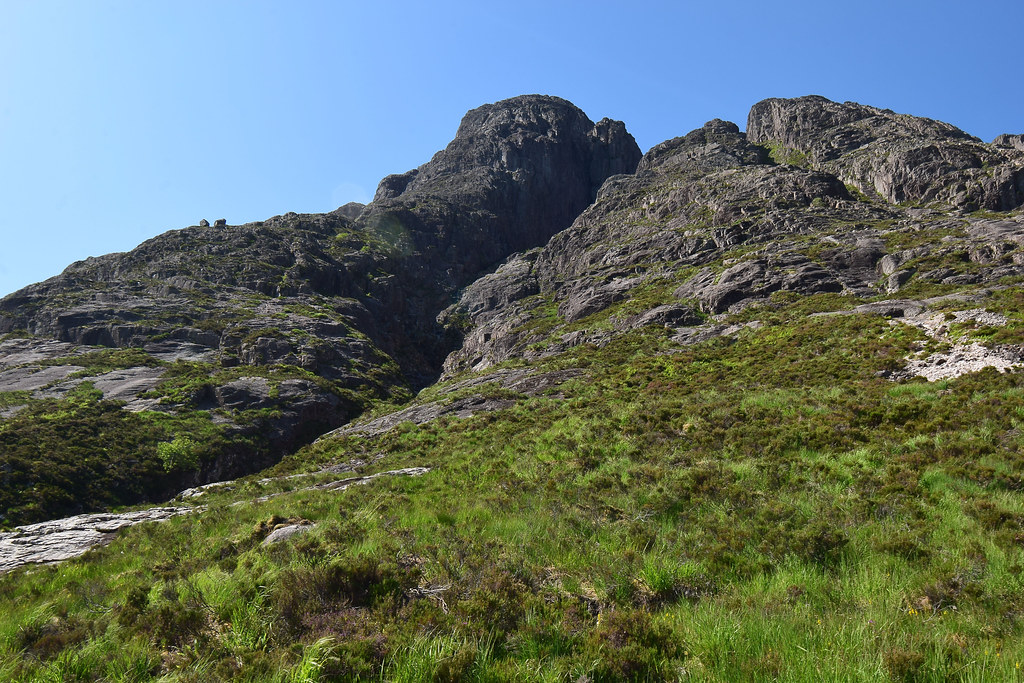
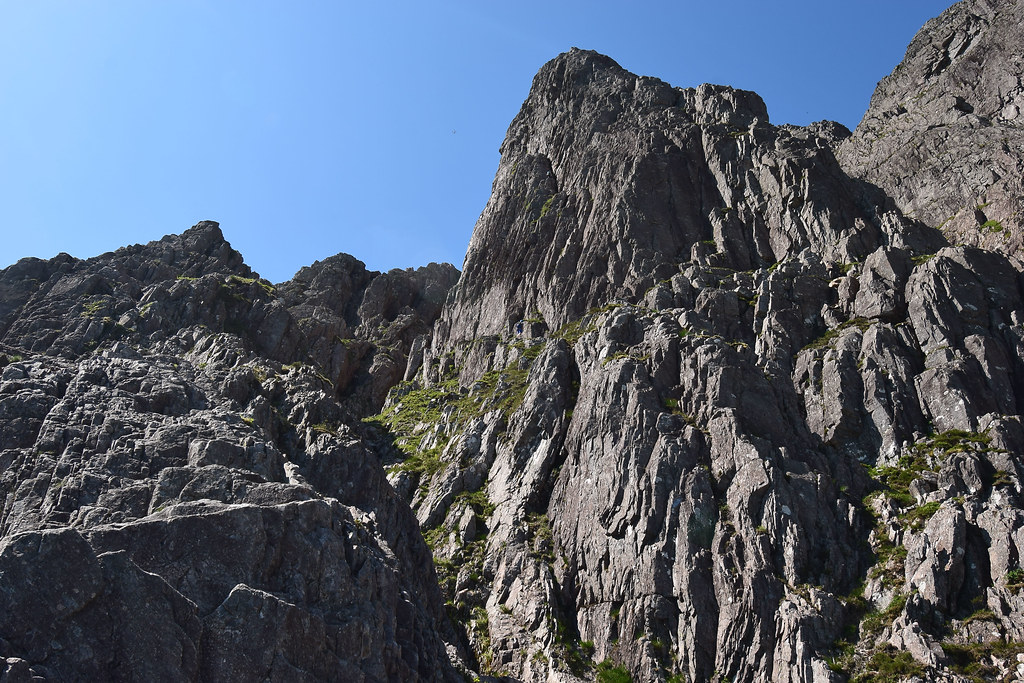
Looking up, we were below the route up to Rannoch Wall and had inadverntantly gone beyond the gully coming down from it:
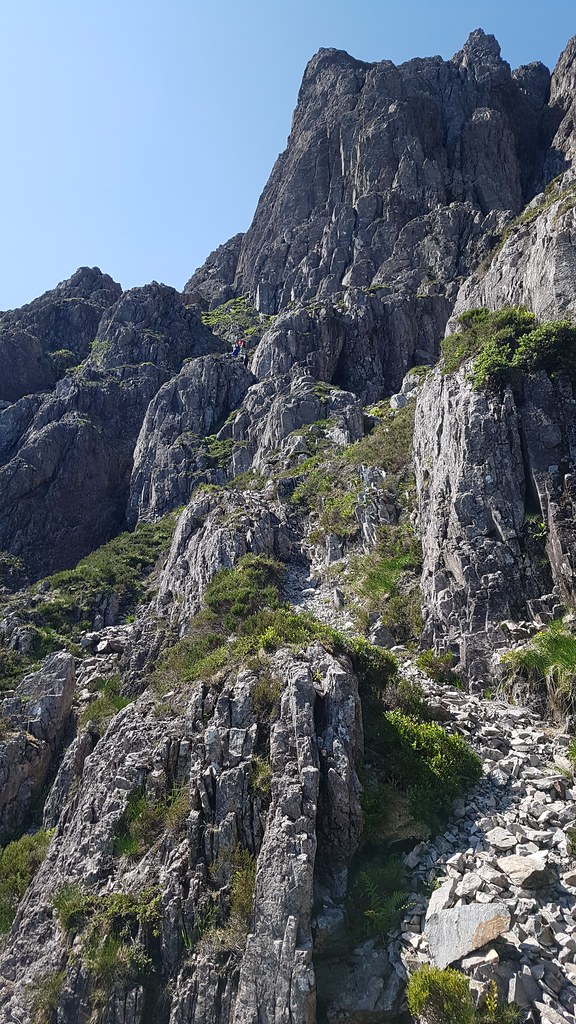 DSC_1889 20180630_112205 by Chris Mac, on Flickr
At around this point we realised we would have to backtrack slightly down and left again to reach the start of curved ridge...
 DSC_1889 20180630_112720 by Chris Mac, on Flickr
We went back down slightly, over the gulley again and were soon back on track, the routefinding to the start is definitely one of the trickier aspects of Curved Ridge, especially when your guide is relying on faint memories from 4 years ago...
Now we're on track again, the pointy feature looking overhead is Rannoch Wall which will soon be all we can see on our right hand side, curved ridge starting down to the left of it:
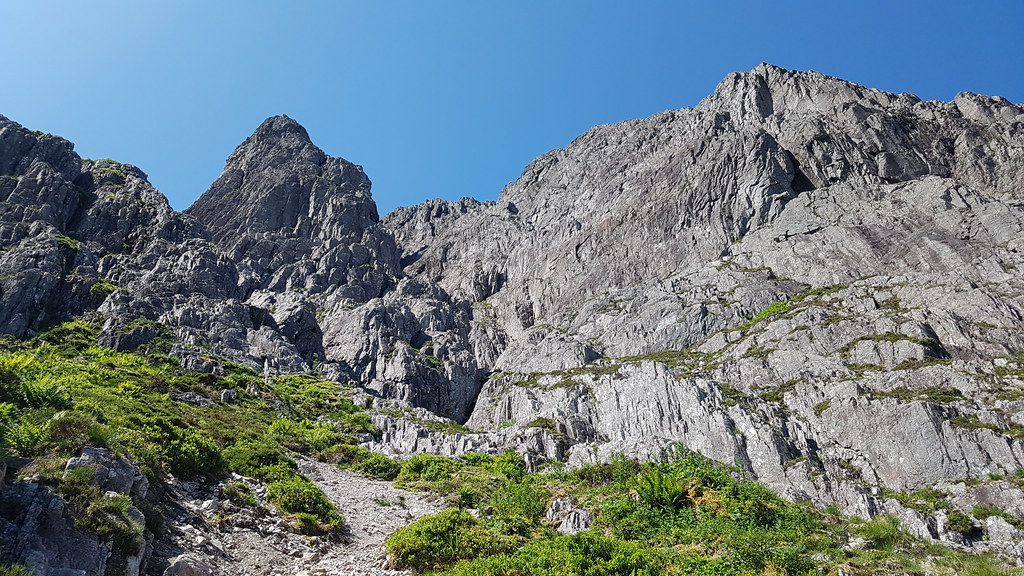 DSC_1889 20180630_112953 by Chris Mac, on Flickr
This is where the fun really begins!!
We briefly discussed a climbing order, nobody was fussed, so Iain went first and left the two rookies bringing up the rear. Michele has over 60 Munro's in her bag including most of Glen Coe, the Mamores, Torridon, Skye... she's an experienced scrambler with a no fear attitude (just keep her out of bogs ) so maybe that should read with the rookie at the rear!
And we're off...
 DSC_1889 20180630_113855 by Chris Mac, on Flickr
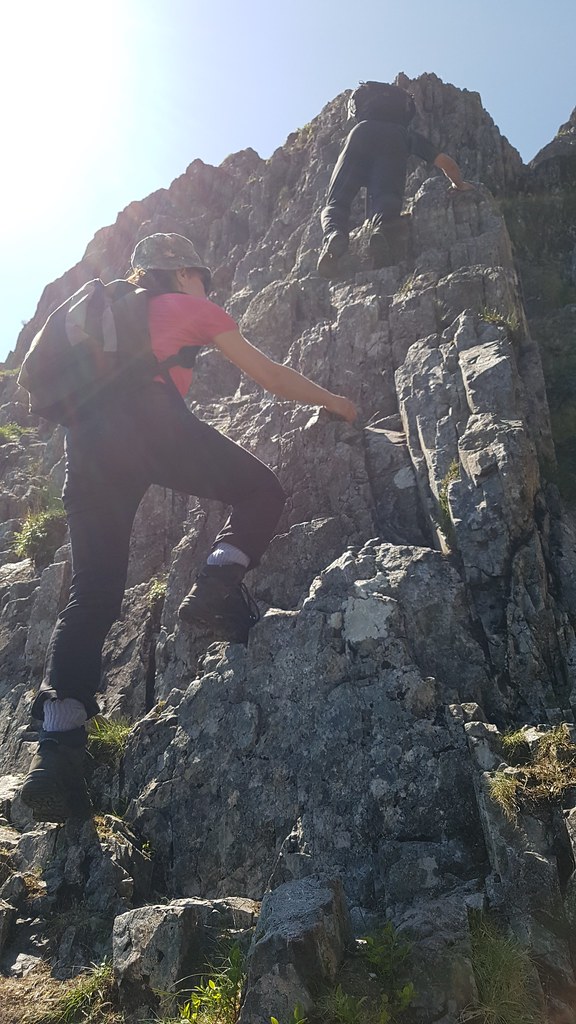
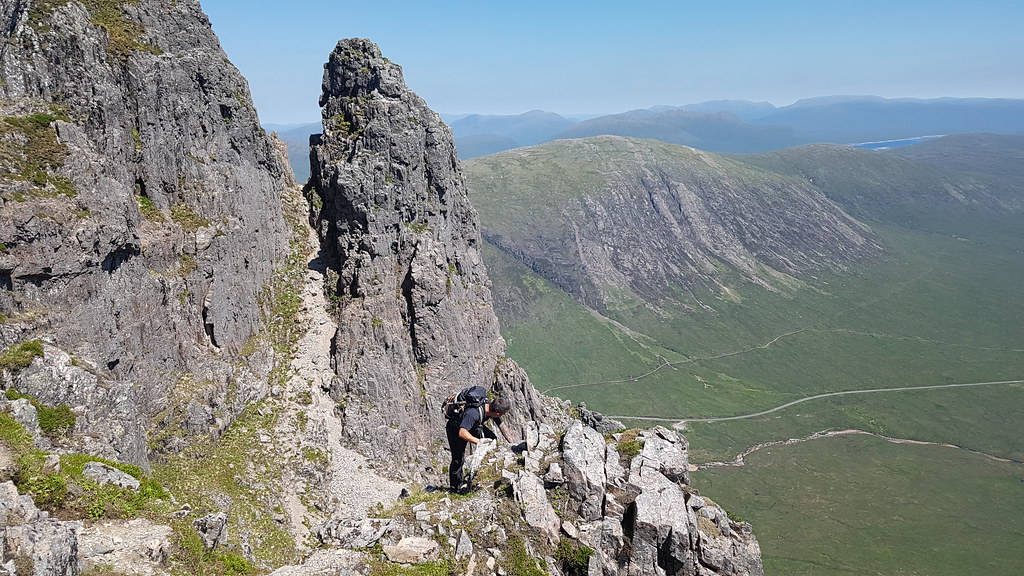
First wee ledge reached, time for a quick phone snap to the side to indicate the scrambling involved:
 DSC_1889 20180630_114258(0) by Chris Mac, on Flickr
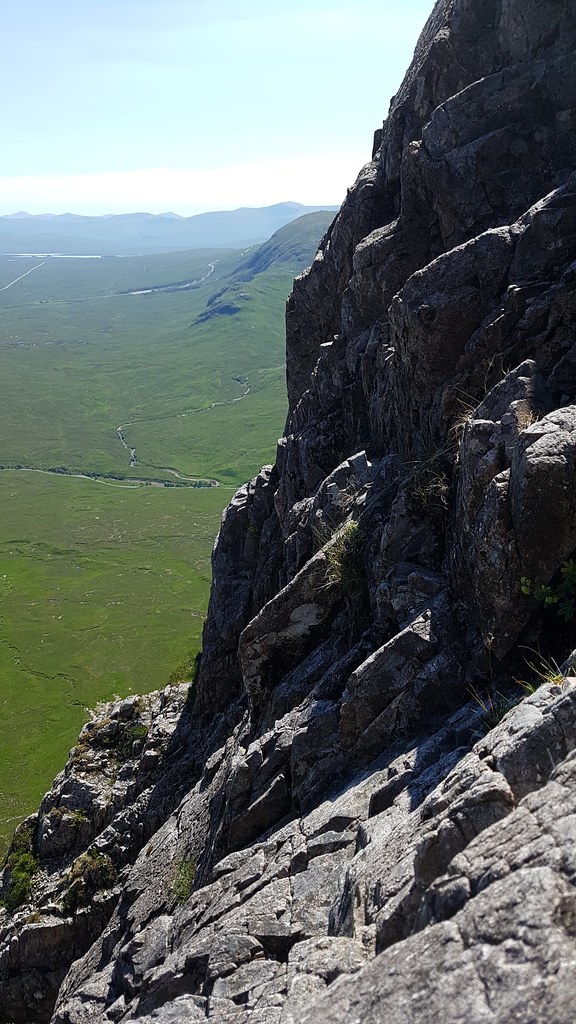
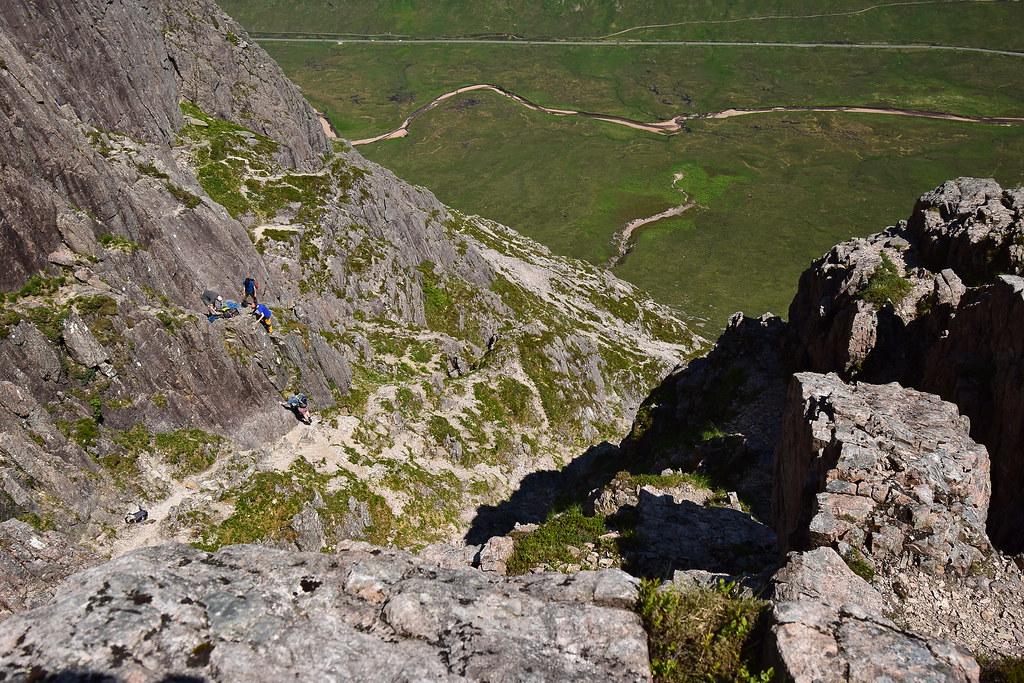
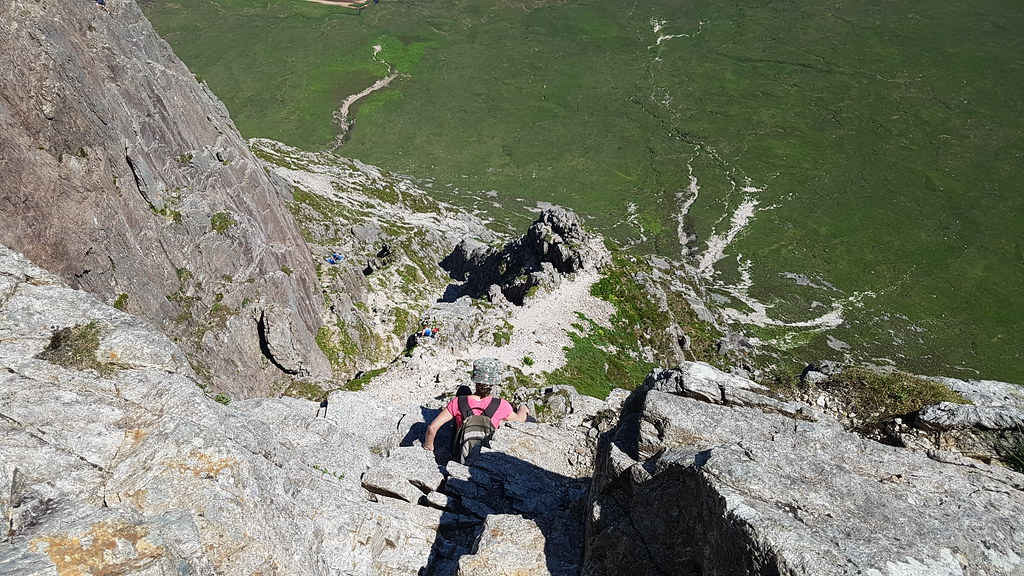
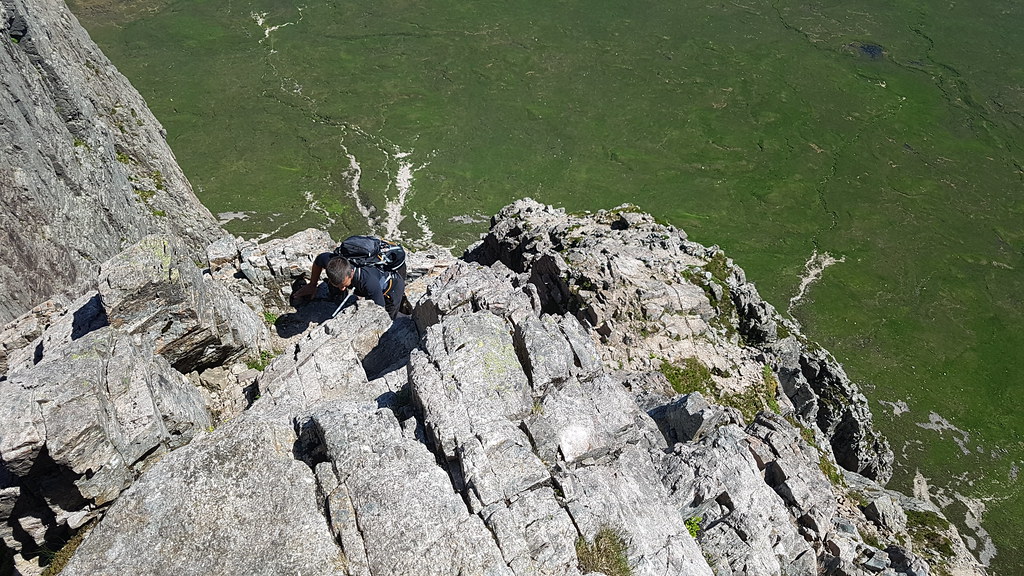
Those of you with vertigo should maybe look away now...
 DSC_1889 20180630_114451 by Chris Mac, on Flickr
For those of you that can handle looking down, you'll see multiple hand grips and the less than vertical slant of the rocks so as long as you are ok climbing and having a long drop below you, you should find curved ridge within your ability.
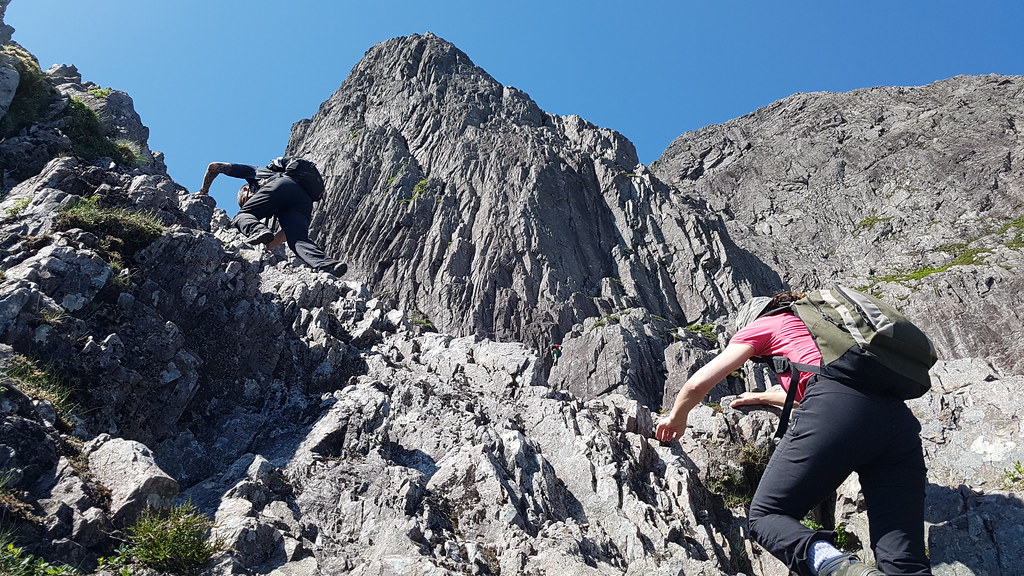
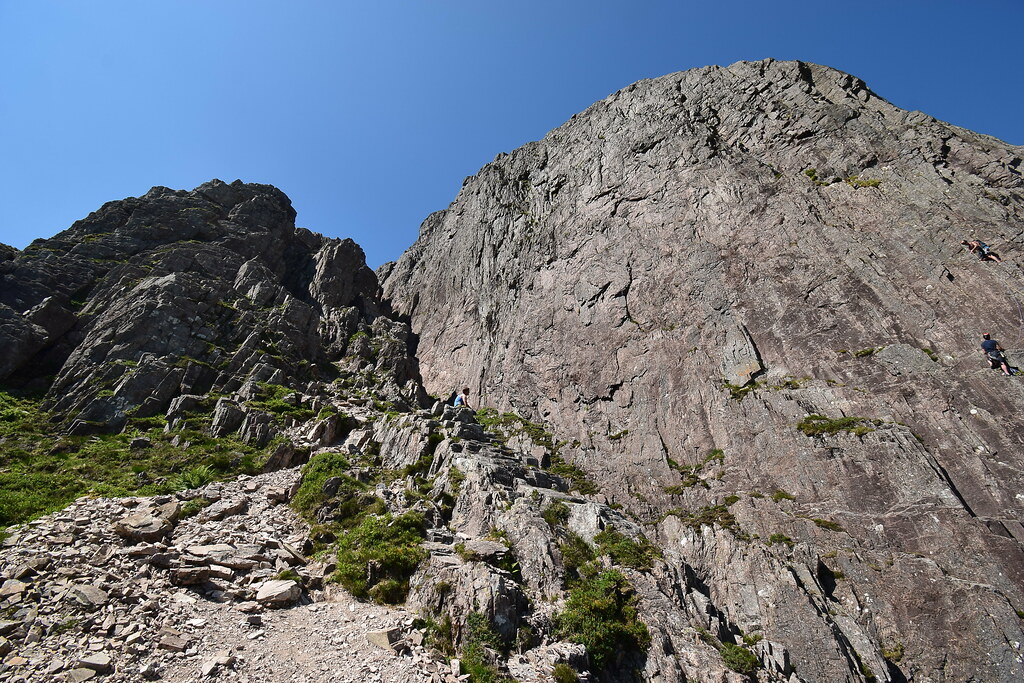
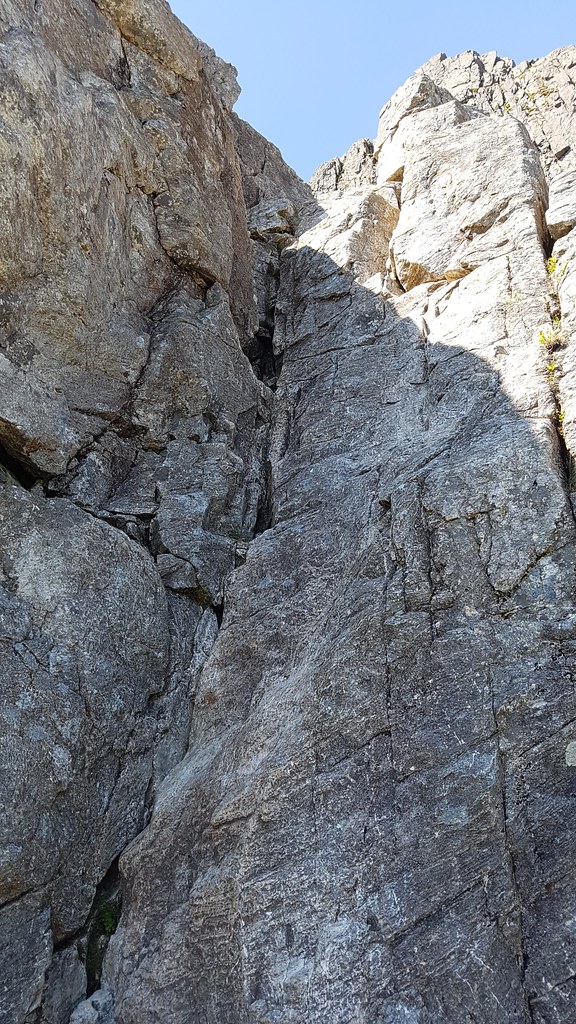
After the climb up the first section of the ridge we reach a platform large enough for a water break, scrambling in direct sunlight in this heat is thirsty work!
Looking up, Rannoch Wall in the middle again, curved ridge going up to the left:
 DSC_1890 by Chris Mac, on Flickr
We could hear a strange buzzing sound up ahead... some of the climbers up at Rannoch Wall were using a drone which can just be seen in this pic:
 DSC_1898 by Chris Mac, on Flickr
We're more than half way up Stob Dearg and the view over to the Mamores, Grey Corries and Easains is a cracker:
 DSC_1907 by Chris Mac, on Flickr
Now that we were tearing our way up Curved Ridge it was scrambling heaven, aided by the very useful crampon scratches on the rocks which are great for ensuring you stay on track:
 DSC_1908 2018-06-30 11.52.20 by Chris Mac, on Flickr
Still going, now in the zone:
 DSC_1908 20180630_115056 by Chris Mac, on Flickr
As the route continues the massive bulk of Rannoch Wall begins to dominate and about a dozen climbers are enjoying the glorious conditions today:
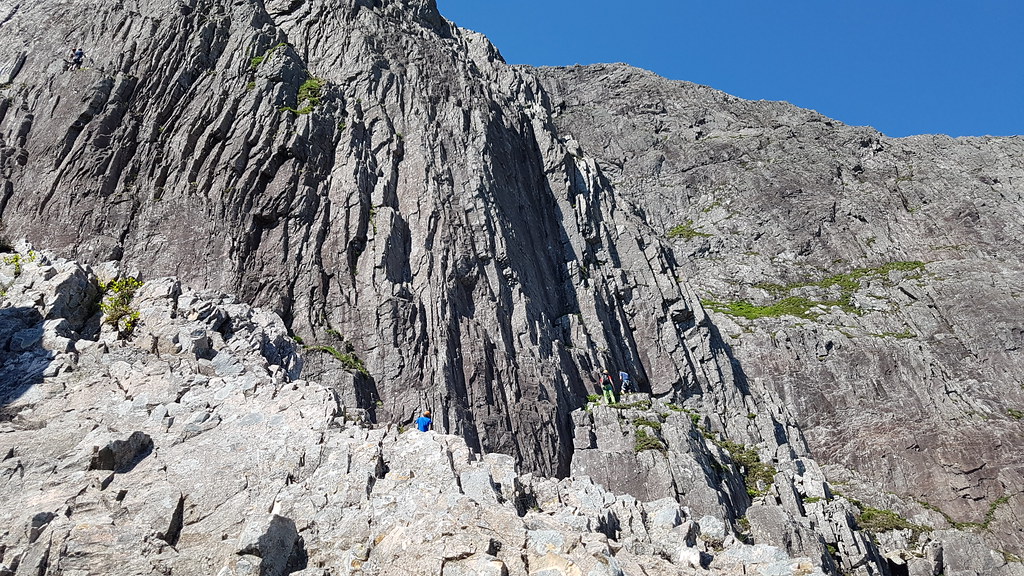 DSC_1908 20180630_115241 by Chris Mac, on Flickr
Michele posing on Curved Ridge, still sporting a massive smile, these never left all three of us throughout the day!
 DSC_1910 20180630_115622 by Chris Mac, on Flickr
As long as you keep out of the gully inbetween the ridge and Rannoch Wall then you'll be fine.
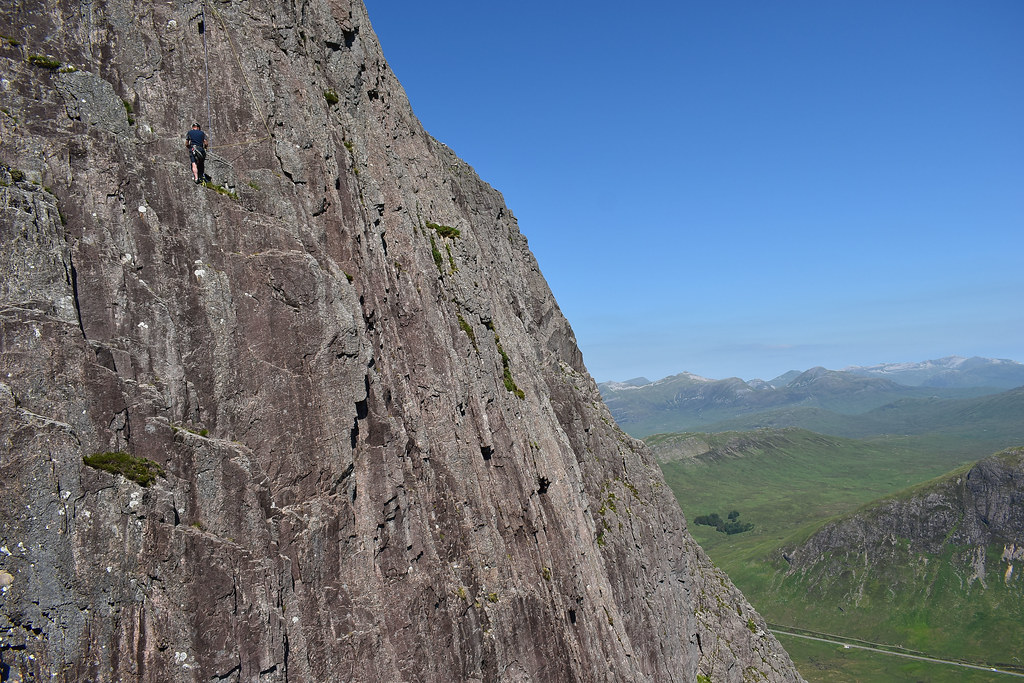
We were loving the scenery, the exposure, the scrambling and watching the rock climbers strut their stuff, these two doing their best impression of seabirds on a cliff edge, impressive stuff!!
 DSC_1910 20180630_115628 by Chris Mac, on Flickr
The thought does cross my mind... these guys have ropes and helmets, we don't!! In saying that, what they are tackling is infnintely more difficult and dangerous than our scrambling route, however don't take that as a green light that anyone can do this.
By now I have noticed one of the scarier aspects of doing this scramble is that quite often you think you have a strong hand hold, only for it to start moving once you put some weight on it, so I would always ensure that any hand hold was very solid during the ascent after a few WTF moments lower down, worth remembering.
After the second section of scrambling we were again higher up and just below the climber's mate who had been flying the drone. I take advantage of our second break ledge to have more water (climbing is thirsty and sweaty work!) and bring out the big camera again.
Looking up at Curved Ridge, Rannoch Wall and the drone pilot who we chatted to briefly and was enjoying a lovely day filming his mates in an epic location:
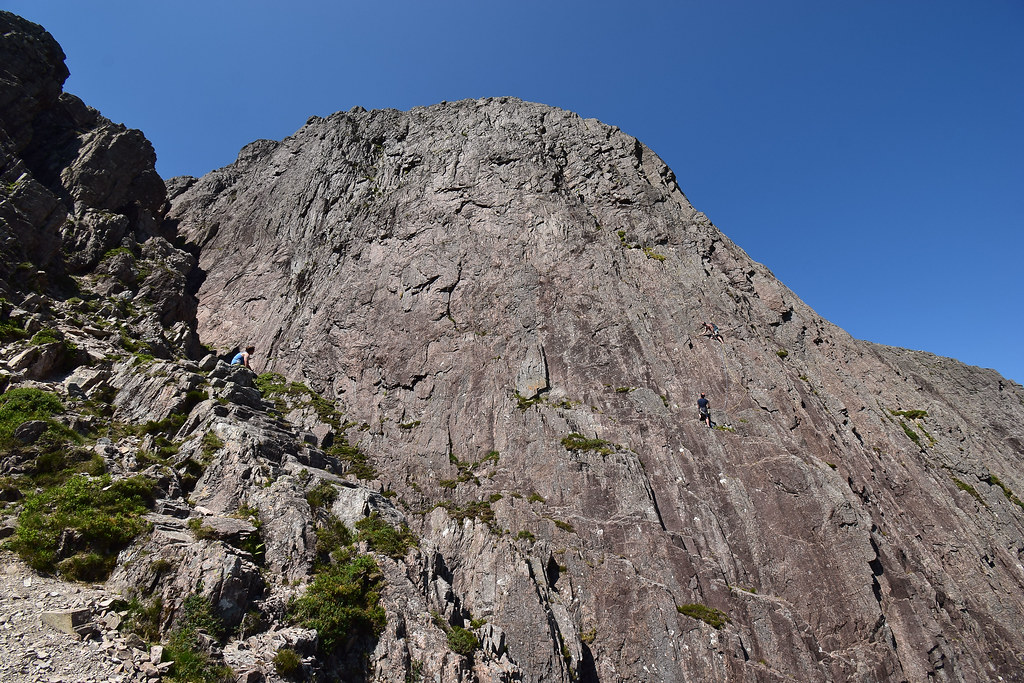 DSC_1912 by Chris Mac, on Flickr
Our route continues up to the left but we decide to enjoy a break here, watch the climbers for a while and take some more photos:
 DSC_1913 by Chris Mac, on Flickr
Rannoch wall... immense!
 DSC_1915 by Chris Mac, on Flickr
Even a wide angle lens struggles to fit it all in at this distance:
 DSC_1920 by Chris Mac, on Flickr
Respect to the rock climbers, you'll not catch me up there any time soon!
 DSC_1922 by Chris Mac, on Flickr
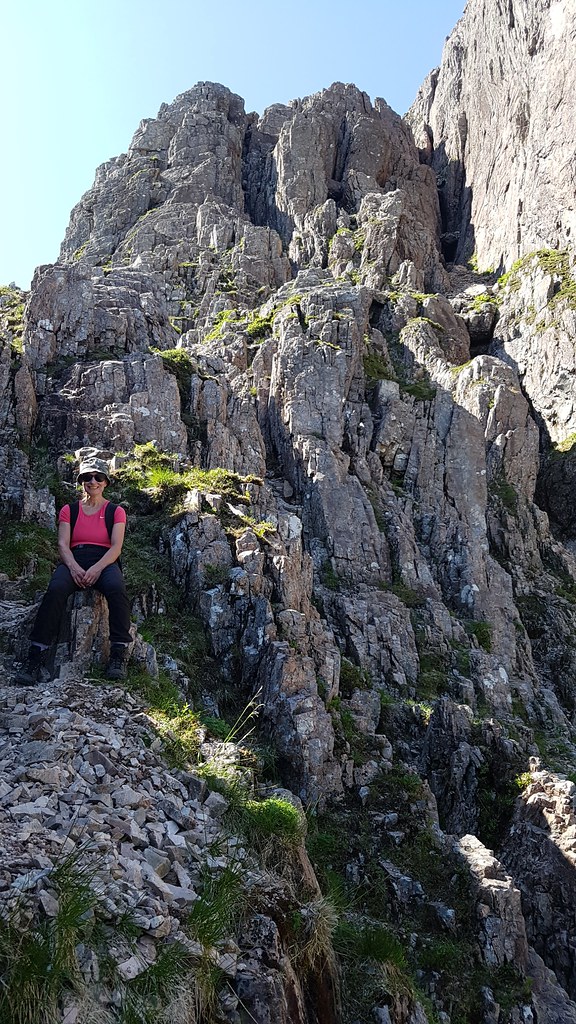
Enjoying a break and some pics after the second of the three main scrambling sections, as you can see from the beaming faces we are having the time of our lives!
 DSC_1931 by Chris Mac, on Flickr
 DSC_1945 by Chris Mac, on Flickr
 DSC_1947 by Chris Mac, on Flickr
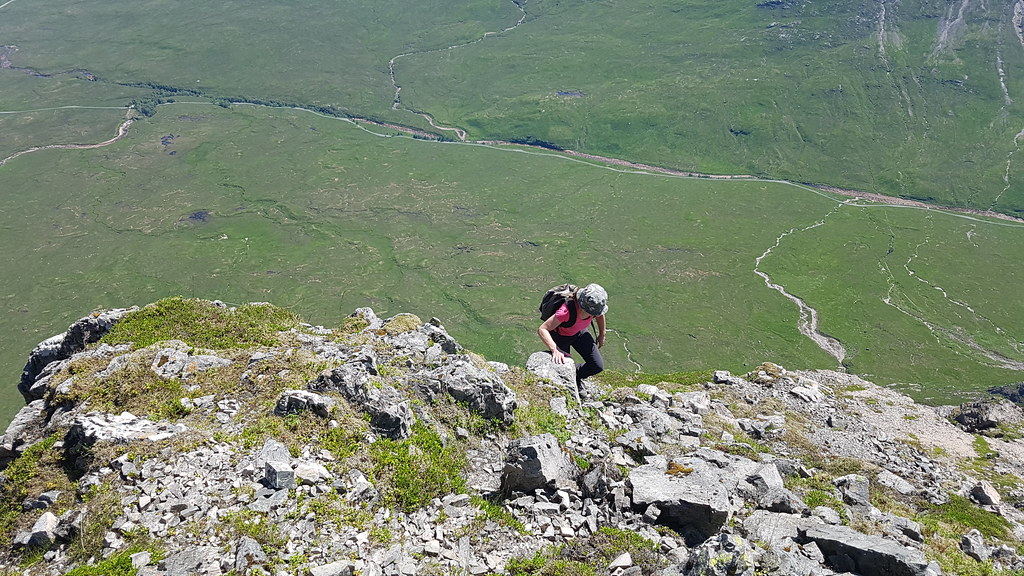
Another wee look straight down to induce some vertigo for others...
 DSC_1953 by Chris Mac, on Flickr
Maybe one day...
 DSC_1959 by Chris Mac, on Flickr
Refreshed and yet again raring to go, we begin the ascent of the final section of curved ridge. I'm in the lead now and find the going pretty easy, flying up at a decent pace but at the same time very carefully, especially when it comes to hand holds and loose rocks, conscious of those behind me now.
I feel like i'm a kid again climbing trees, this is what it's all about!
After a few climbs i'm up on a ledge and on looking back see that Michele is waiting below me to try and assist Iain up a section below me:
 DSC_1960 20180630_121502 by Chris Mac, on Flickr
Iain was there for about 3 minutes and I was baffled at how he was stuck since I had just done a spiderman and ascended effortlessly! I was waiting on a ledge with a large vertical rock face in front of me...
 DSC_1960 20180630_121539 by Chris Mac, on Flickr
I was aware that the "crux move" of Curved Ridge was around this point, but was Iain stuck at that or was it next up for me...?!
As you can see it was a fairly steep section to be sitting at!
 DSC_1960 20180630_121553 by Chris Mac, on Flickr
I decide to just ascend while waiting, they'll soon be chasing me up anyway. I found this section a little tricky, more for having to hoist myself up on the ledge using my leg, i'm pretty sure I recall this being mentioned as the crux move, well i've done it!
 DSC_1960 20180630_121603 by Chris Mac, on Flickr
Looking down again, my route to the left of the boulder below me... it looked easier to climb up to my right so I said to Michele to try that way to avoid the humph up atop the crux move (if it was indeed that section), especially since the other two have smaller legs than I do!
 DSC_1960 20180630_121821(0) by Chris Mac, on Flickr
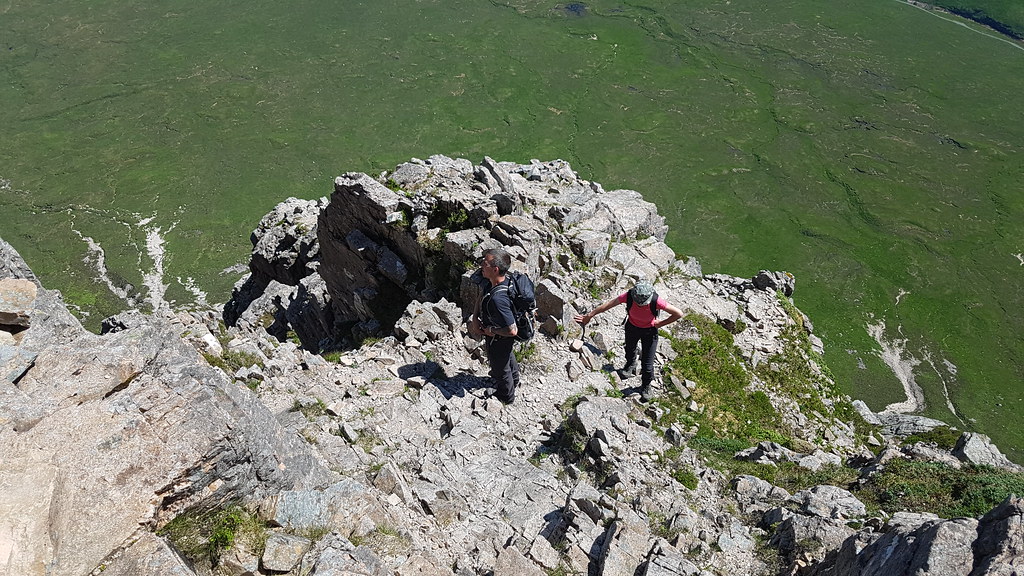
They've made it and onwards we go!
 DSC_1960 20180630_122047 by Chris Mac, on Flickr
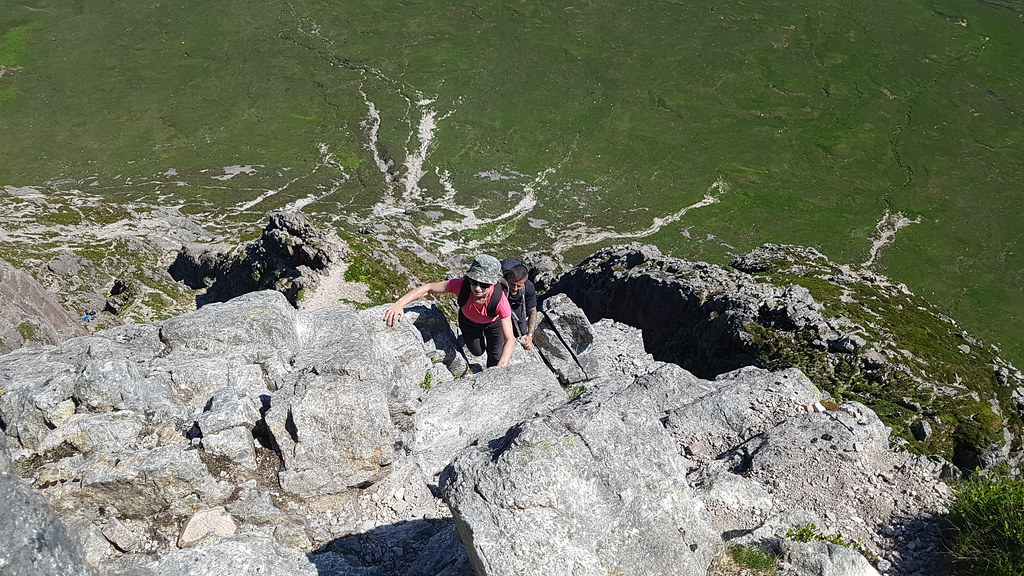
The scrambling and exposure certainly doesn't ease up during the final section!
 DSC_1960 20180630_122353 by Chris Mac, on Flickr
It may not look it but it is pretty straightforward if you know what you are doing. I was most surprised at my being completely fine with exposure like this, the scrambling was no problem, the exposure I was initially slightly worried about but it would turn out that it's something you get used to the more you are exposed to it. This was maxiumum exposure!
 DSC_1960 20180630_122504 by Chris Mac, on Flickr
Due to the fact that you are climbing almost straight up, height is gained very quickly:
 DSC_1960 20180630_122544 by Chris Mac, on Flickr
Getting there now, I love the massive cheeser on Michele's face in this pic as Iain eyes up Crowberry Tower...
 DSC_1960 20180630_122711(0) by Chris Mac, on Flickr
We're now left with the final bit to go, either continue up Curved Ridge or head right along the scree to Crowberry Tower:
 DSC_1960 20180630_122836 by Chris Mac, on Flickr
By now we're pumped full of adrenaline, we're hungry and thirsty, hot and sweaty, we briefly discuss heading up there but settle on continuing on and lunching atop Stob Dearg, we can always leave Crowberry Tower for a future visit!!
Iain ascending the final part of Curved Ridge with Crowberry Tower in the background:
 DSC_1960 20180630_124052 by Chris Mac, on Flickr
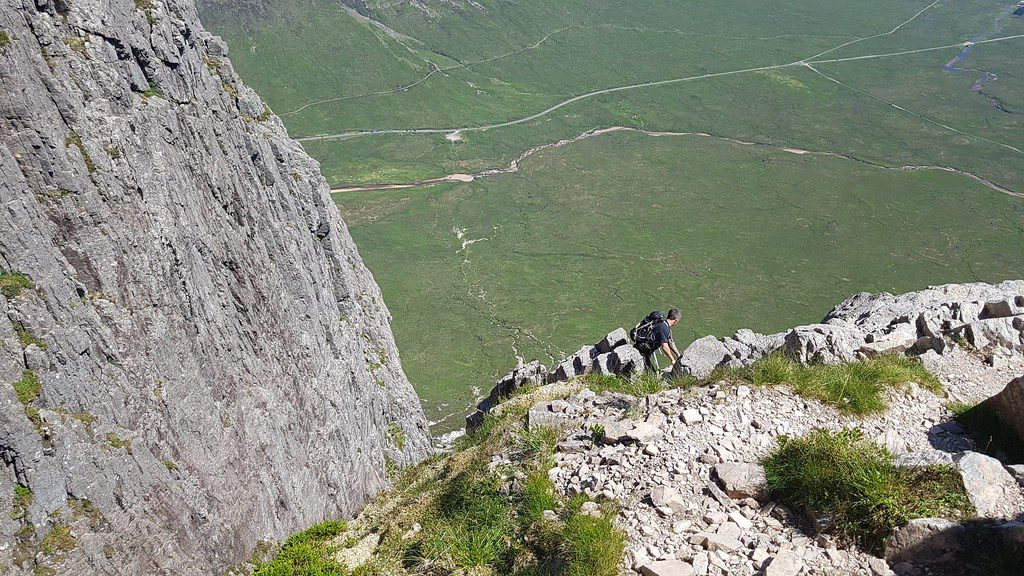
Michele, the top of this final section is easily walked:
 DSC_1960 20180630_124357 by Chris Mac, on Flickr
Nothing wrong with an occasional hand to steady yourself though:
 DSC_1960 20180630_124407 by Chris Mac, on Flickr
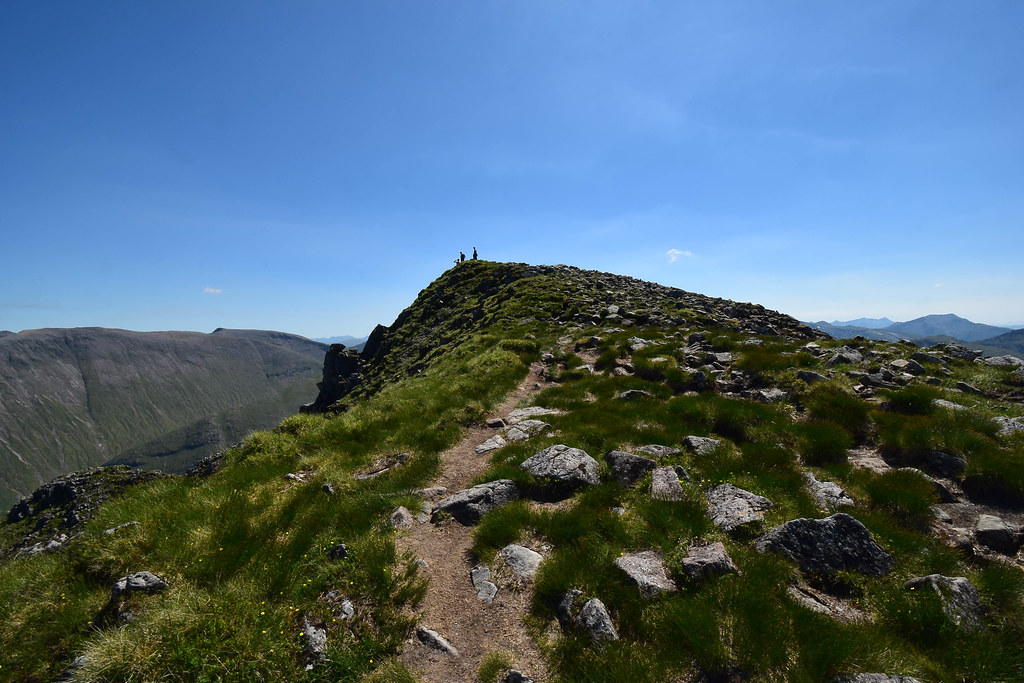
Almost there, ascending the final scree path to the summit:
 DSC_1960 20180630_124453 by Chris Mac, on Flickr
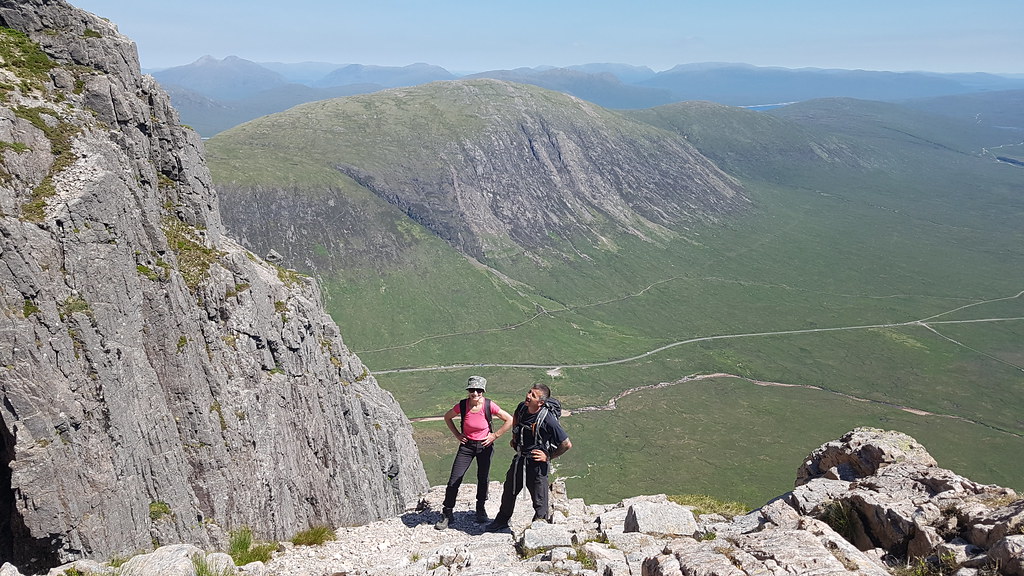
Time for a panorama pose, we've earned it!!
 DSC_1960 20180630_124530 by Chris Mac, on Flickr
All that's left now is to head up and around to the summit of Stob Dearg:
 DSC_1960 20180630_124723 by Chris Mac, on Flickr
Woohoo success!! THIS is how you climb a mountain!!!
 DSC_1966 by Chris Mac, on Flickr
We feel on top of the world and we're almost giddy with excitement at what we've just accomplished, plus we have a full ridge walk to enjoy along to Stob na Broige still to go, this is the best day ever and it's only lunchtime!
As we marvel at the view, Iain marvels at this beast...
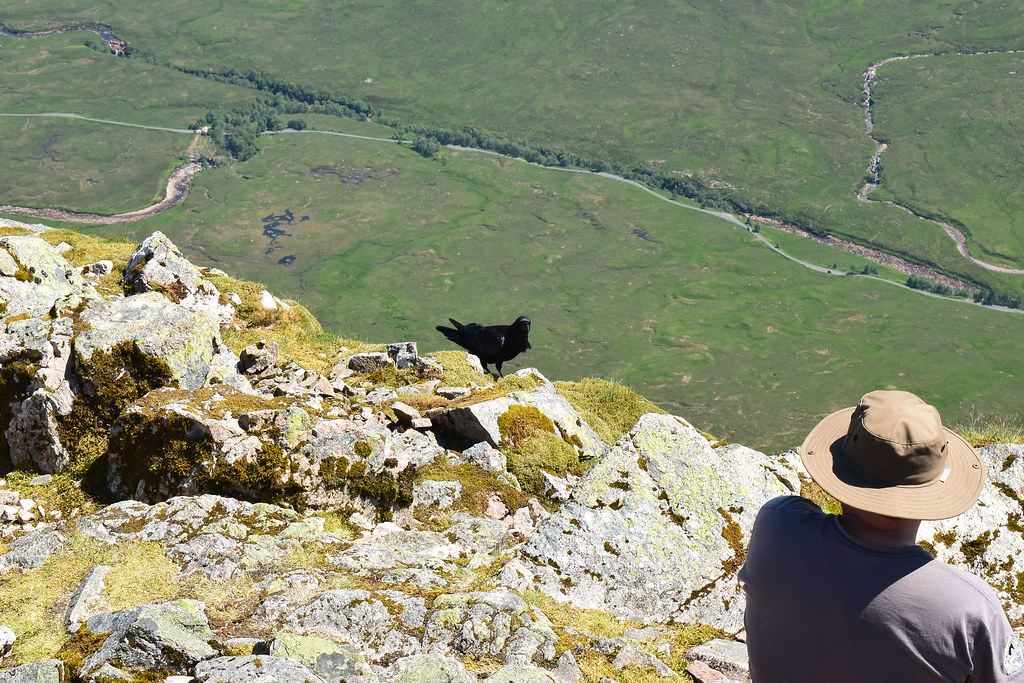 DSC_1976 by Chris Mac, on Flickr
"Look at the size of that thing! It must eat all the people that die falling off the mountain..." reassuring words from Iain there, luckily kept until after we have finished our incredible scramble!!
Michele and the view west to Bidean nam Bian, Aonach Eagach and more:
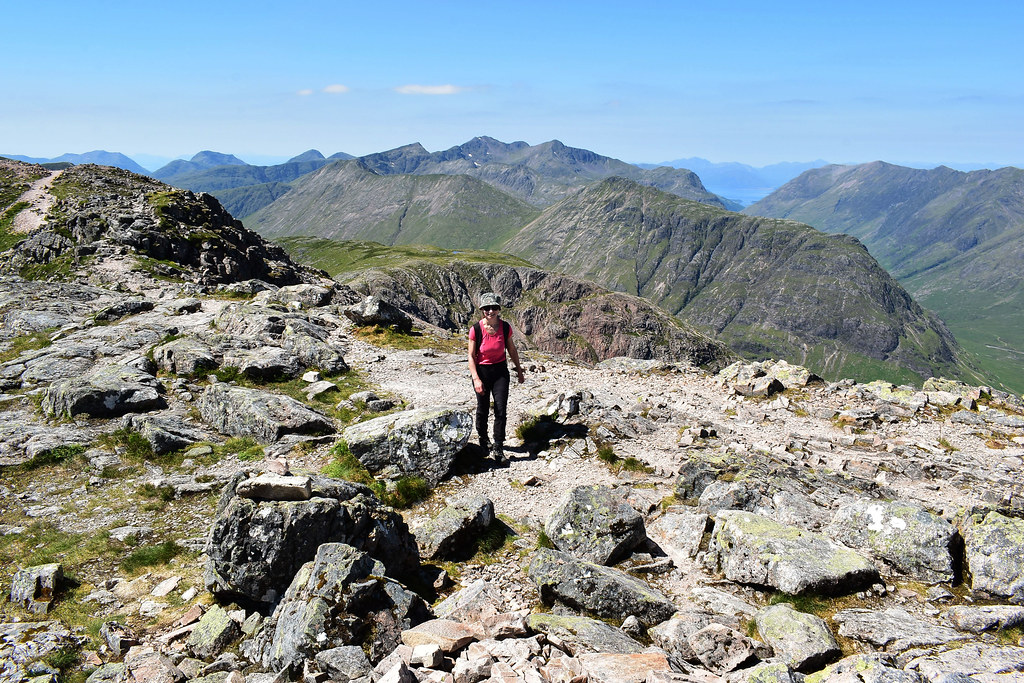 DSC_1988 by Chris Mac, on Flickr
The Raven of Rannoch Moor!
 DSC_1993 by Chris Mac, on Flickr
Iain and I nip along from the summit to check out Crowberry Tower from above:
 DSC_1997 by Chris Mac, on Flickr
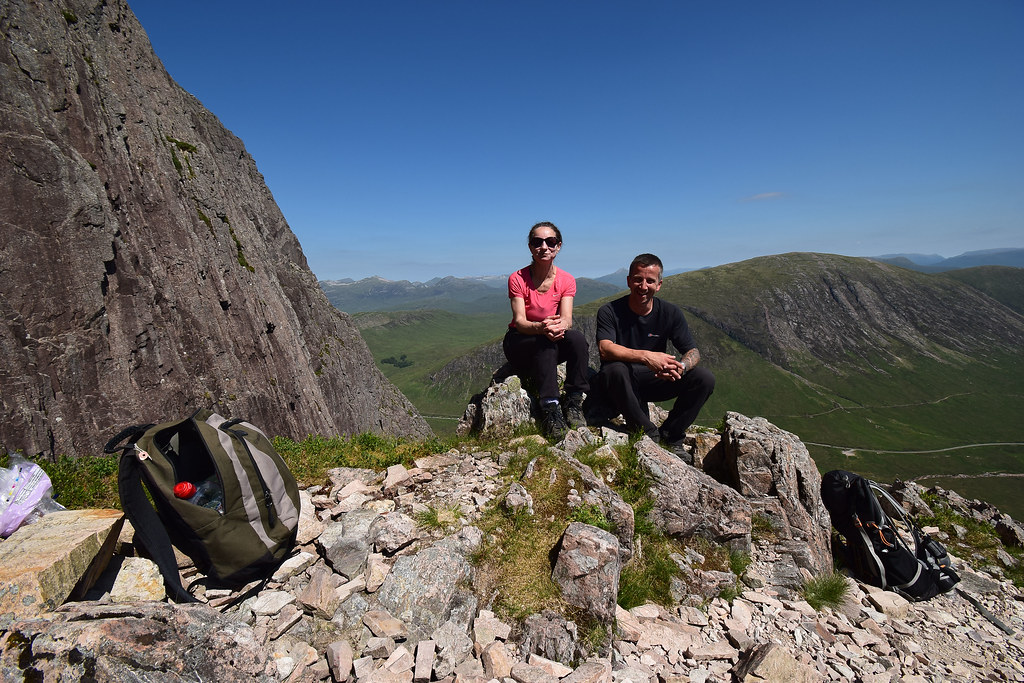
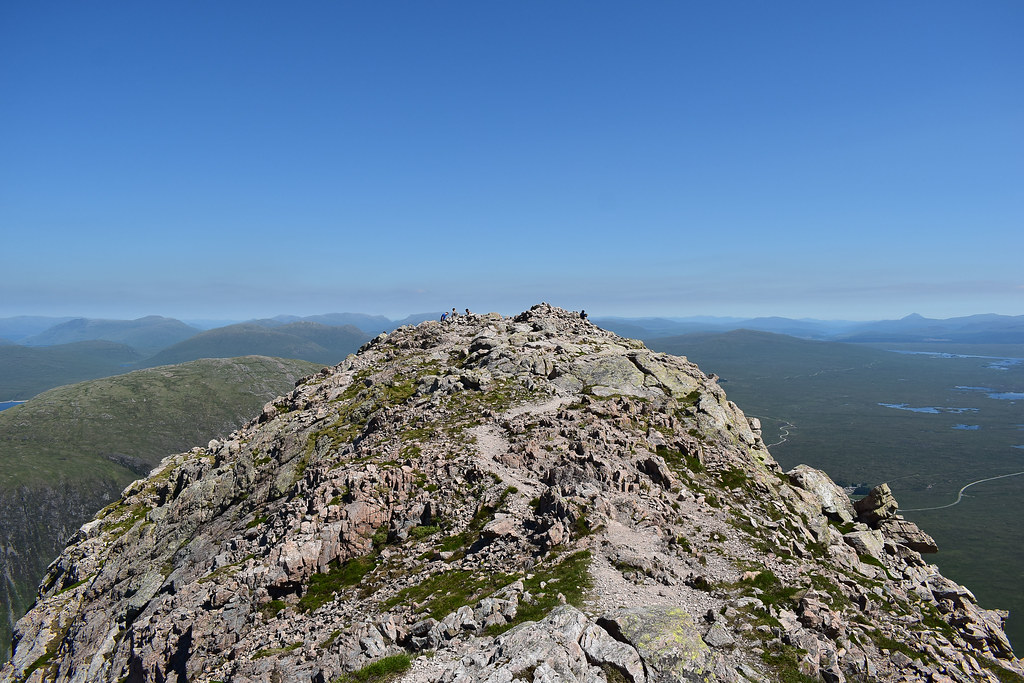
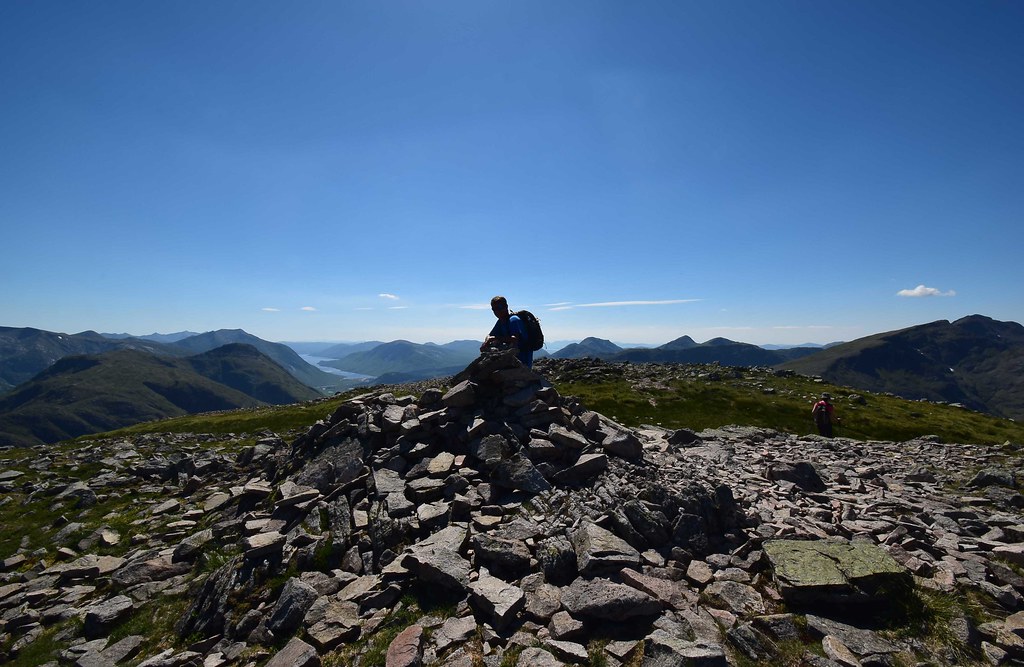
Summit shot looking south:
 DSC_2004 by Chris Mac, on Flickr
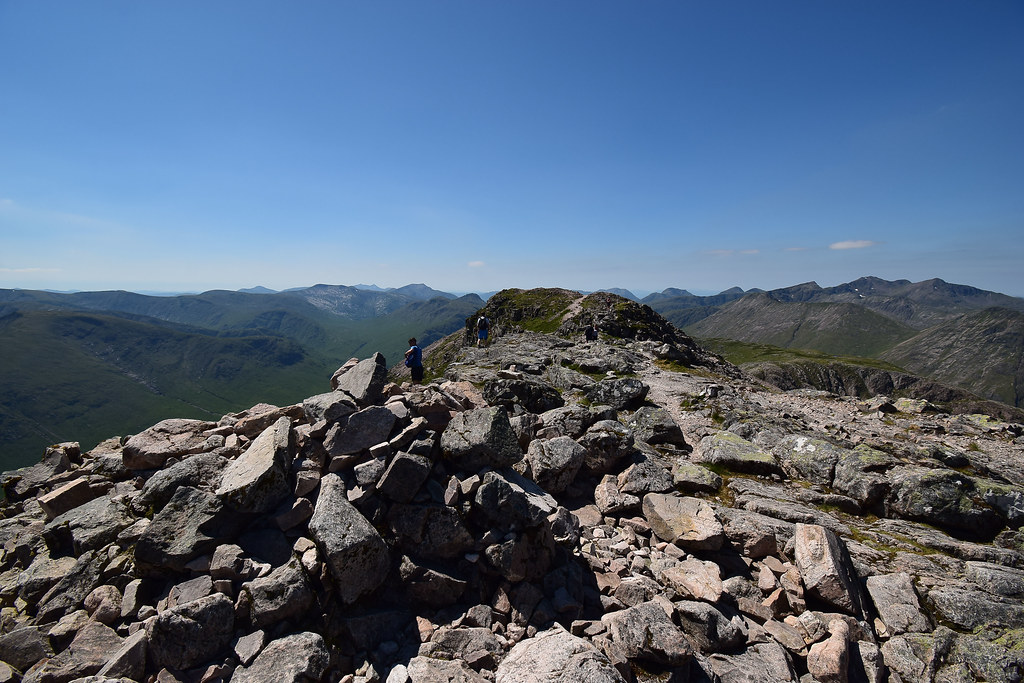
Admiring the mountains to the north and playing spot the hill:
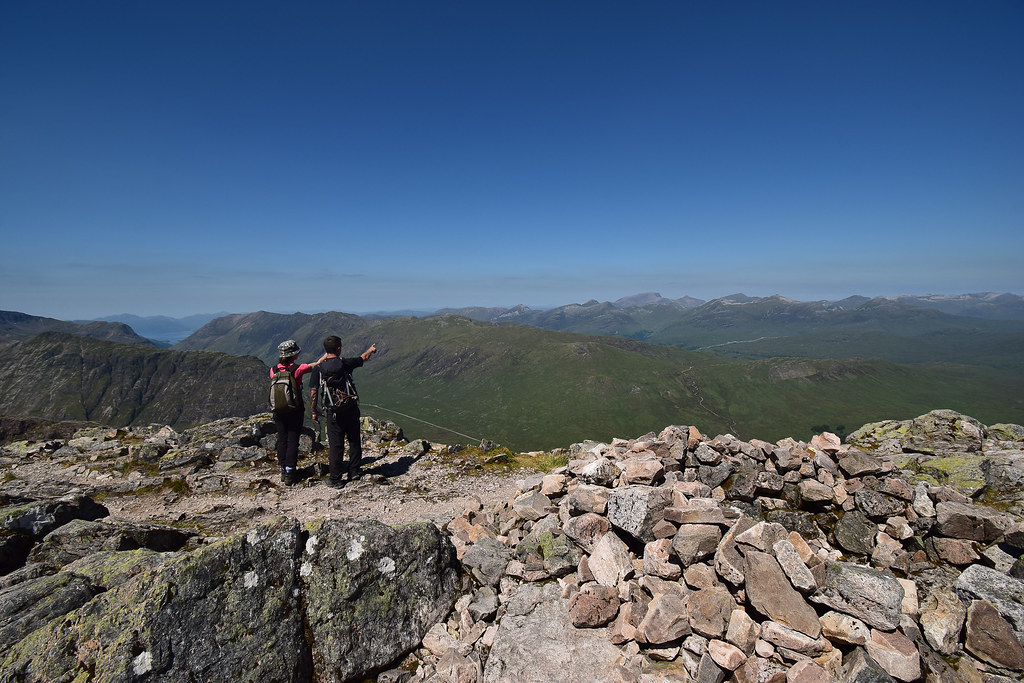 DSC_2007 by Chris Mac, on Flickr
Looking down Glen Coe towards Loch Linnhe and Ardgour, Rannoch Raven circling looking for victims with Stob Ban walks being recalled by the other two:
 DSC_2009 by Chris Mac, on Flickr
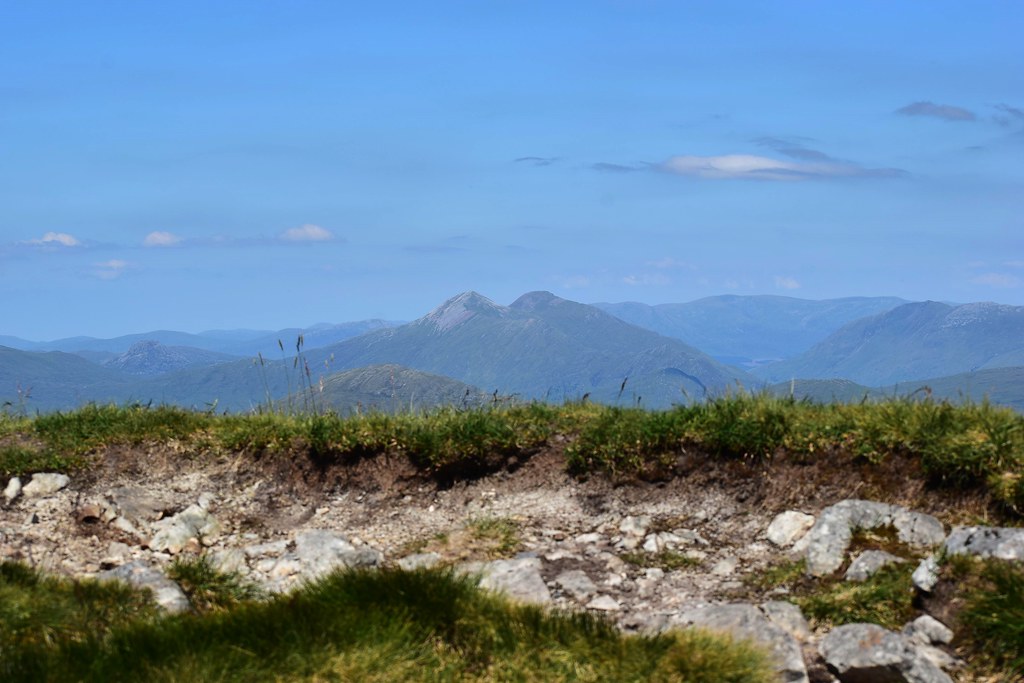
Looking south east to the Lawers group in the distance, Great Wall of Rannoch Moor Munros and Black Mount Munros:
 DSC_2016 by Chris Mac, on Flickr
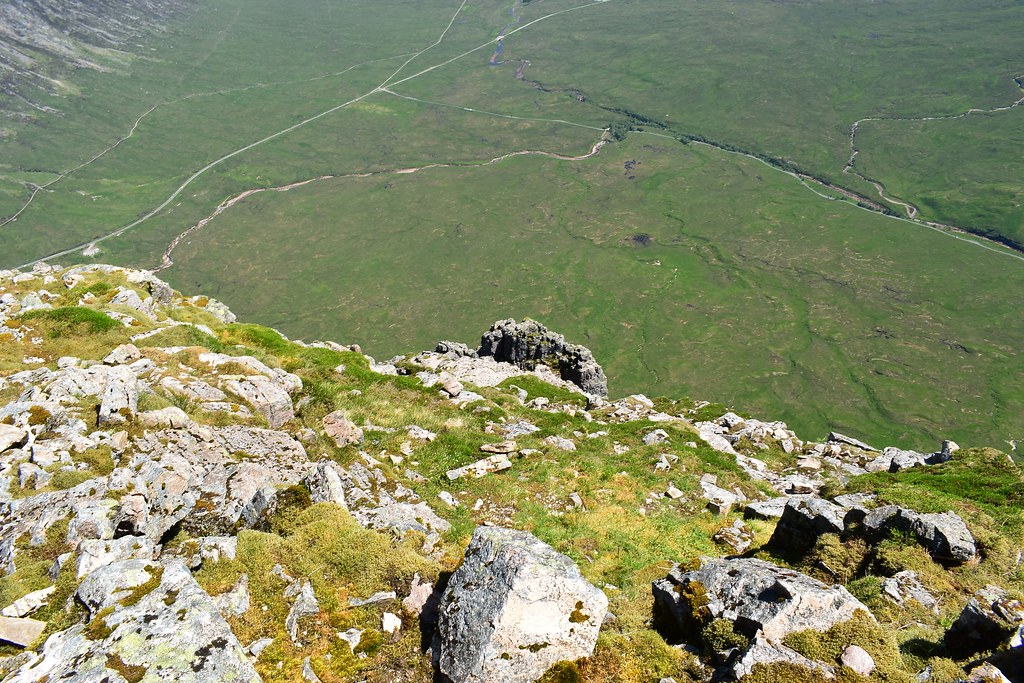
Looking north to Ben Nevis and co., Altnafeadh car park waaaay down below!
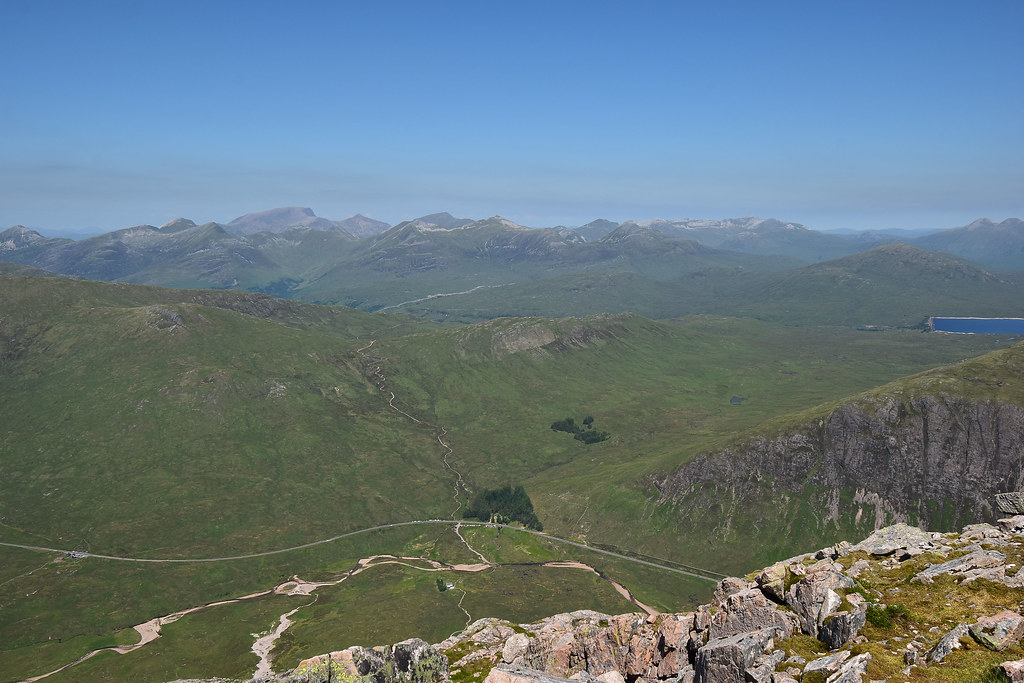 DSC_2023 by Chris Mac, on Flickr
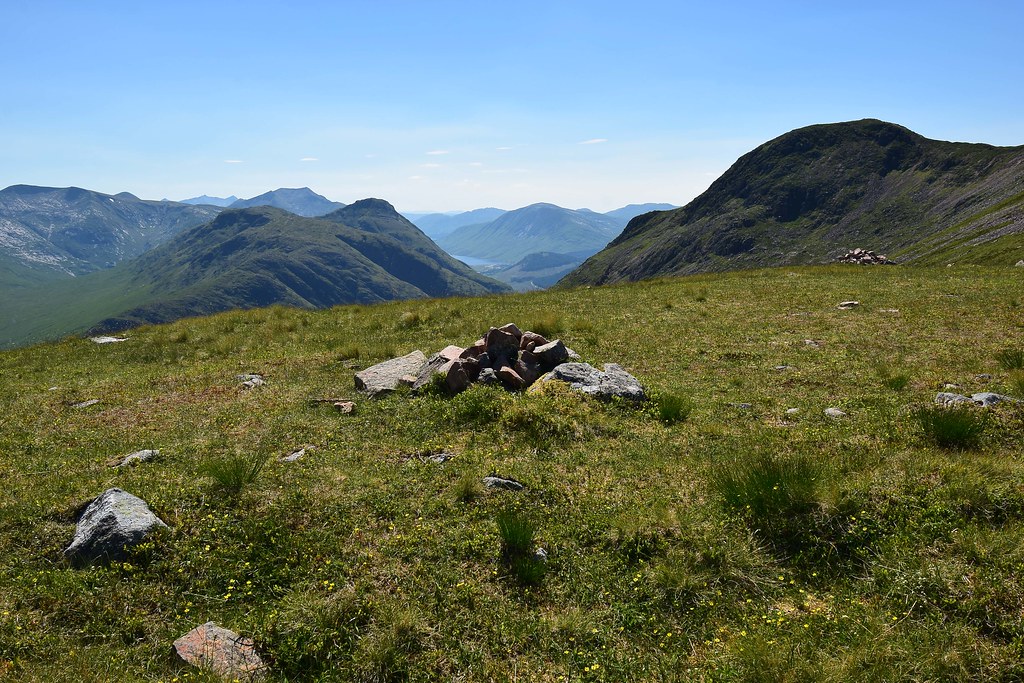
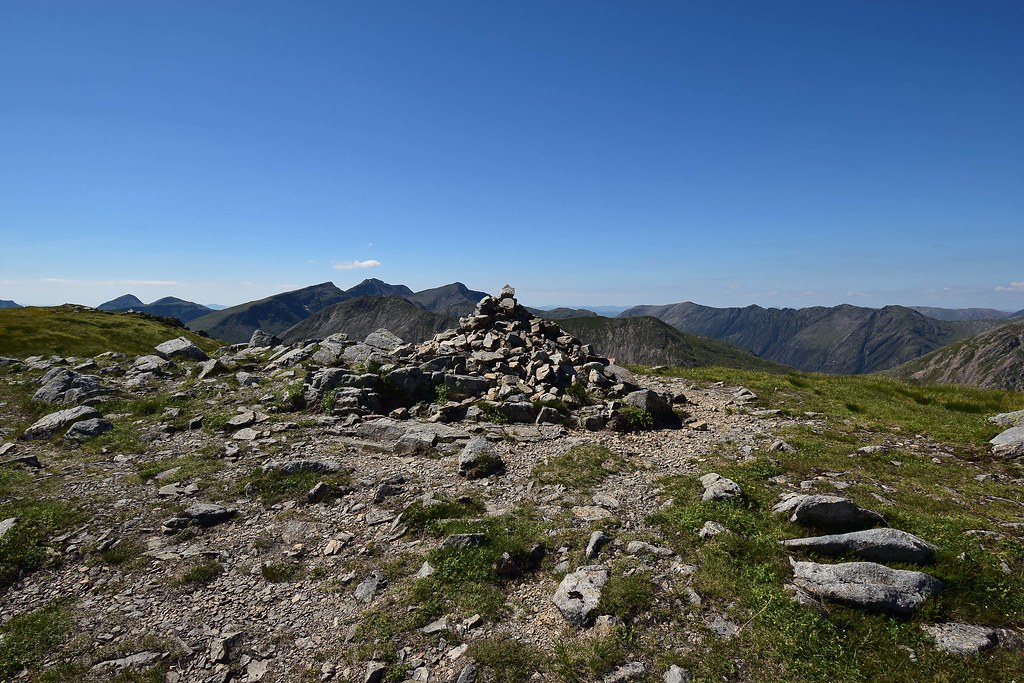
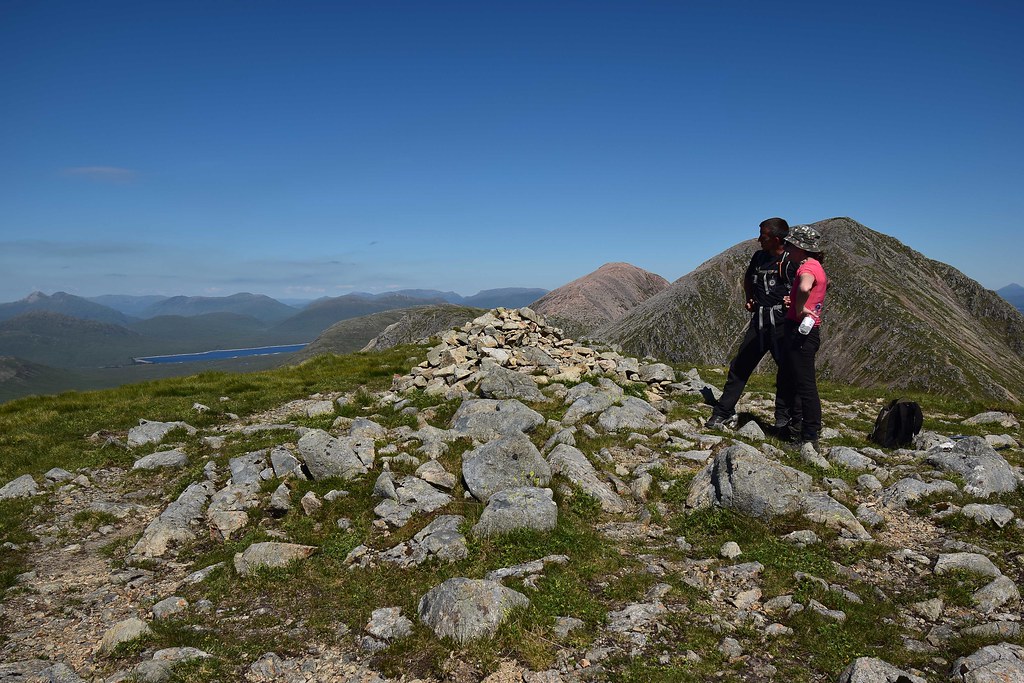
As the summit was pretty busy we decided to continue along towards Stob na Doire and find another spot to have lunch
 DSC_2044 by Chris Mac, on Flickr
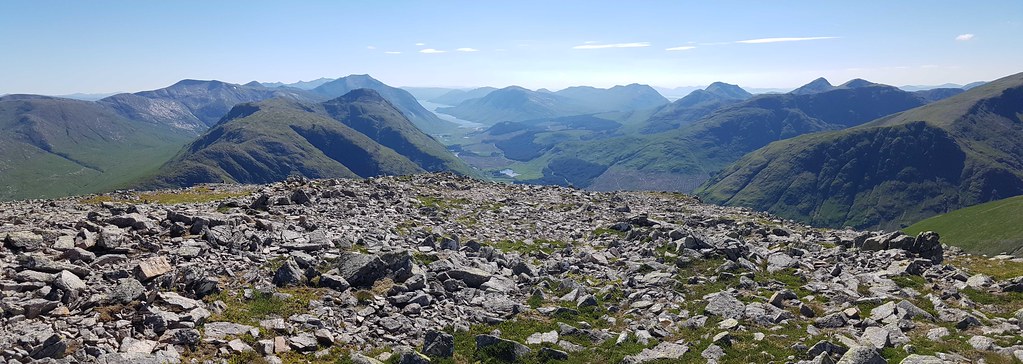
We'd settle for the rocky outcrop shown here to enjoy the view south and west:
 DSC_2047 by Chris Mac, on Flickr
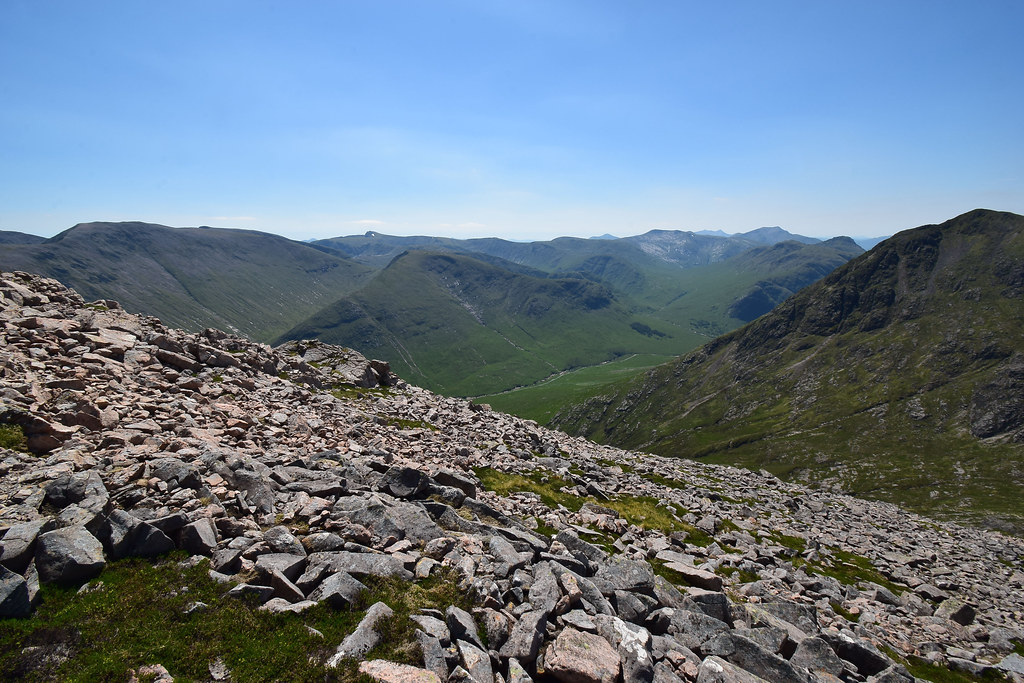
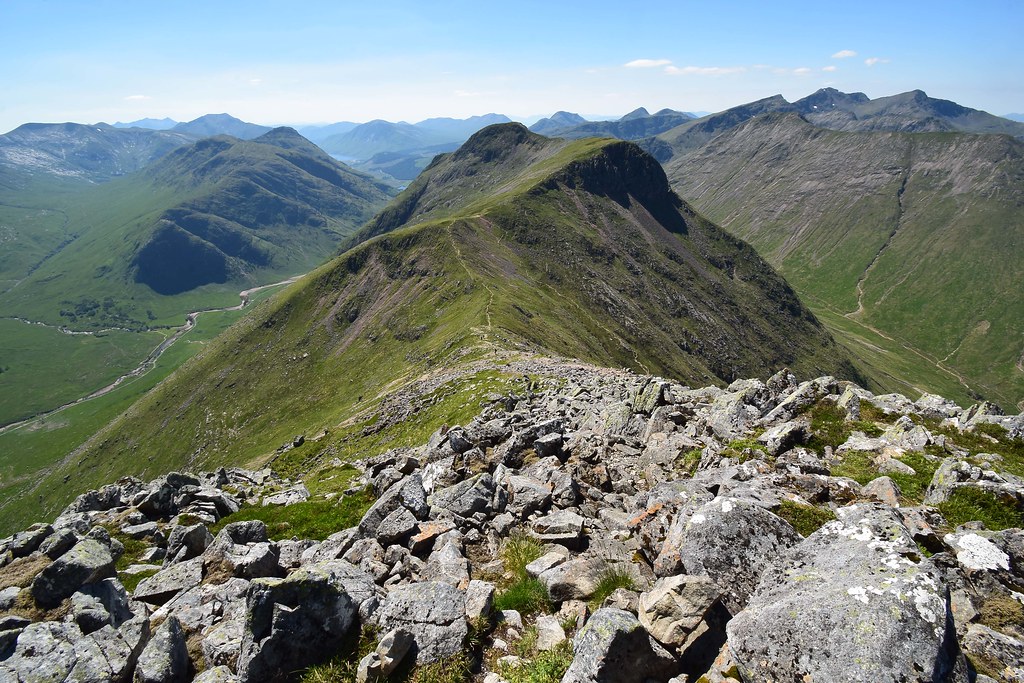
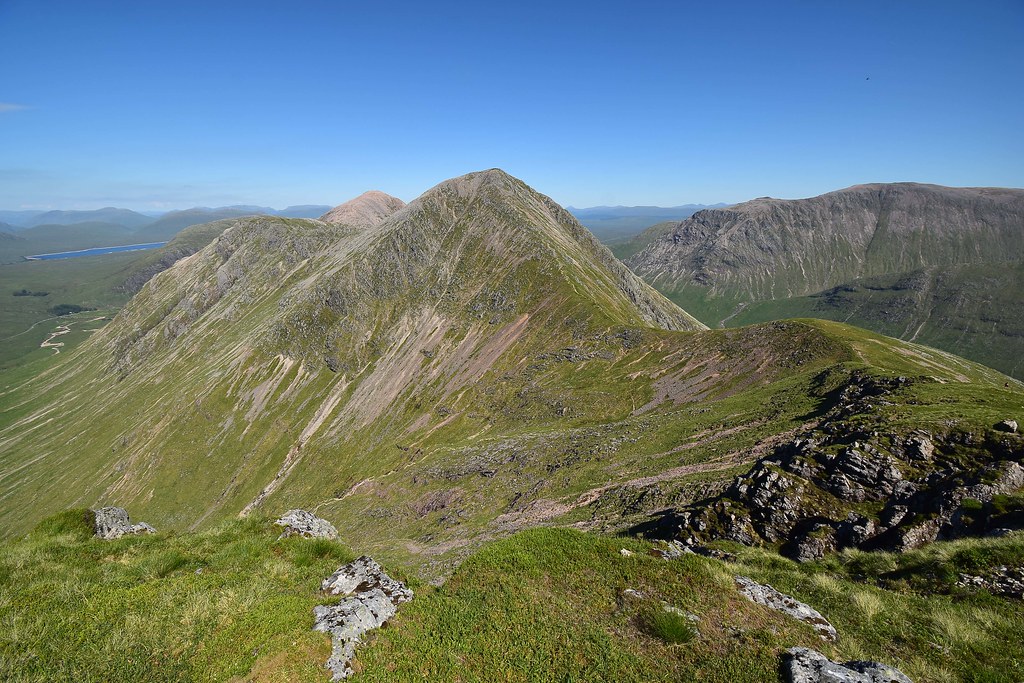
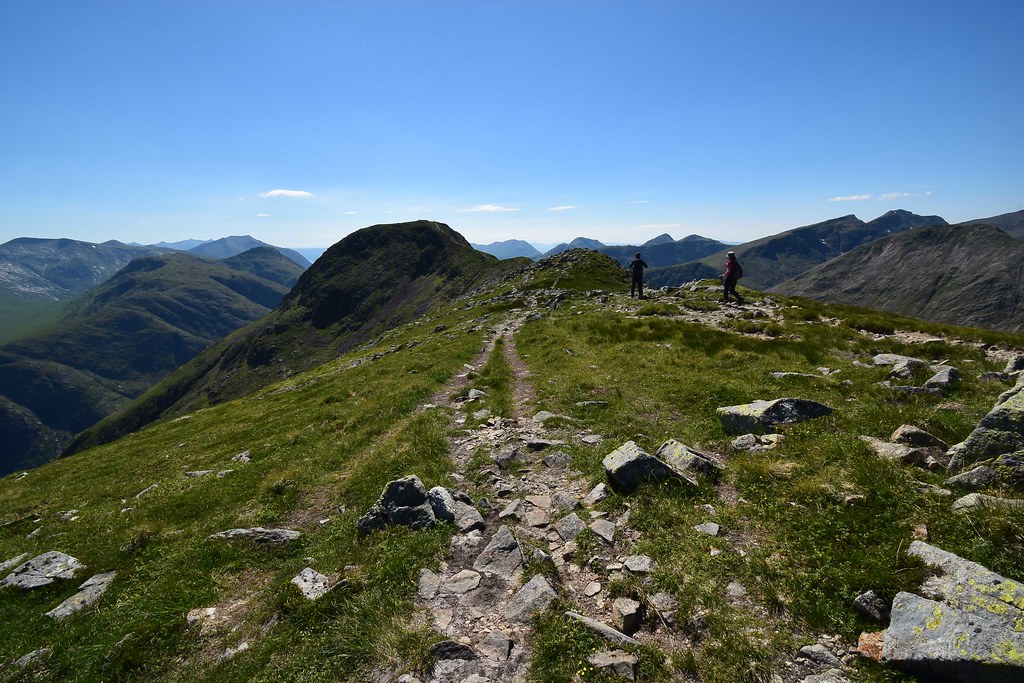
Our route ahead:
 DSC_2064 by Chris Mac, on Flickr
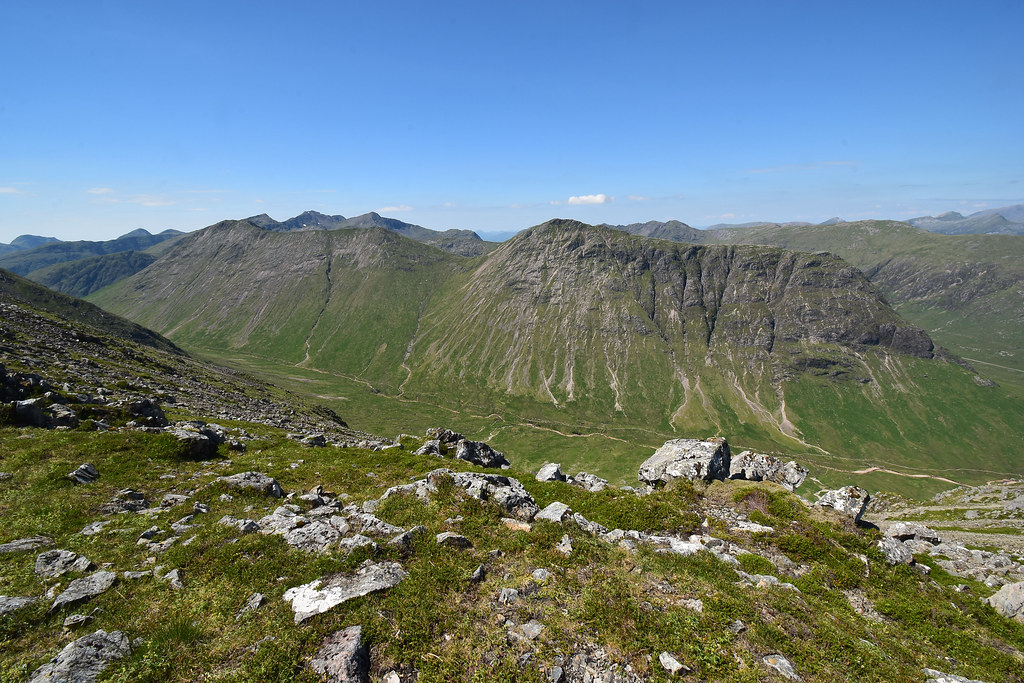
Bidean nam Bian looking amazing with Stob Dubh of the Buachaille Etive Beag in the foreground:
 DSC_2067 by Chris Mac, on Flickr
Aonach Eagach ridge... Iain had done this just two days before our Curved Ridge trip!
 DSC_2073 by Chris Mac, on Flickr
Unfortunately after what we had just done, I now had an appetite for doing it too!
We enjoyed our top quality lunch spot and blethered about other scrambling routes and such like. Refreshed and still buzzing at our Curved Ridge ascent we decide to head off for Stob na Doire:
 DSC_2104 by Chris Mac, on Flickr
Passing the tourist route on the way...
 DSC_2113 by Chris Mac, on Flickr
North:
 DSC_2115 by Chris Mac, on Flickr
It's easy to see why Stob Dearg is the red peak!
 DSC_2118 by Chris Mac, on Flickr
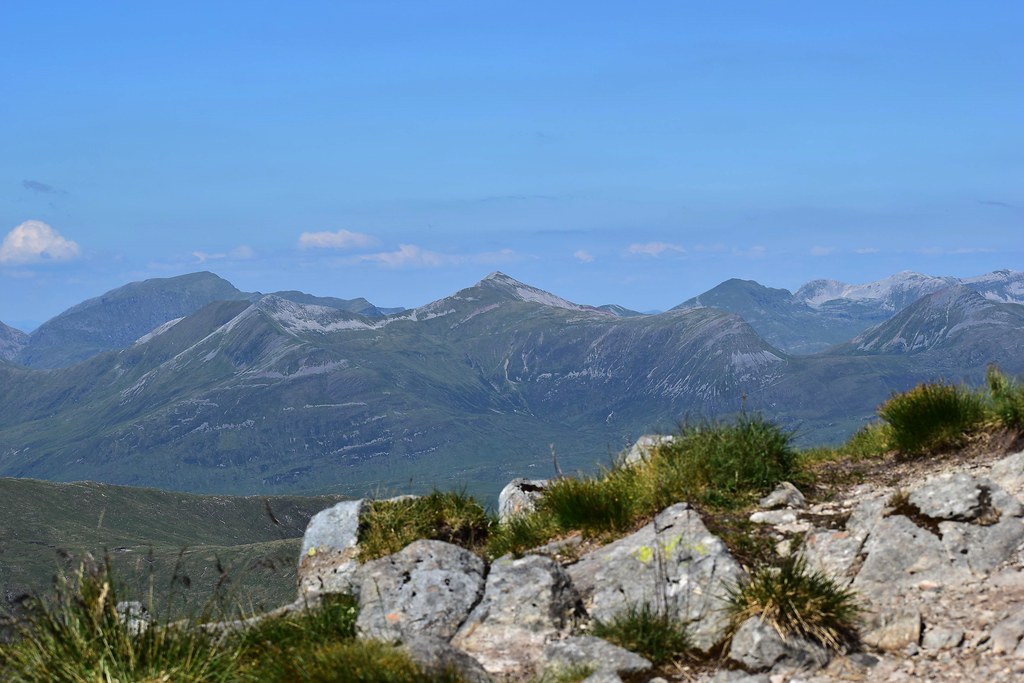
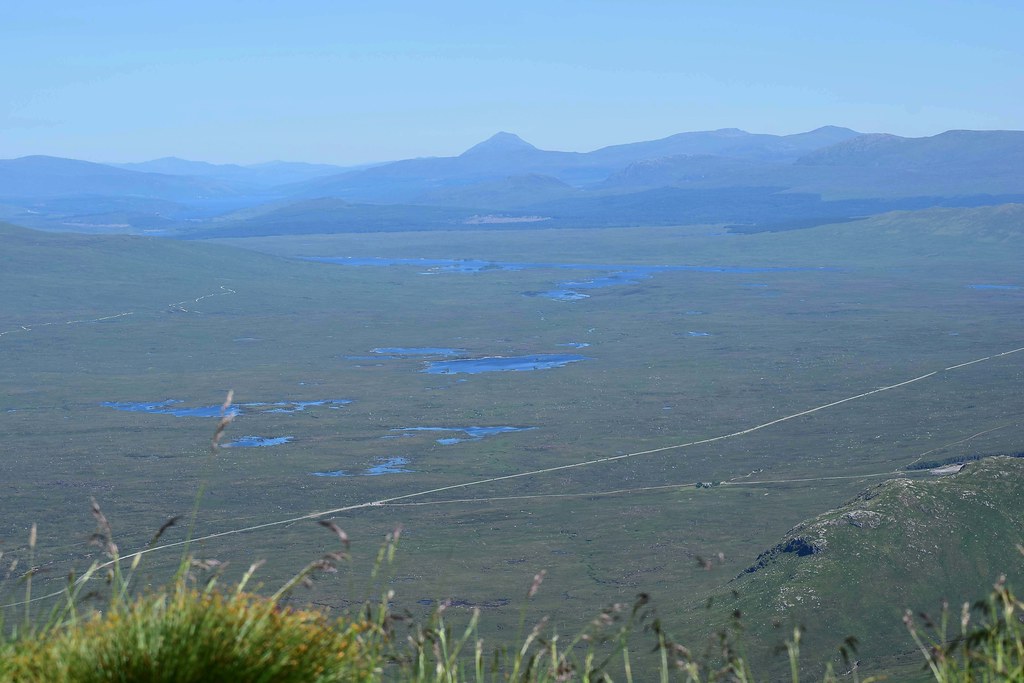
North again, Mamores and lochans:
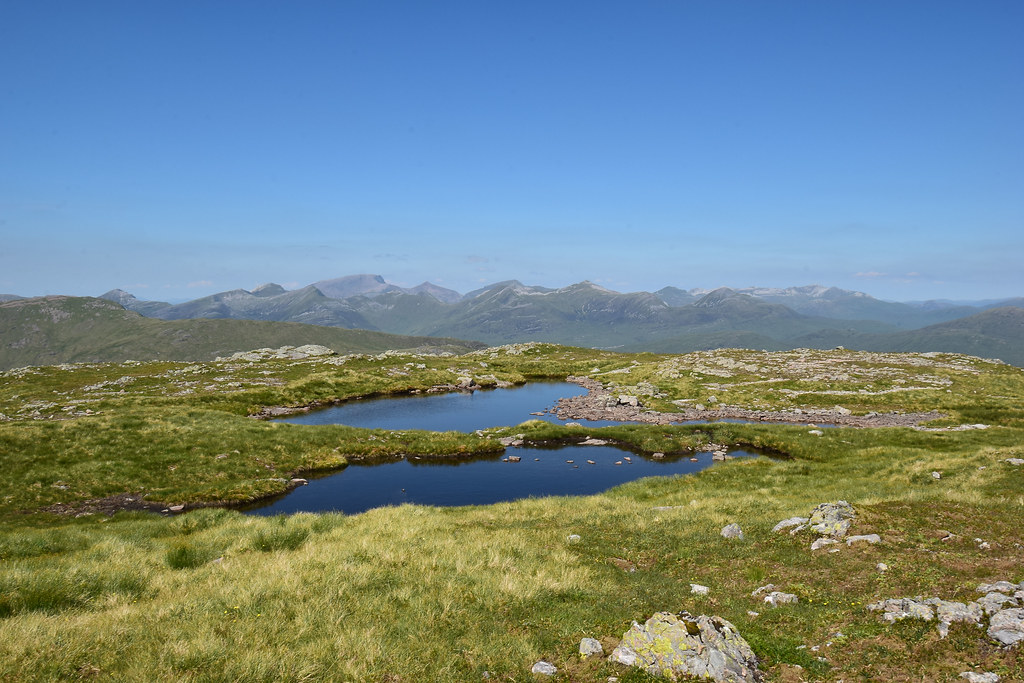 DSC_2120 by Chris Mac, on Flickr
Passing more wee lochans right and left on the way up the Munro top:
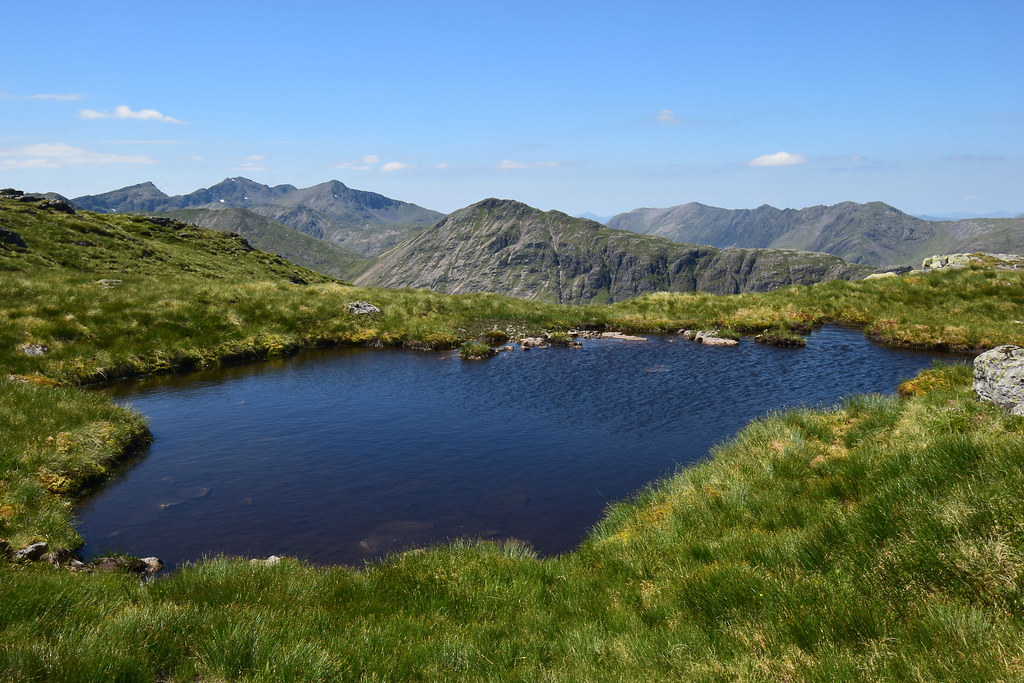 DSC_2133 by Chris Mac, on Flickr
 DSC_2144 by Chris Mac, on Flickr
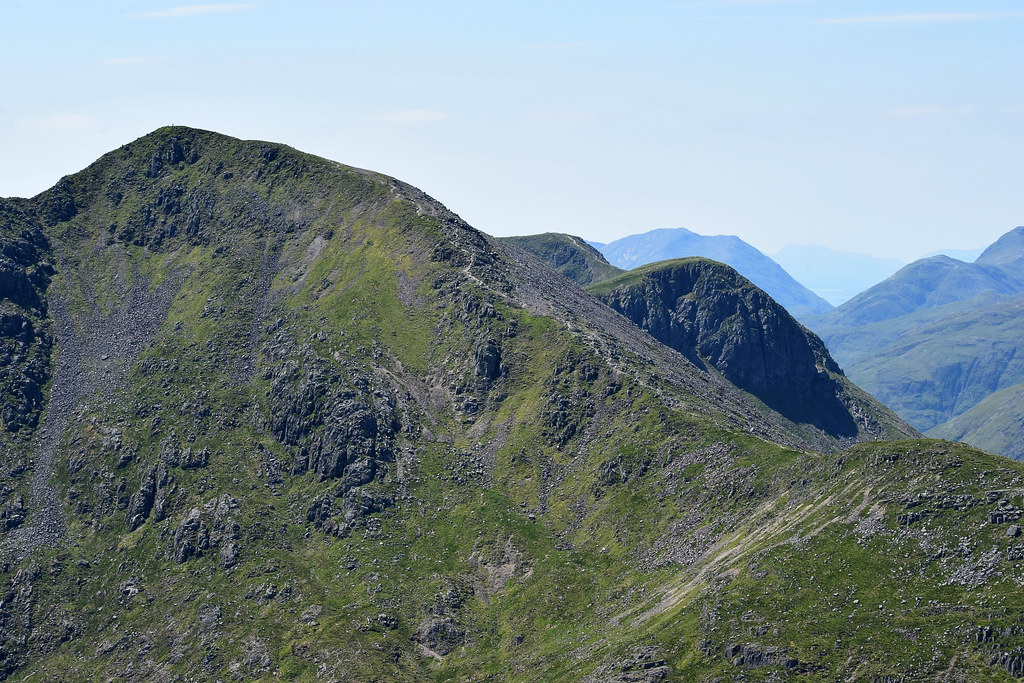
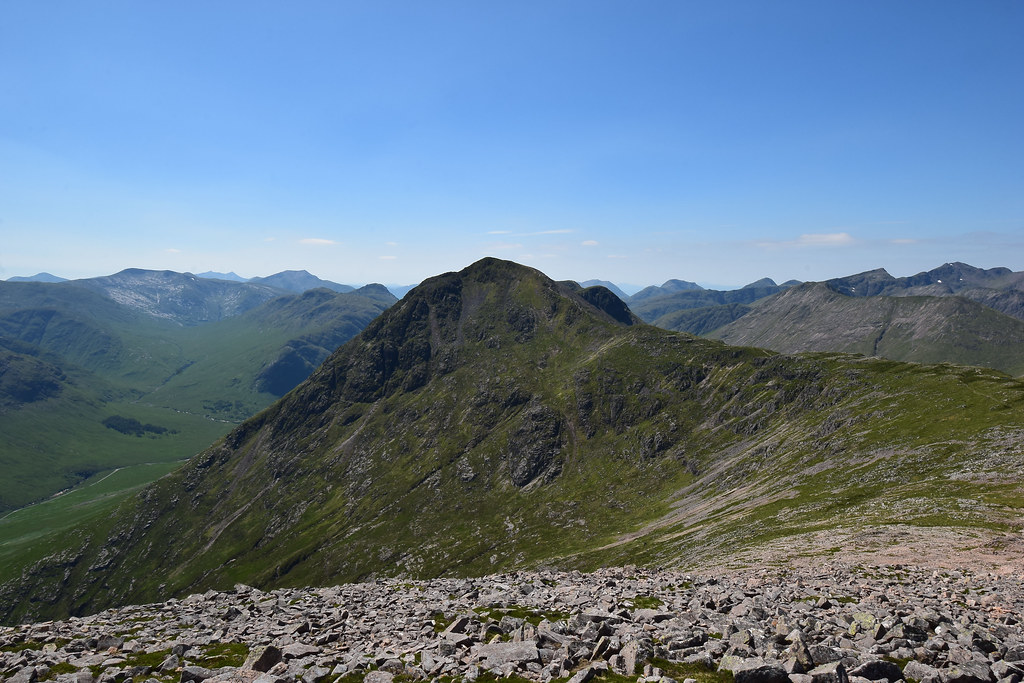
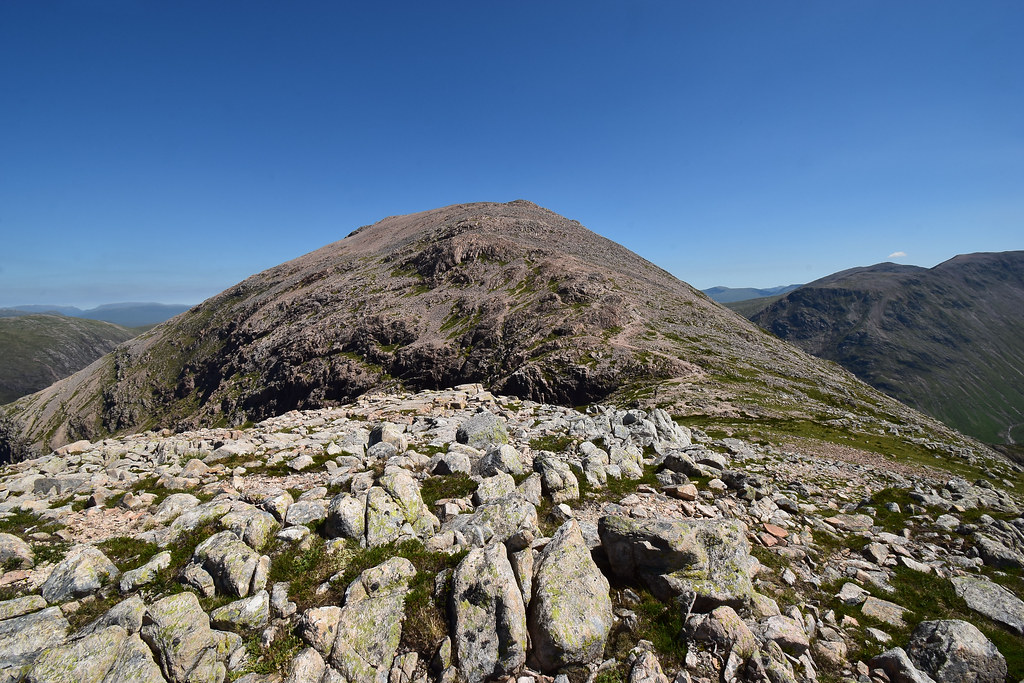
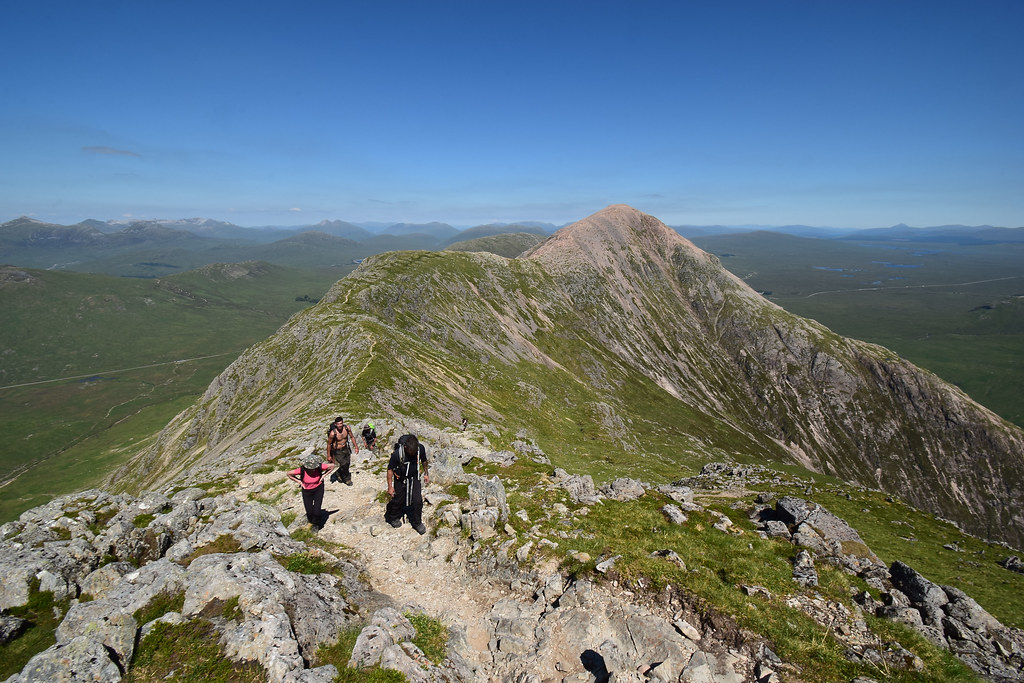
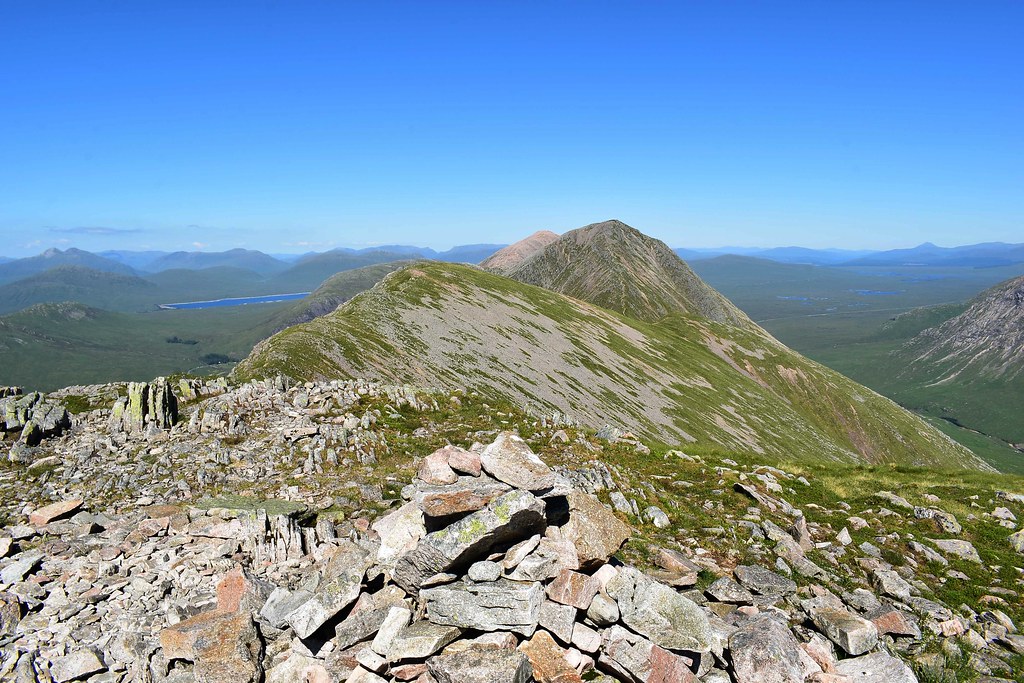
Stob na Broige at the end of the ridge:
 DSC_2152 by Chris Mac, on Flickr
The Buachaille Etive Beag, baby brother of our current mountain, one I already have my eye on for a return visit, looking like a much easier version of this walk, minus the crazy scramble at the start of course!
 DSC_2167 by Chris Mac, on Flickr
There were a fair few other groups of people doing the ridge walk between the Munros in both directions. We had got chatting to the taps aff lads from Elgin at Stob Dearg summit and would continue doing so at the summit of Stob na Doire:
 DSC_2189 by Chris Mac, on Flickr
 DSC_2193 by Chris Mac, on Flickr
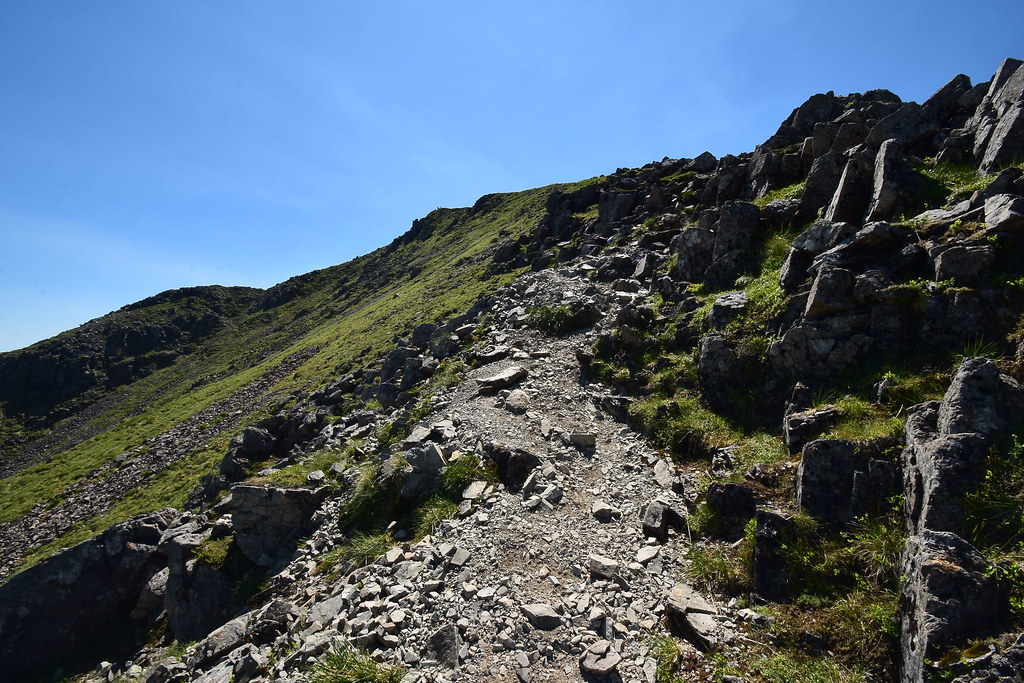
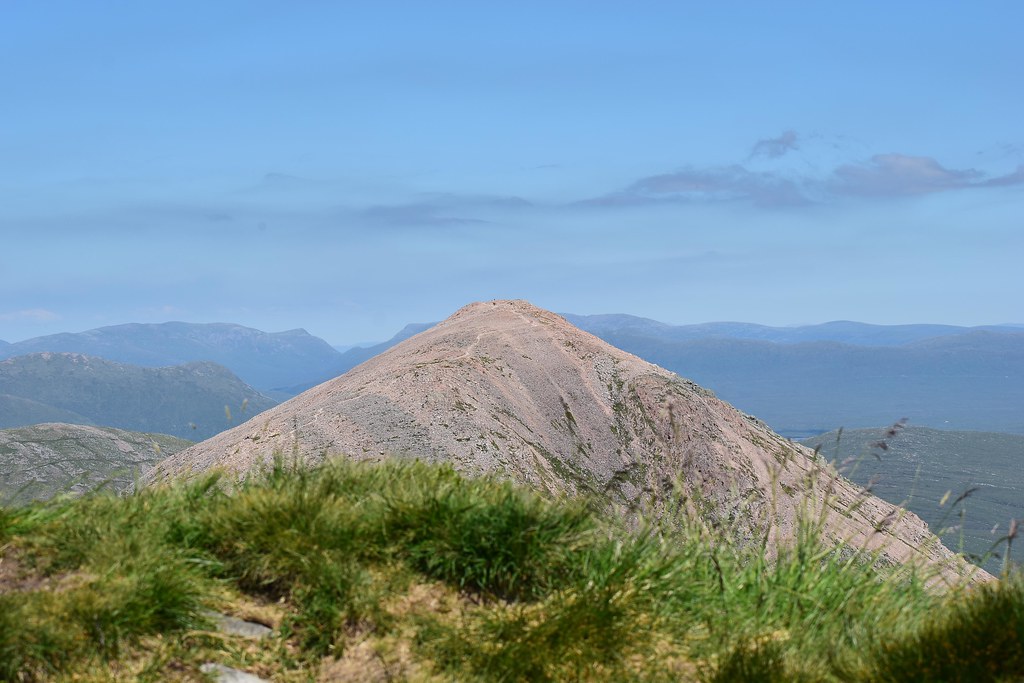
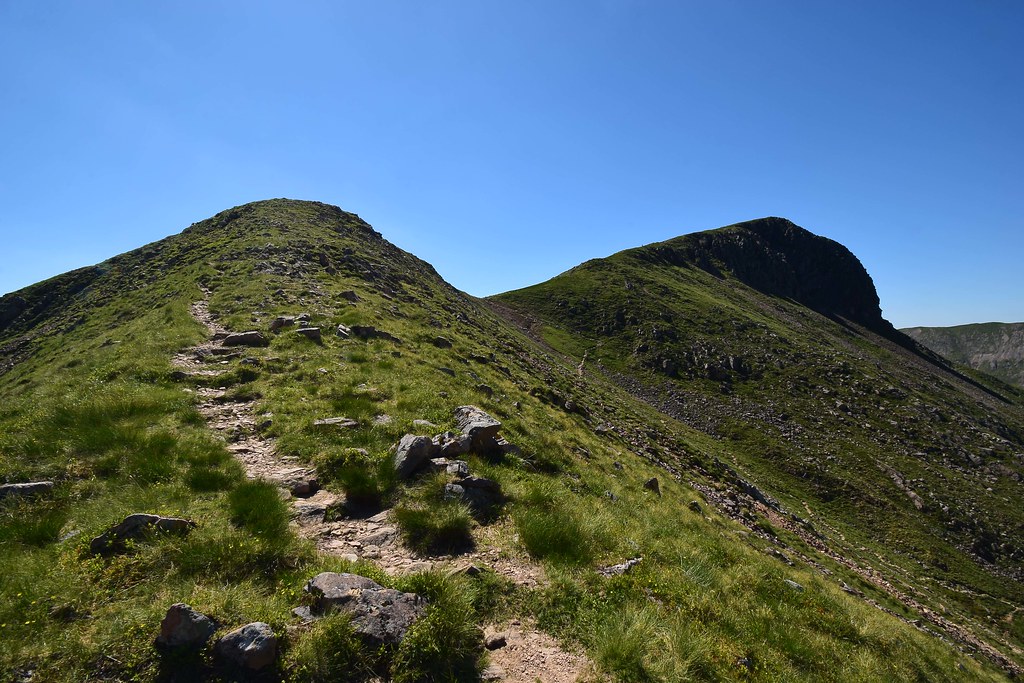
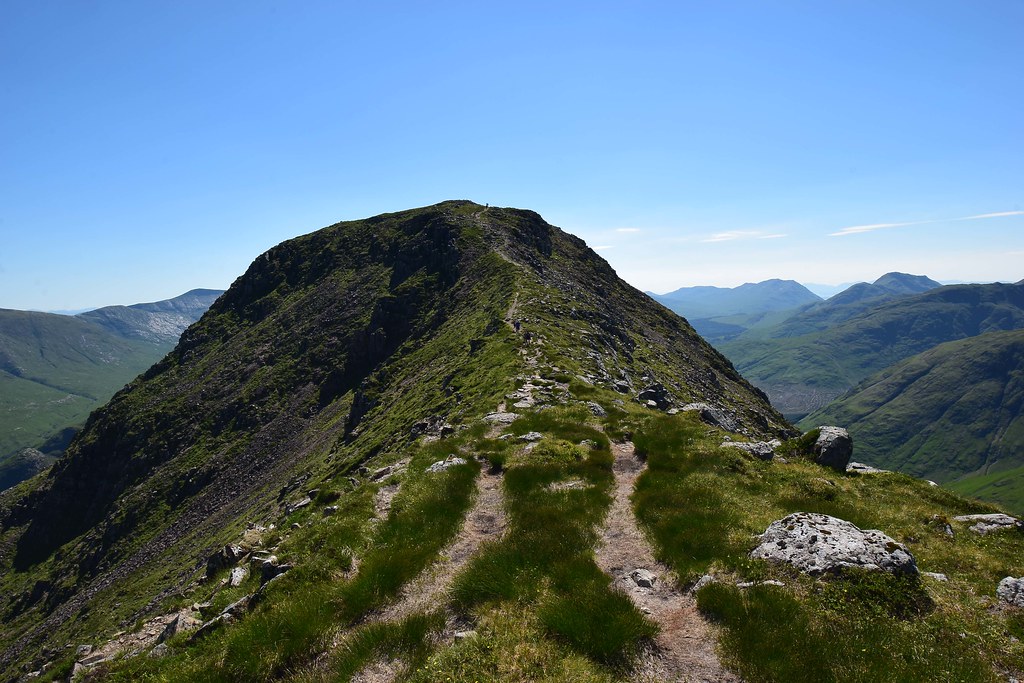
Almost there...
 DSC_2201 by Chris Mac, on Flickr
At the summit we enjoy another breather and water break although by now, despite taking extra water with us, we're already running low due to the heat and exertion of the day so far! The lads from Elgin were a good laugh and we enjoyed chatting to them while spotting Ben Cruachan, Ben Starav, Beinn Sgulaird and others to the south:
 DSC_2214 by Chris Mac, on Flickr
It's an excellent viewpoint and we all wonder at how it's not a Munro in it's own right, feels like it should be. We soak in the views down Glen Etive, west to Bidean nam Bian and especially the Aonach Eagach.
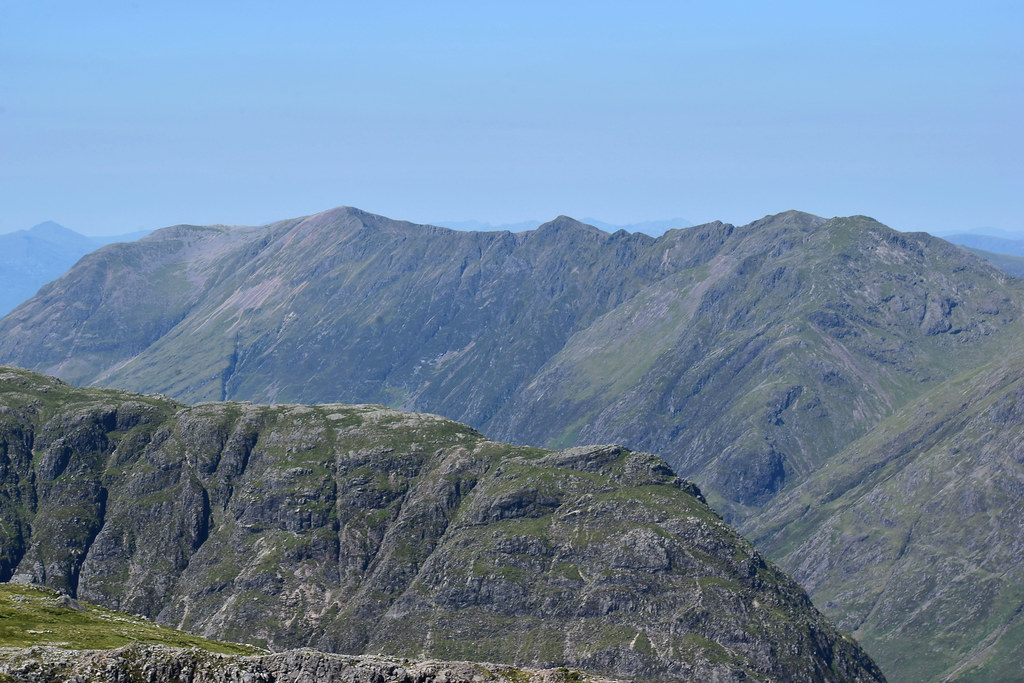
Stob Coire Sgreamhach:
 DSC_2261 by Chris Mac, on Flickr
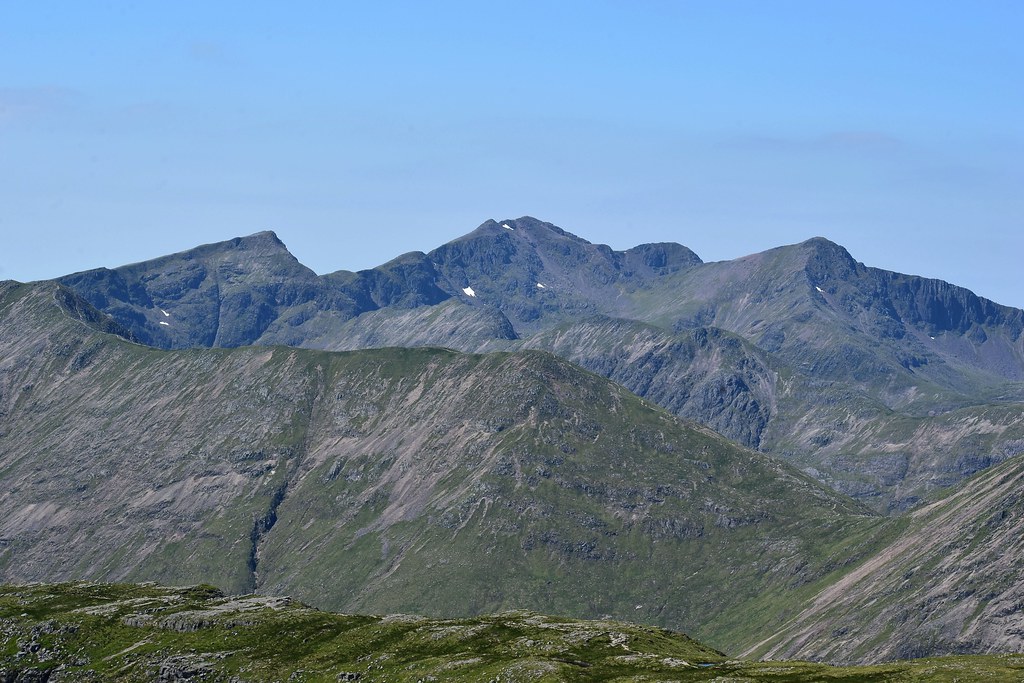
Bidean nam Bian:
 DSC_2264 by Chris Mac, on Flickr
Stob Coire nan Lochan:
 DSC_2267 by Chris Mac, on Flickr
Sgorr nam Fiannaidh, Stob Coire Leith, Meall Dearg and Am Bodach of Aonach Eagach with Stob Coire Raineach in the foreground:
 DSC_2282 by Chris Mac, on Flickr
Ridge of death in the background, friendly family picnic in the foreground, quite a contrast!
 DSC_2284 by Chris Mac, on Flickr
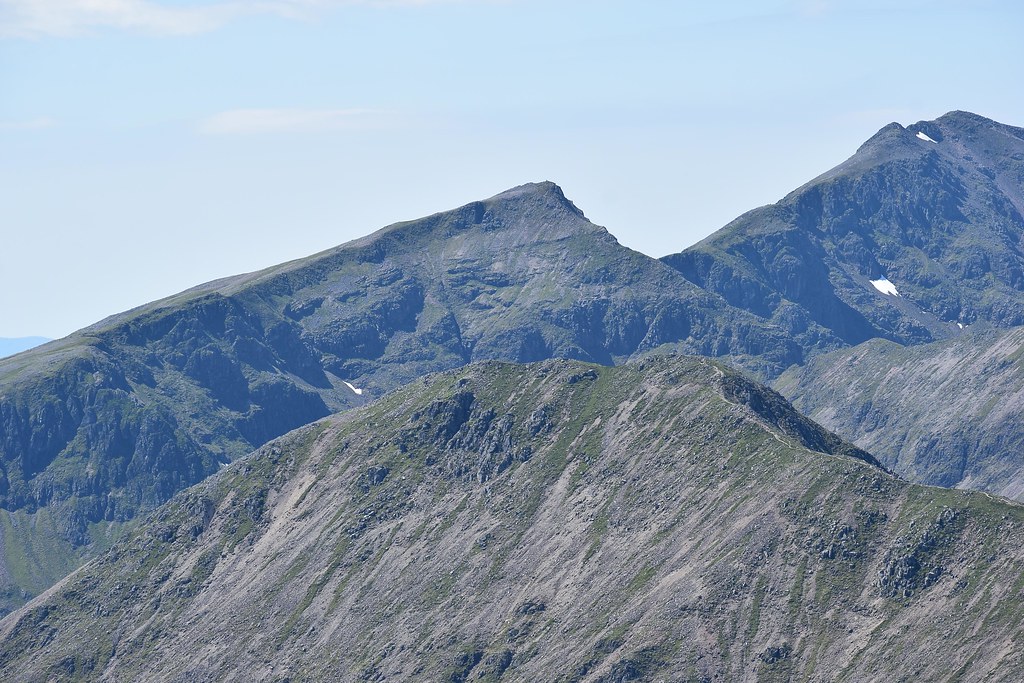
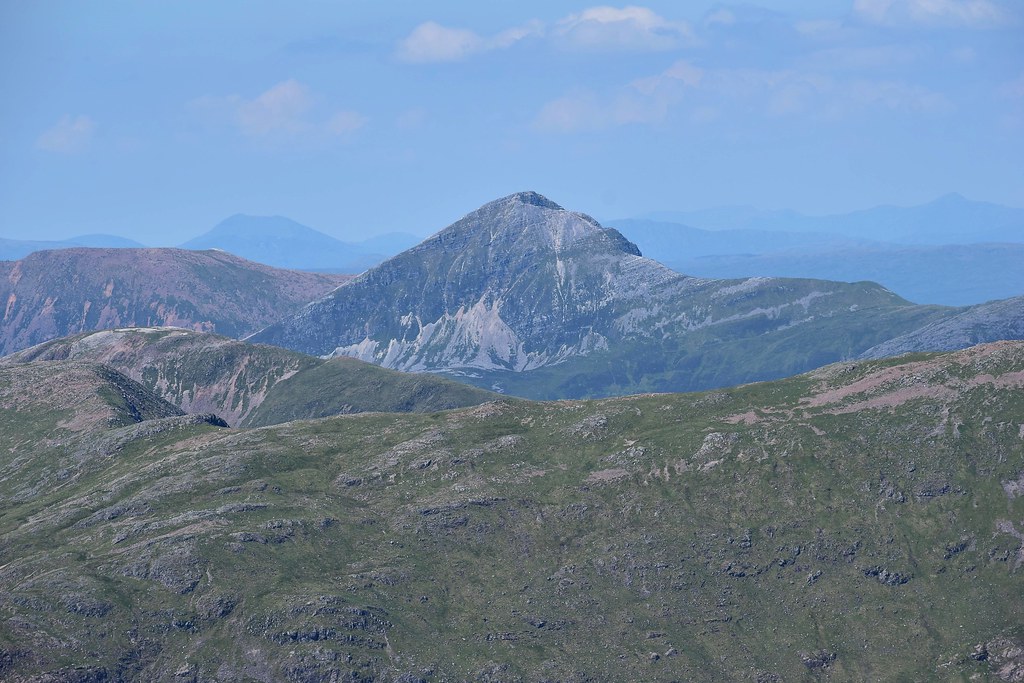
Looking north west to Stob Ban, an impressive looking peak and one the other two have enjoyed:
 DSC_2289 by Chris Mac, on Flickr
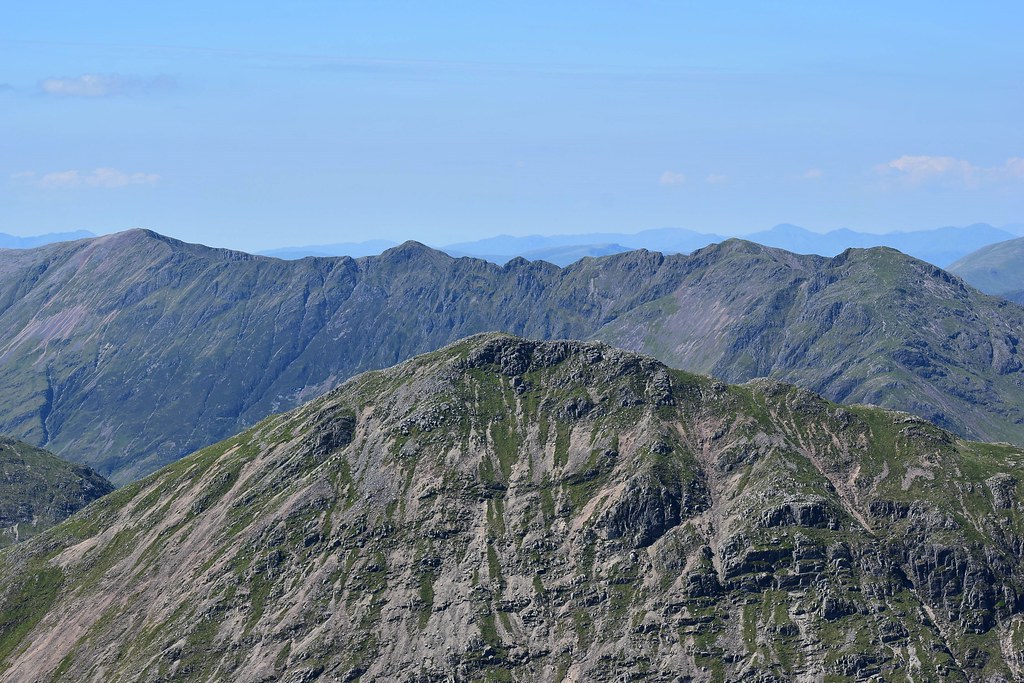
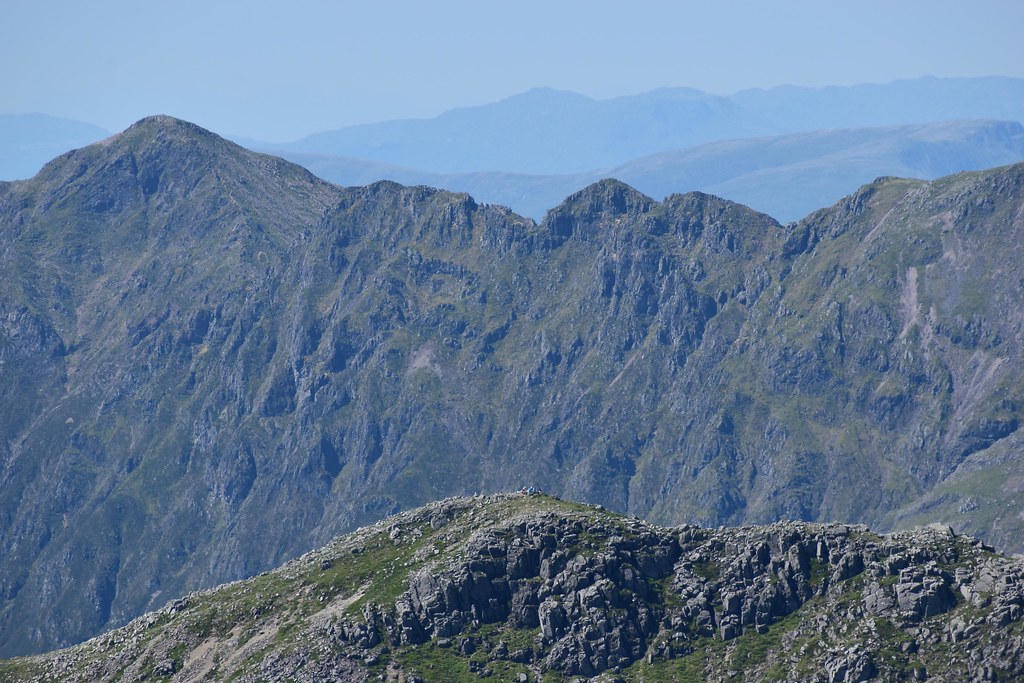
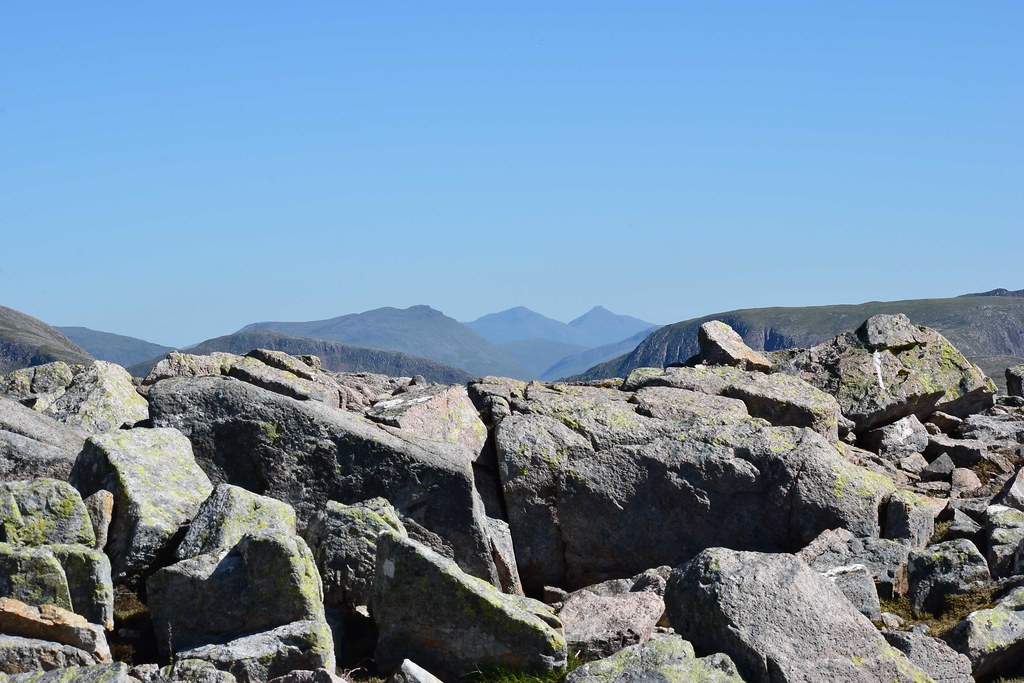
Time for a closer look at the other big hills to the north:
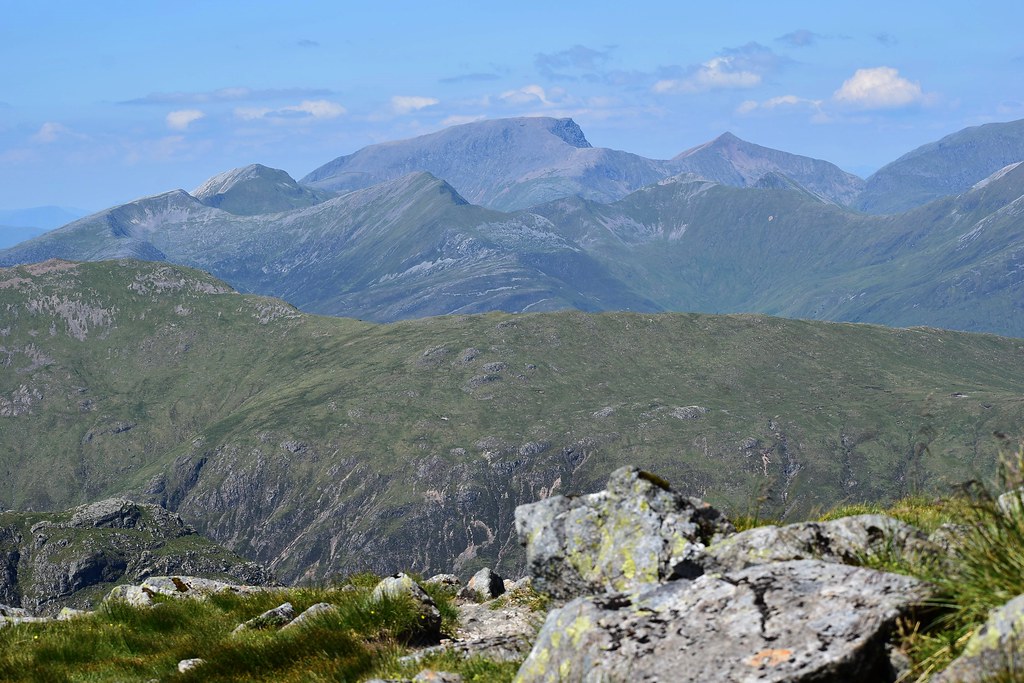 DSC_2293 by Chris Mac, on Flickr
Ben Nevis:
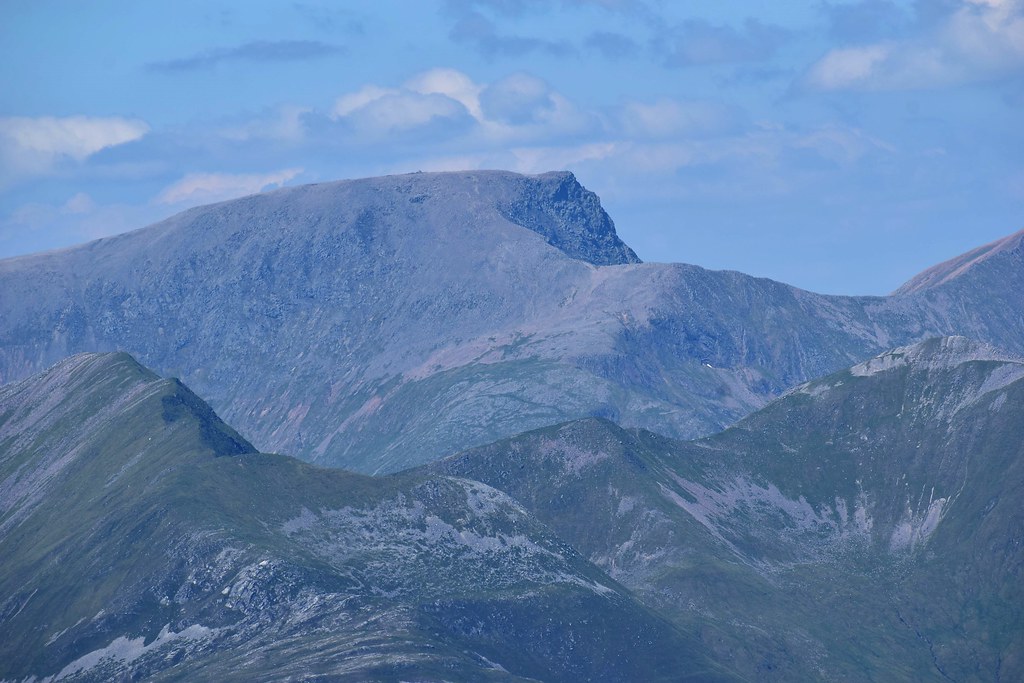 DSC_2298 by Chris Mac, on Flickr
Carn Mor Dearg:
 DSC_2303 by Chris Mac, on Flickr
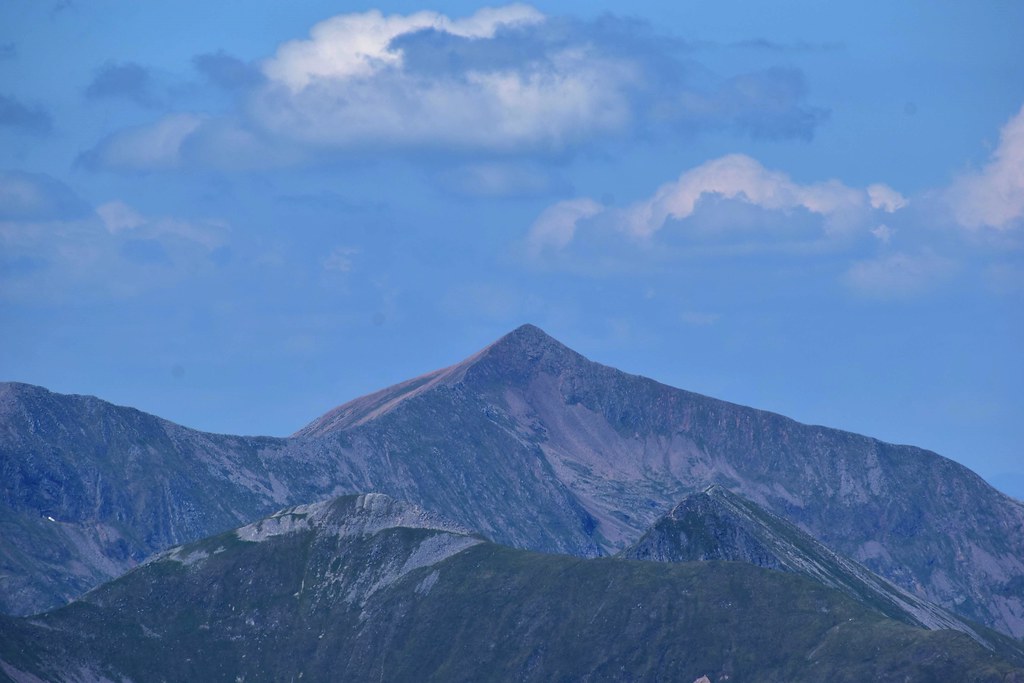
Binnein Mor:
 DSC_2309 by Chris Mac, on Flickr
Grey Corries:
 DSC_2313 by Chris Mac, on Flickr
The Easain's further east from the Mamores and Grey Corries looks like a fine pair of mountains:
 DSC_2320 by Chris Mac, on Flickr
Stob Dearg:
 DSC_2323 by Chris Mac, on Flickr
Schiehallion and Rannoch Moor:
 DSC_2328 by Chris Mac, on Flickr
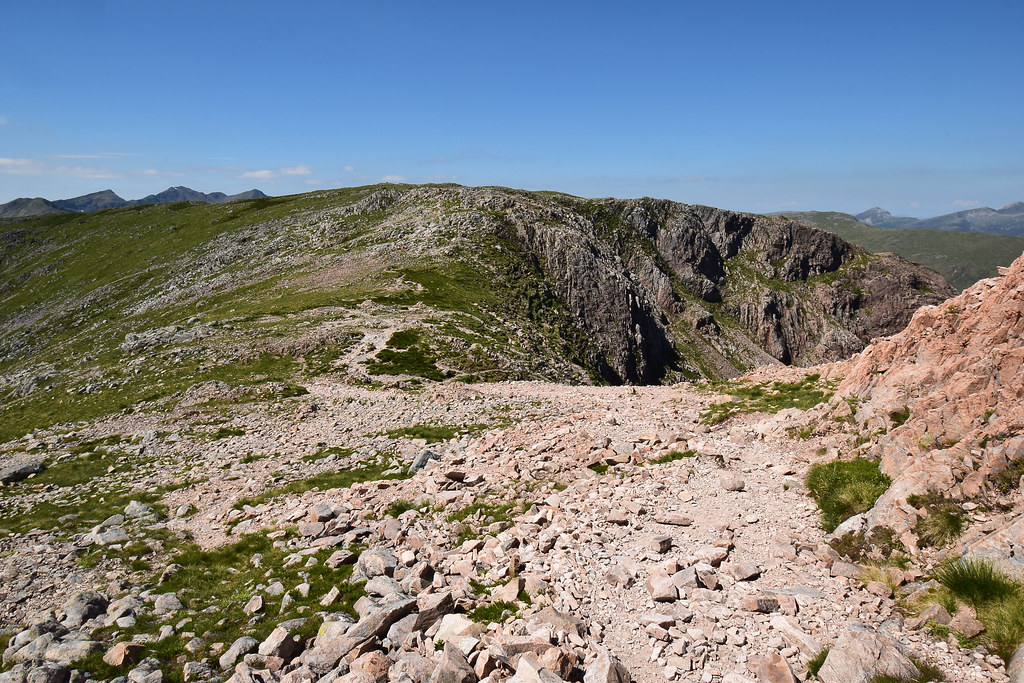
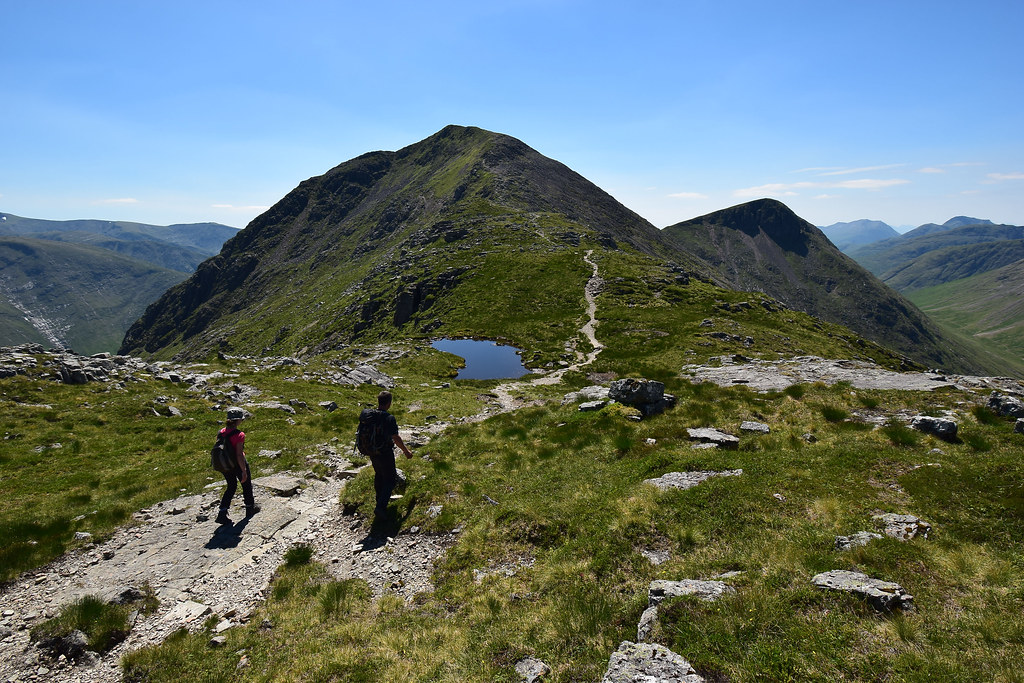
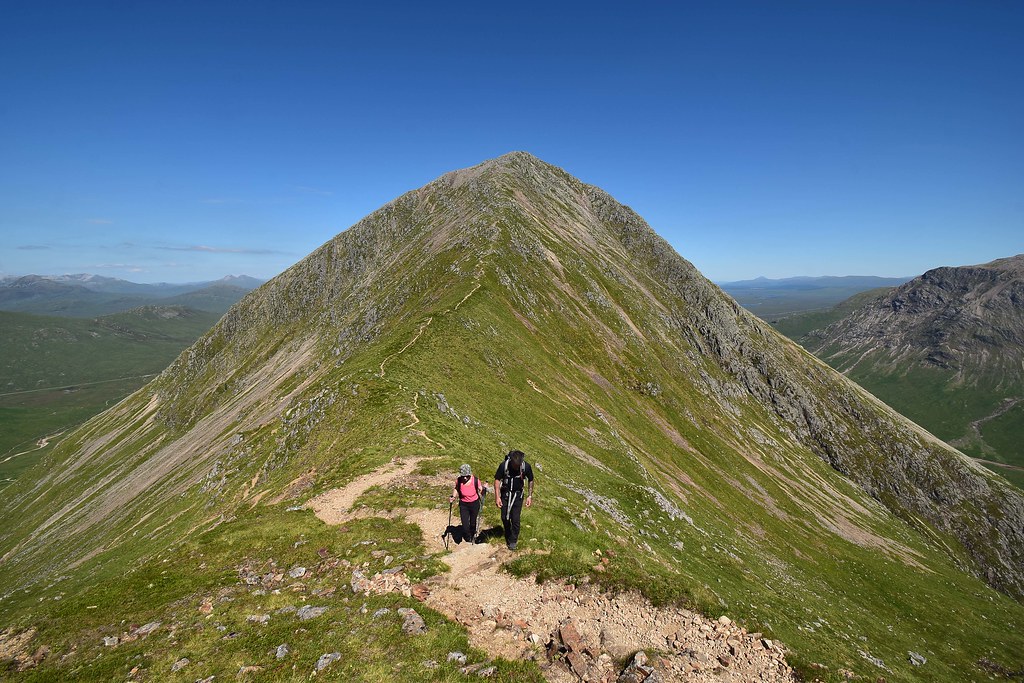
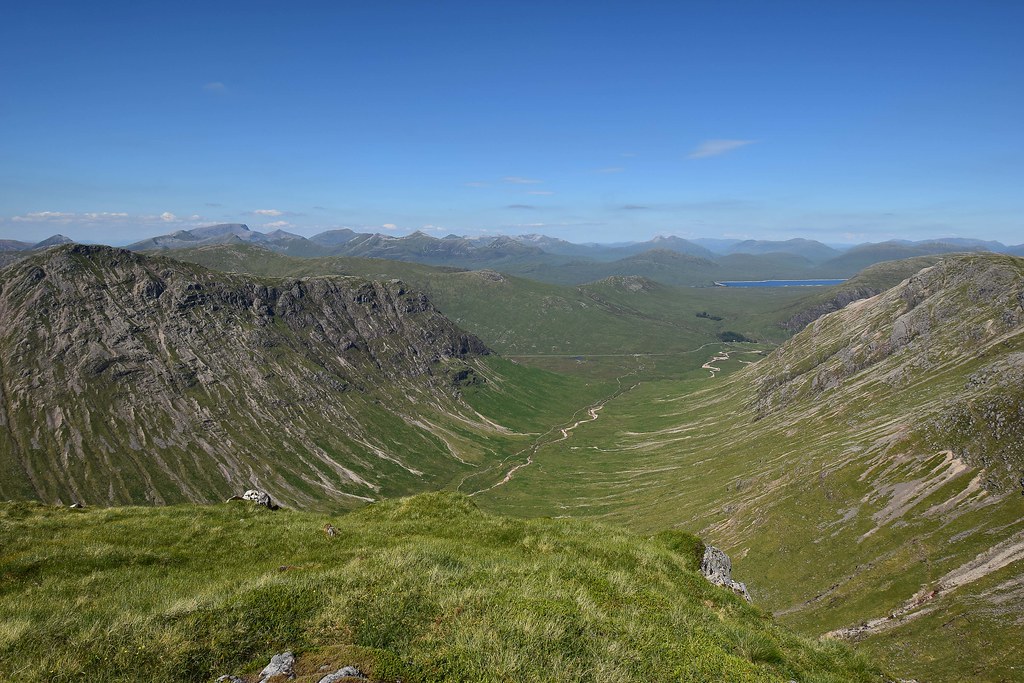
It was time to head on to Stob Coire Altruim and Stob na Broige, the view was simply stunning:
 DSC_2340 by Chris Mac, on Flickr
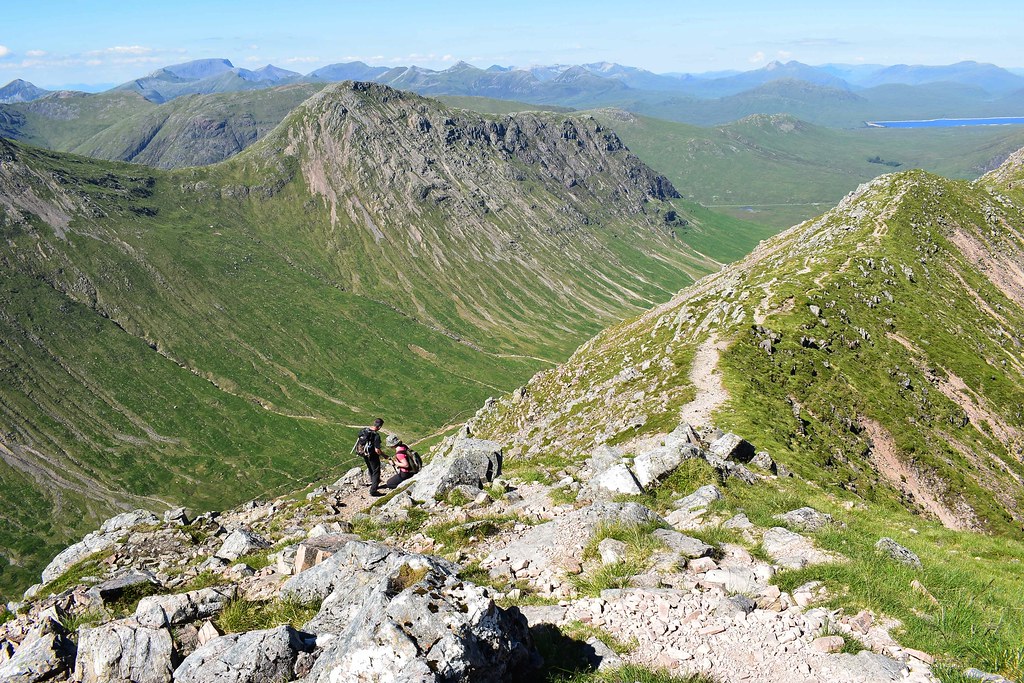
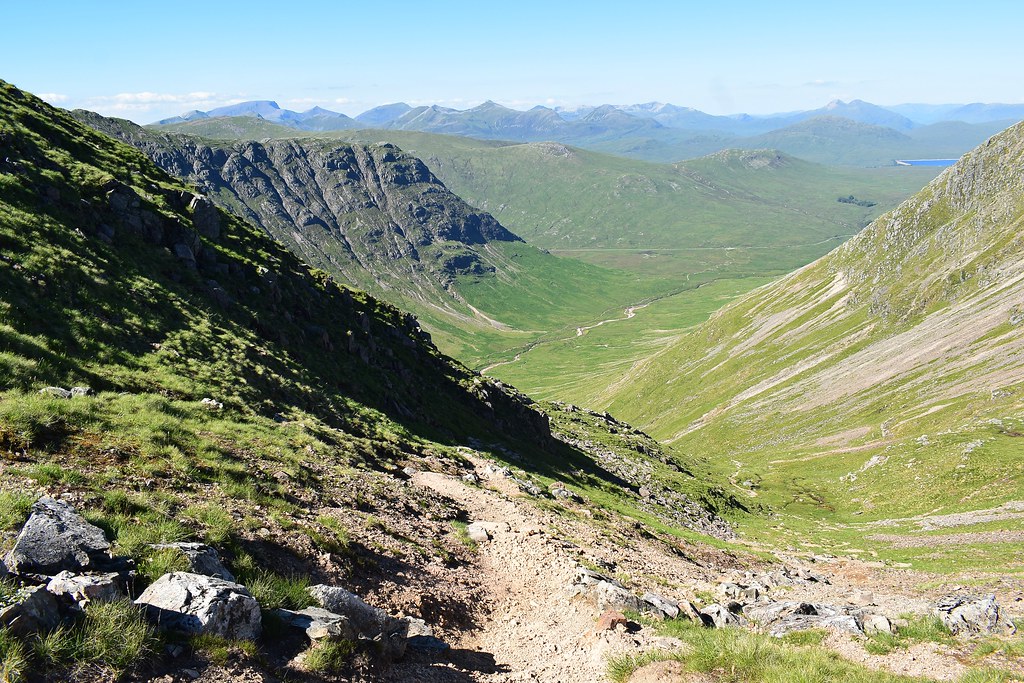
Heading along the ridge to the final Munro Top and Munro with our descent route path down Coire Altruim visible:
 DSC_2350 by Chris Mac, on Flickr
Stob Coire Altruim's crags in shadow:
 DSC_2360 by Chris Mac, on Flickr
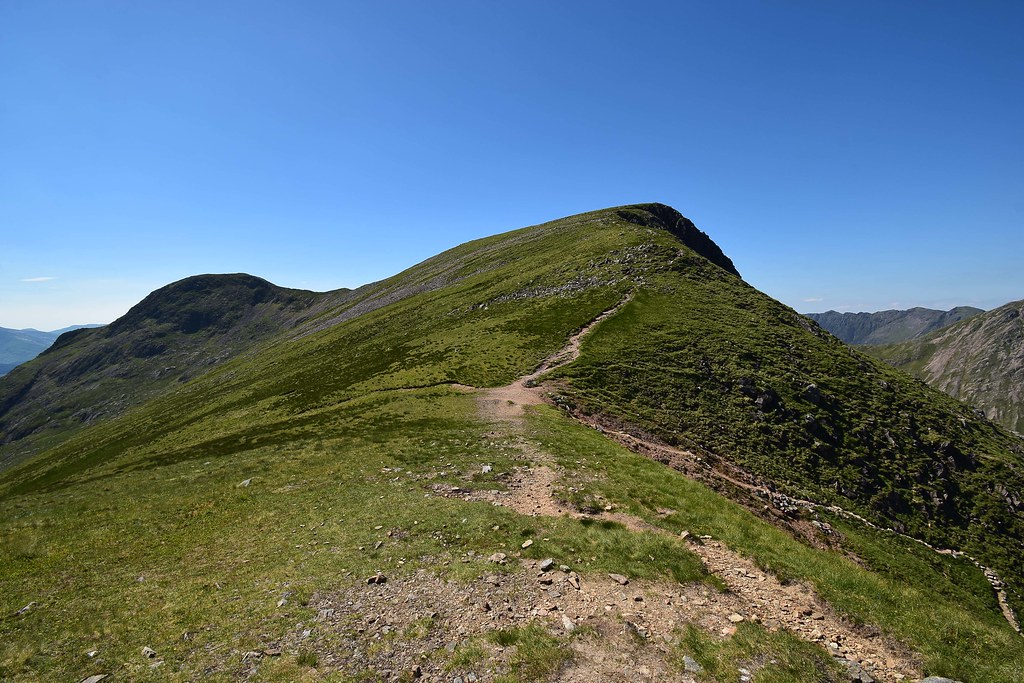
Stob na Doire behind us:
 DSC_2373 by Chris Mac, on Flickr
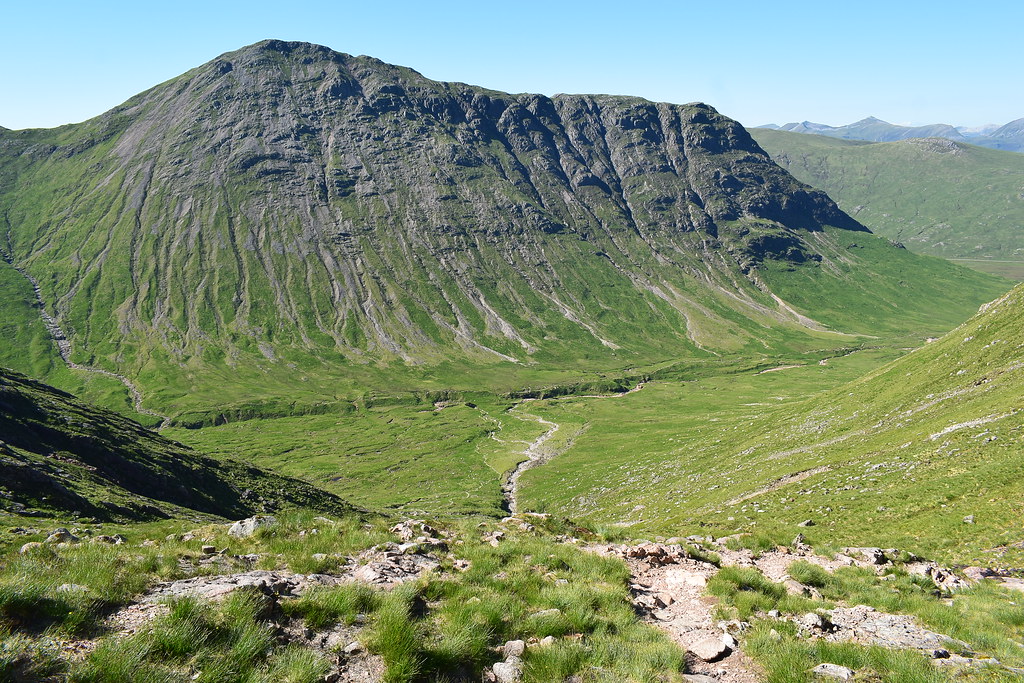
We pass two small cairns and the view down Glen Etive gets closer, Stob Dubh the Corbett on the left catches the eye and looks impressively steep:
 DSC_2377 by Chris Mac, on Flickr:
 DSC_2391 by Chris Mac, on Flickr
Stob Coire Altruim summit:
 DSC_2401 by Chris Mac, on Flickr
The view is another belter!
 DSC_2402 by Chris Mac, on Flickr
One of Iain's pics of me atop the crags absolutely loving the view:
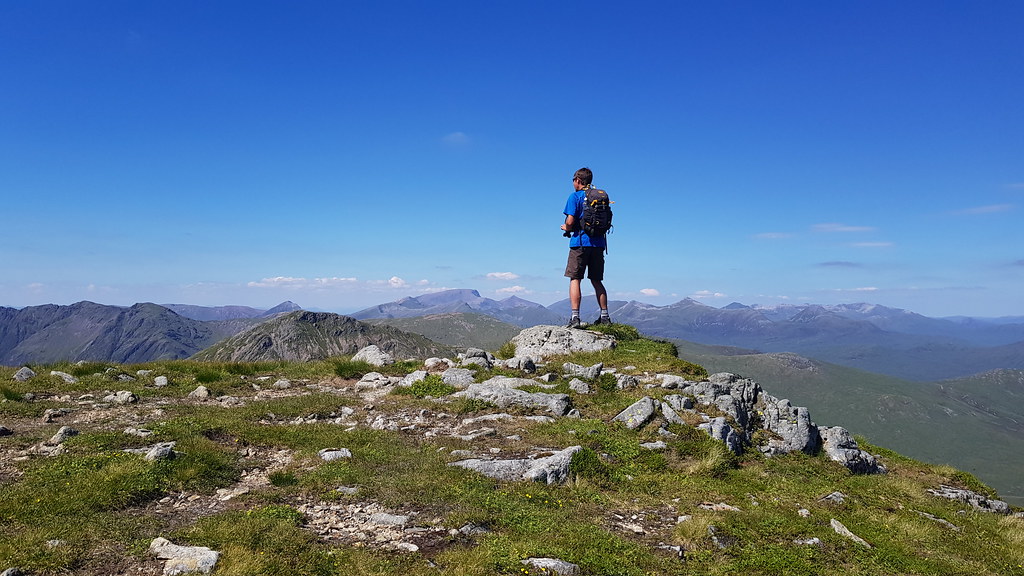 DSC_2403 2018-06-30 15.16.17 by Chris Mac, on Flickr
Our exit route to the north:
 DSC_2405 by Chris Mac, on Flickr
Lots of fun to be had over there!
 DSC_2409 by Chris Mac, on Flickr
Michele with the Black Mount hills behind her to the east:
 DSC_2415 by Chris Mac, on Flickr
After looking over to Aonach Eagach again and discussing the scrambling on it, we were still buzzing remember we set off again for the final summit...
 DSC_2424 by Chris Mac, on Flickr
 DSC_2433 by Chris Mac, on Flickr
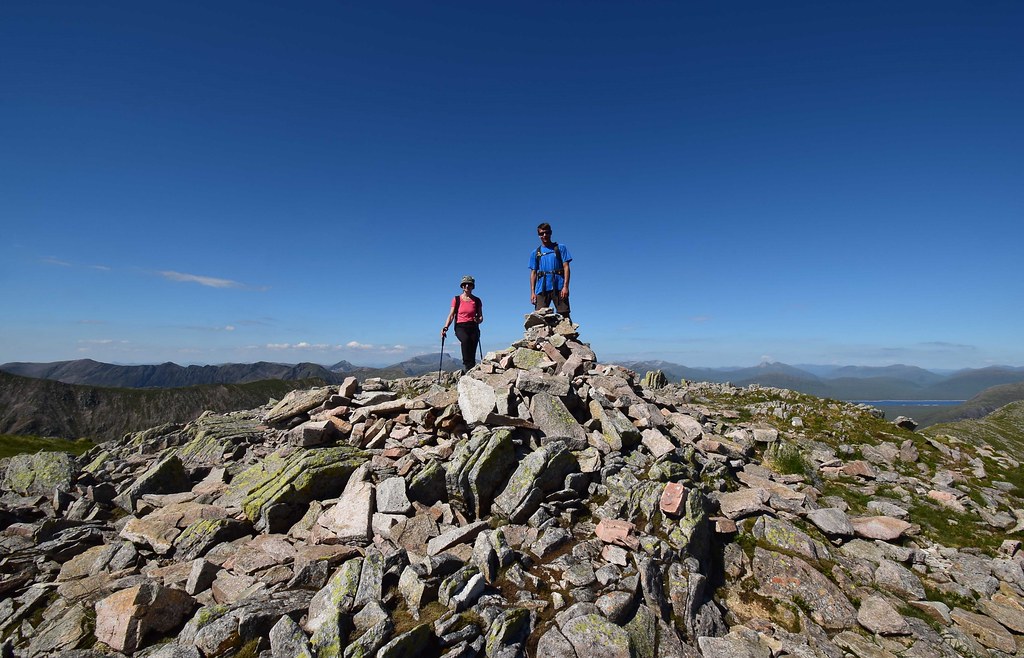
Stob na Broige:
 DSC_2445 by Chris Mac, on Flickr
Munro number 16 for me, Iain and Michele had both climbed the two already:
 DSC_2462 by Chris Mac, on Flickr
Loch Etive:
 DSC_2465 by Chris Mac, on Flickr
We moved along to the rocky bit along from the summit cairn to get a better view down Glen Etive toLoch Etive and the plethora of peaks surrounding it...
 DSC_2465 20180630_155456 by Chris Mac, on Flickr
Ben More and Stob Binnein can be seen peaking out to the south east:
 DSC_2466 by Chris Mac, on Flickr
The full ridge, from Stob na Broige to Stob Dearg:
 DSC_2504 by Chris Mac, on Flickr
Time to head back down now, still a fair bit to go to get back to the car which would take 2 hours from here:
 DSC_2510 by Chris Mac, on Flickr
Cruach Ardrain now visible as we make our way back along to Coire Altruim:
 DSC_2516 by Chris Mac, on Flickr
Almost at the path:
 DSC_2521 by Chris Mac, on Flickr
At this point we were all running very low on water, it had been a long and hot day with a lot of exertion during the scrambling, not to mention taps aff all along the ridge, the Elgin lads had said the same as we passed them before the final summit! We had all taken extra too but luck would soon be on our side...
 DSC_2533 by Chris Mac, on Flickr
As we descended the steep but well made path we soon heard the running water of the Allt Coire Altruim and I spotted a small waterfall, result! We refilled all of our bottles with the excellent water and had a head shower to cool down which felt amazing but not as good as the cold water we chugged down.
Enjoying the view of Stob Coire Raineach as we refuel:
 DSC_2539 by Chris Mac, on Flickr
Flora:
 DSC_2549 by Chris Mac, on Flickr
Crossing the River Coupall looking back at Stob Coire Altruim and the exit path:
 DSC_2566 by Chris Mac, on Flickr
We follow the excellent path, making fast progress along the scenic banks of the river:
 DSC_2570 by Chris Mac, on Flickr
We're soon heading towards Beinn a' Chrulaiste and the car park at Altnafeadh:
 DSC_2580 by Chris Mac, on Flickr
The sun was much further west as 6pm approached, making it bang on 8 hours we had been walking, just the big day out I needed and we had done it in style! The Buachaille Etive Beag doing it's best Stob Dearg impression:
 DSC_2590 by Chris Mac, on Flickr
Although it's around the other side it's still quite strange looking at the steep side of Stob Dearg and thinking we just went up that way via Curved Ridge!!
 DSC_2608 by Chris Mac, on Flickr
Final stretch back to Altnafeadh:
 DSC_2613 by Chris Mac, on Flickr
Panorama of the Big Buachaille:
 DSC_2614 20180630_175654 by Chris Mac, on Flickr
So that was us, we had conquered Curved Ridge and the Big Buachaille in style and had one of our best days ouit ever, incredible scrambling, exposure and scenery, top quality ridge walking and views to die for, friendly people and characters all loving the being up the mountains on a glorious day, perfect!
On the drive home we all got exited like children as we spotted our route up and could scarcely believe we had been climbing up it just 6 or 7 hours earlier.
I'm still buzzing from doing it, we made a good team on our first outing together, had plenty to chat about and worked well together when we had to be serious about the scrambling and routefinding. We were all in agreement that if conditions permitted we would never climb Buachaille Etive Mor again by any other route than Curved Ridge and I say that having climbed it for the first time!
Stob Dearg... I think I love you!
 DSC_2631 by Chris Mac, on Flickr
When I was 5 years old I visited Glen Coe when passing through driving from Loch Ness back to Glasgow, around that time in 1982 the likes of Adam and the Ants were on Top of the Pops. The night before this walk an old TOTP was on TV and it was exactly the same one I remember vividly from this time in my childhood! It was meant to be...
This crazy adventure began while on holiday in Fuerteventura in the middle of June, having texted Iain some pics of a Volcano walk, a few days later I received a simple message...
"Weather looking good for next week so i'm gonna pencil in curved ridge for Saturday the 30th if you fancy it?"
It was a simple and easy reply...
"Nice one aye count me in!"
I spent the final evenings of my holiday reading up on Curved Ridge and doing my homework so I knew what to expect... which was airy scrambling and breathtaking exposure!
Back home a few days later and a mention of our plans to another walking partner Michele soon meant we would be travelling up there as a party of 3 and in style with Iain taking the Subaru.
A strange thing happened though, the stars aligned, fate brought me full circle to 1982 and after a few months of doing smaller hills and walks I really needed an epic day out... yet I wasn't worried in the slightest, in fact I was absolutely buzzing at the prospect of srambling up the north face of Stob Dearg! Any initial fears or worries were strangely absent...
Although it would only be my 15th Munro, a childhood spent climbing trees and rocks along with a few years hillwalking experience meant I felt more than ready to up the game ahead of my scrambling exam, in fact I would later be cursing everyone I know since childhood for not taking me scrambling up the mountains sooner!
The night before excitement was at fever pitch as Iain, Michele and I texted walk reports and pics to each other so of course none of us got the early night we wanted. An early rise and collection soon saw us in the west end for a breakfast and sandwiches for later pitstop on the way and the drive up to Glen Coe took no time at all thanks to being in the blue beast.
I had asked Iain if he didn't mind driving for this one as since it was my first trip into the Glen I wanted to be able to soak in the arrival and see what we had in store as the Buachaille Etive Mor loomed ever closer...
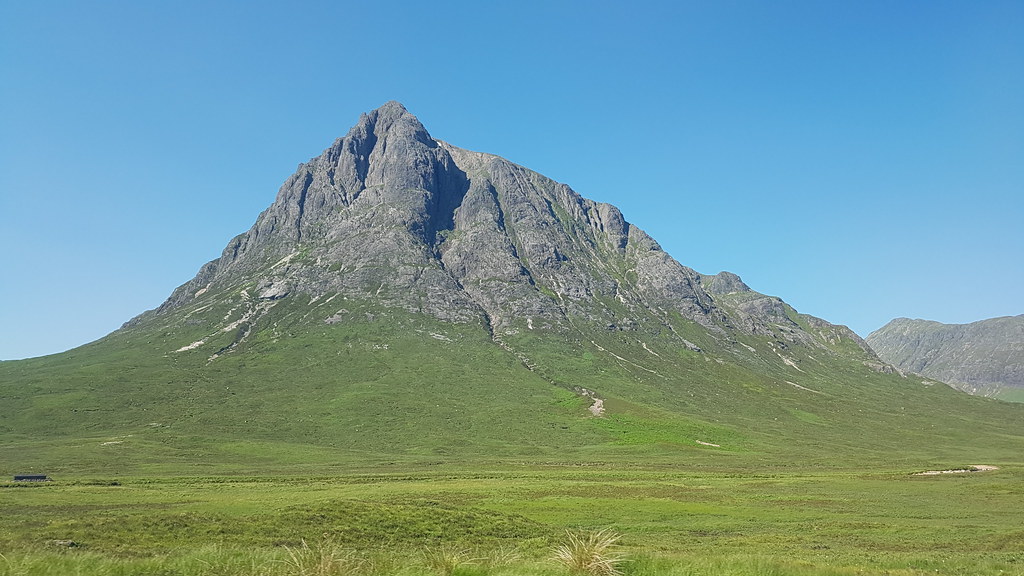
DSC_1800 20180630_094708 by Chris Mac, on FlickrCurved Ridge, from the summit go down, turn left and you'll find the large slab of Rannoch Wall with Crowberry Tower sticking out at the top, the ridge goes from the bottom of Rannoch Wall and curves up around it to the left then back again towards the summit as shown so well in houdi's report:
DSC_1801 20180630_094745 by Chris Mac, on FlickrThis image by jwramsay in his report was very useful in showing the route, except we wouldn't go behind Crowberry Tower and would instead continue up to the end of Curved Ridge:
We parked just before 10am and got ready, the conditions were absolutely perfect:
DSC_1802 20180630_095247(0) by Chris Mac, on FlickrNo tourist route for us thanks, we'll be going left when we reach the fork in the path:
DSC_1819 by Chris Mac, on FlickrThe path climbs gradually up the hillside and around the base of Stob Dearg:
DSC_1829 by Chris Mac, on FlickrWe're soon at some of the scree fields and making our way towards and across Great Gully:
DSC_1838 by Chris Mac, on FlickrDSC_1847 by Chris Mac, on FlickrCheck out the smiles, this would be a constant feature during the walk!
DSC_1855 by Chris Mac, on FlickrWe continue around on the path towards Stob a' Ghlais Choire and Creise:
DSC_1862 by Chris Mac, on FlickrStill gaining height gradually as we pass the water slab, it was a very warm day already and behind us the view is opening up to Ben Nevis, Binnein Mor and the other Mamores:
DSC_1868 by Chris Mac, on FlickrAt the start of the scree/path, let's do this... please note that this shot is with a wide angle lens so the background is not quite so far away, it towers above you and this shot is also pointing upwards at an angle, it's much more intimidating being at the bottom looking up than appears in this shot!
DSC_1879 by Chris Mac, on FlickrWe're now heading up the scree path:
DSC_1880 20180630_105450 by Chris Mac, on FlickrA pause to view the way ahead and do some routefinding:
DSC_1880 20180630_105910 by Chris Mac, on FlickrThe way ahead, this shot is taken looking up the way!
DSC_1881 20180630_105927 by Chris Mac, on FlickrHaving climbed Curved Ridge about 4 years ago Iain was in the lead, although it would turn out that his memory from 4 years ago wasn't as fresh as he hoped!
DSC_1882 2018-06-30 11.05.13 by Chris Mac, on FlickrWe reviewed the route notes which said head to the right which we did as I took the lead:
DSC_1883 2018-06-30 11.13.12 by Chris Mac, on FlickrStill gaining height and it's getting steeper...
DSC_1884 by Chris Mac, on FlickrSomething was wrong, an assessment of the situation told us we were a bit too far along to the right:
DSC_1889 20180630_111924 by Chris Mac, on FlickrLooking up, we were below the route up to Rannoch Wall and had inadverntantly gone beyond the gully coming down from it:
DSC_1889 20180630_112205 by Chris Mac, on FlickrAt around this point we realised we would have to backtrack slightly down and left again to reach the start of curved ridge...
DSC_1889 20180630_112720 by Chris Mac, on FlickrWe went back down slightly, over the gulley again and were soon back on track, the routefinding to the start is definitely one of the trickier aspects of Curved Ridge, especially when your guide is relying on faint memories from 4 years ago...
Now we're on track again, the pointy feature looking overhead is Rannoch Wall which will soon be all we can see on our right hand side, curved ridge starting down to the left of it:
DSC_1889 20180630_112953 by Chris Mac, on FlickrThis is where the fun really begins!!
We briefly discussed a climbing order, nobody was fussed, so Iain went first and left the two rookies bringing up the rear. Michele has over 60 Munro's in her bag including most of Glen Coe, the Mamores, Torridon, Skye... she's an experienced scrambler with a no fear attitude (just keep her out of bogs
And we're off...
DSC_1889 20180630_113855 by Chris Mac, on FlickrFirst wee ledge reached, time for a quick phone snap to the side to indicate the scrambling involved:
DSC_1889 20180630_114258(0) by Chris Mac, on FlickrThose of you with vertigo should maybe look away now...
DSC_1889 20180630_114451 by Chris Mac, on FlickrFor those of you that can handle looking down, you'll see multiple hand grips and the less than vertical slant of the rocks so as long as you are ok climbing and having a long drop below you, you should find curved ridge within your ability.
After the climb up the first section of the ridge we reach a platform large enough for a water break, scrambling in direct sunlight in this heat is thirsty work!
Looking up, Rannoch Wall in the middle again, curved ridge going up to the left:
DSC_1890 by Chris Mac, on FlickrWe could hear a strange buzzing sound up ahead... some of the climbers up at Rannoch Wall were using a drone which can just be seen in this pic:
DSC_1898 by Chris Mac, on FlickrWe're more than half way up Stob Dearg and the view over to the Mamores, Grey Corries and Easains is a cracker:
DSC_1907 by Chris Mac, on FlickrNow that we were tearing our way up Curved Ridge it was scrambling heaven, aided by the very useful crampon scratches on the rocks which are great for ensuring you stay on track:
DSC_1908 2018-06-30 11.52.20 by Chris Mac, on FlickrStill going, now in the zone:
DSC_1908 20180630_115056 by Chris Mac, on FlickrAs the route continues the massive bulk of Rannoch Wall begins to dominate and about a dozen climbers are enjoying the glorious conditions today:
DSC_1908 20180630_115241 by Chris Mac, on FlickrMichele posing on Curved Ridge, still sporting a massive smile, these never left all three of us throughout the day!
DSC_1910 20180630_115622 by Chris Mac, on FlickrAs long as you keep out of the gully inbetween the ridge and Rannoch Wall then you'll be fine.
We were loving the scenery, the exposure, the scrambling and watching the rock climbers strut their stuff, these two doing their best impression of seabirds on a cliff edge, impressive stuff!!
DSC_1910 20180630_115628 by Chris Mac, on FlickrThe thought does cross my mind... these guys have ropes and helmets, we don't!!
By now I have noticed one of the scarier aspects of doing this scramble is that quite often you think you have a strong hand hold, only for it to start moving once you put some weight on it, so I would always ensure that any hand hold was very solid during the ascent after a few WTF moments lower down, worth remembering.
After the second section of scrambling we were again higher up and just below the climber's mate who had been flying the drone. I take advantage of our second break ledge to have more water (climbing is thirsty and sweaty work!) and bring out the big camera again.
Looking up at Curved Ridge, Rannoch Wall and the drone pilot who we chatted to briefly and was enjoying a lovely day filming his mates in an epic location:
DSC_1912 by Chris Mac, on FlickrOur route continues up to the left but we decide to enjoy a break here, watch the climbers for a while and take some more photos:
DSC_1913 by Chris Mac, on FlickrRannoch wall... immense!
DSC_1915 by Chris Mac, on FlickrEven a wide angle lens struggles to fit it all in at this distance:
DSC_1920 by Chris Mac, on FlickrRespect to the rock climbers, you'll not catch me up there any time soon!
DSC_1922 by Chris Mac, on FlickrEnjoying a break and some pics after the second of the three main scrambling sections, as you can see from the beaming faces we are having the time of our lives!
DSC_1931 by Chris Mac, on FlickrDSC_1945 by Chris Mac, on FlickrDSC_1947 by Chris Mac, on FlickrAnother wee look straight down to induce some vertigo for others...
DSC_1953 by Chris Mac, on FlickrMaybe one day...
DSC_1959 by Chris Mac, on FlickrRefreshed and yet again raring to go, we begin the ascent of the final section of curved ridge. I'm in the lead now and find the going pretty easy, flying up at a decent pace but at the same time very carefully, especially when it comes to hand holds and loose rocks, conscious of those behind me now.
I feel like i'm a kid again climbing trees, this is what it's all about!
After a few climbs i'm up on a ledge and on looking back see that Michele is waiting below me to try and assist Iain up a section below me:
DSC_1960 20180630_121502 by Chris Mac, on FlickrIain was there for about 3 minutes and I was baffled at how he was stuck since I had just done a spiderman and ascended effortlessly! I was waiting on a ledge with a large vertical rock face in front of me...
DSC_1960 20180630_121539 by Chris Mac, on FlickrI was aware that the "crux move" of Curved Ridge was around this point, but was Iain stuck at that or was it next up for me...?!
As you can see it was a fairly steep section to be sitting at!
DSC_1960 20180630_121553 by Chris Mac, on FlickrI decide to just ascend while waiting, they'll soon be chasing me up anyway. I found this section a little tricky, more for having to hoist myself up on the ledge using my leg, i'm pretty sure I recall this being mentioned as the crux move, well i've done it!
DSC_1960 20180630_121603 by Chris Mac, on FlickrLooking down again, my route to the left of the boulder below me... it looked easier to climb up to my right so I said to Michele to try that way to avoid the humph up atop the crux move (if it was indeed that section), especially since the other two have smaller legs than I do!
DSC_1960 20180630_121821(0) by Chris Mac, on FlickrThey've made it and onwards we go!
DSC_1960 20180630_122047 by Chris Mac, on FlickrThe scrambling and exposure certainly doesn't ease up during the final section!
DSC_1960 20180630_122353 by Chris Mac, on FlickrIt may not look it but it is pretty straightforward if you know what you are doing. I was most surprised at my being completely fine with exposure like this, the scrambling was no problem, the exposure I was initially slightly worried about but it would turn out that it's something you get used to the more you are exposed to it. This was maxiumum exposure!
DSC_1960 20180630_122504 by Chris Mac, on FlickrDue to the fact that you are climbing almost straight up, height is gained very quickly:
DSC_1960 20180630_122544 by Chris Mac, on FlickrGetting there now, I love the massive cheeser on Michele's face in this pic as Iain eyes up Crowberry Tower...
DSC_1960 20180630_122711(0) by Chris Mac, on FlickrWe're now left with the final bit to go, either continue up Curved Ridge or head right along the scree to Crowberry Tower:
DSC_1960 20180630_122836 by Chris Mac, on FlickrBy now we're pumped full of adrenaline, we're hungry and thirsty, hot and sweaty, we briefly discuss heading up there but settle on continuing on and lunching atop Stob Dearg, we can always leave Crowberry Tower for a future visit!!
Iain ascending the final part of Curved Ridge with Crowberry Tower in the background:
DSC_1960 20180630_124052 by Chris Mac, on FlickrMichele, the top of this final section is easily walked:
DSC_1960 20180630_124357 by Chris Mac, on FlickrNothing wrong with an occasional hand to steady yourself though:
DSC_1960 20180630_124407 by Chris Mac, on FlickrAlmost there, ascending the final scree path to the summit:
DSC_1960 20180630_124453 by Chris Mac, on FlickrTime for a panorama pose, we've earned it!!
DSC_1960 20180630_124530 by Chris Mac, on FlickrAll that's left now is to head up and around to the summit of Stob Dearg:
DSC_1960 20180630_124723 by Chris Mac, on FlickrWoohoo success!!
DSC_1966 by Chris Mac, on FlickrWe feel on top of the world and we're almost giddy with excitement at what we've just accomplished, plus we have a full ridge walk to enjoy along to Stob na Broige still to go, this is the best day ever and it's only lunchtime!
As we marvel at the view, Iain marvels at this beast...
DSC_1976 by Chris Mac, on Flickr"Look at the size of that thing! It must eat all the people that die falling off the mountain..." reassuring words from Iain there, luckily kept until after we have finished our incredible scramble!!
Michele and the view west to Bidean nam Bian, Aonach Eagach and more:
DSC_1988 by Chris Mac, on FlickrThe Raven of Rannoch Moor!
DSC_1993 by Chris Mac, on FlickrIain and I nip along from the summit to check out Crowberry Tower from above:
DSC_1997 by Chris Mac, on FlickrSummit shot looking south:
DSC_2004 by Chris Mac, on FlickrAdmiring the mountains to the north and playing spot the hill:
DSC_2007 by Chris Mac, on FlickrLooking down Glen Coe towards Loch Linnhe and Ardgour, Rannoch Raven circling looking for victims with Stob Ban walks being recalled by the other two:
DSC_2009 by Chris Mac, on FlickrLooking south east to the Lawers group in the distance, Great Wall of Rannoch Moor Munros and Black Mount Munros:
DSC_2016 by Chris Mac, on FlickrLooking north to Ben Nevis and co., Altnafeadh car park waaaay down below!
DSC_2023 by Chris Mac, on FlickrAs the summit was pretty busy we decided to continue along towards Stob na Doire and find another spot to have lunch
DSC_2044 by Chris Mac, on FlickrWe'd settle for the rocky outcrop shown here to enjoy the view south and west:
DSC_2047 by Chris Mac, on FlickrOur route ahead:
DSC_2064 by Chris Mac, on FlickrBidean nam Bian looking amazing with Stob Dubh of the Buachaille Etive Beag in the foreground:
DSC_2067 by Chris Mac, on FlickrAonach Eagach ridge... Iain had done this just two days before our Curved Ridge trip!
DSC_2073 by Chris Mac, on FlickrUnfortunately after what we had just done, I now had an appetite for doing it too!
We enjoyed our top quality lunch spot and blethered about other scrambling routes and such like. Refreshed and still buzzing at our Curved Ridge ascent we decide to head off for Stob na Doire:
DSC_2104 by Chris Mac, on FlickrPassing the tourist route on the way...
DSC_2113 by Chris Mac, on FlickrNorth:
DSC_2115 by Chris Mac, on FlickrIt's easy to see why Stob Dearg is the red peak!
DSC_2118 by Chris Mac, on FlickrNorth again, Mamores and lochans:
DSC_2120 by Chris Mac, on FlickrPassing more wee lochans right and left on the way up the Munro top:
DSC_2133 by Chris Mac, on FlickrDSC_2144 by Chris Mac, on FlickrStob na Broige at the end of the ridge:
DSC_2152 by Chris Mac, on FlickrThe Buachaille Etive Beag, baby brother of our current mountain, one I already have my eye on for a return visit, looking like a much easier version of this walk, minus the crazy scramble at the start of course!
DSC_2167 by Chris Mac, on FlickrThere were a fair few other groups of people doing the ridge walk between the Munros in both directions. We had got chatting to the taps aff lads from Elgin at Stob Dearg summit and would continue doing so at the summit of Stob na Doire:
DSC_2189 by Chris Mac, on FlickrDSC_2193 by Chris Mac, on FlickrAlmost there...
DSC_2201 by Chris Mac, on FlickrAt the summit we enjoy another breather and water break although by now, despite taking extra water with us, we're already running low due to the heat and exertion of the day so far! The lads from Elgin were a good laugh and we enjoyed chatting to them while spotting Ben Cruachan, Ben Starav, Beinn Sgulaird and others to the south:
DSC_2214 by Chris Mac, on FlickrIt's an excellent viewpoint and we all wonder at how it's not a Munro in it's own right, feels like it should be. We soak in the views down Glen Etive, west to Bidean nam Bian and especially the Aonach Eagach.
Stob Coire Sgreamhach:
DSC_2261 by Chris Mac, on FlickrBidean nam Bian:
DSC_2264 by Chris Mac, on FlickrStob Coire nan Lochan:
DSC_2267 by Chris Mac, on FlickrSgorr nam Fiannaidh, Stob Coire Leith, Meall Dearg and Am Bodach of Aonach Eagach with Stob Coire Raineach in the foreground:
DSC_2282 by Chris Mac, on FlickrRidge of death in the background, friendly family picnic in the foreground, quite a contrast!
DSC_2284 by Chris Mac, on FlickrLooking north west to Stob Ban, an impressive looking peak and one the other two have enjoyed:
DSC_2289 by Chris Mac, on FlickrTime for a closer look at the other big hills to the north:
DSC_2293 by Chris Mac, on FlickrBen Nevis:
DSC_2298 by Chris Mac, on FlickrCarn Mor Dearg:
DSC_2303 by Chris Mac, on FlickrBinnein Mor:
DSC_2309 by Chris Mac, on FlickrGrey Corries:
DSC_2313 by Chris Mac, on FlickrThe Easain's further east from the Mamores and Grey Corries looks like a fine pair of mountains:
DSC_2320 by Chris Mac, on FlickrStob Dearg:
DSC_2323 by Chris Mac, on FlickrSchiehallion and Rannoch Moor:
DSC_2328 by Chris Mac, on FlickrIt was time to head on to Stob Coire Altruim and Stob na Broige, the view was simply stunning:
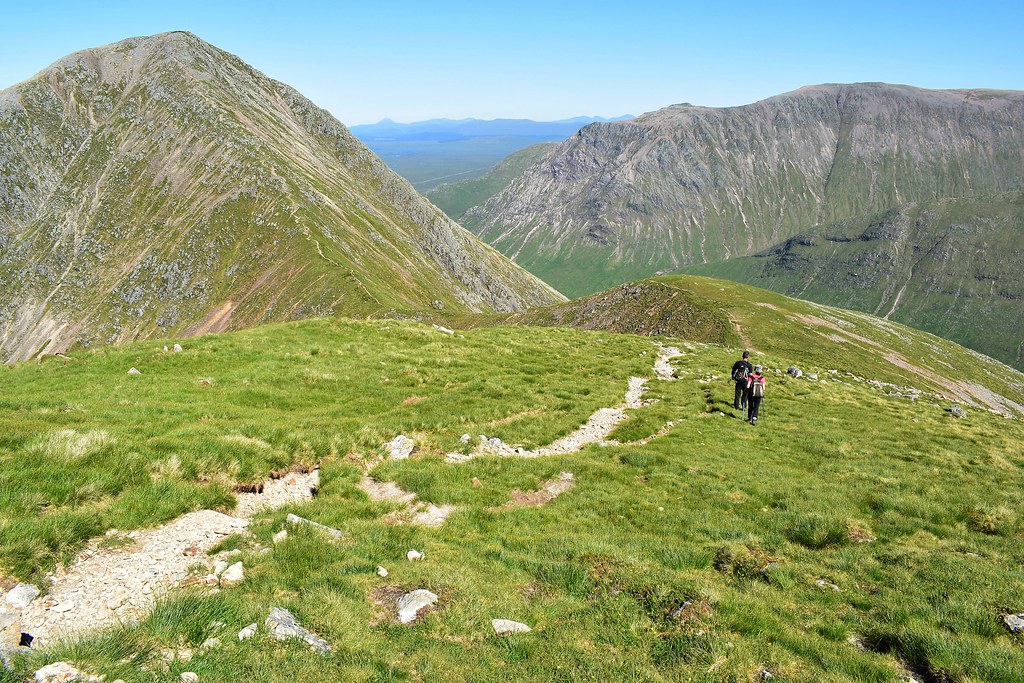
DSC_2340 by Chris Mac, on FlickrHeading along the ridge to the final Munro Top and Munro with our descent route path down Coire Altruim visible:
DSC_2350 by Chris Mac, on FlickrStob Coire Altruim's crags in shadow:
DSC_2360 by Chris Mac, on FlickrStob na Doire behind us:
DSC_2373 by Chris Mac, on FlickrWe pass two small cairns and the view down Glen Etive gets closer, Stob Dubh the Corbett on the left catches the eye and looks impressively steep:
DSC_2377 by Chris Mac, on Flickr:DSC_2391 by Chris Mac, on FlickrStob Coire Altruim summit:
DSC_2401 by Chris Mac, on FlickrThe view is another belter!
DSC_2402 by Chris Mac, on FlickrOne of Iain's pics of me atop the crags absolutely loving the view:
DSC_2403 2018-06-30 15.16.17 by Chris Mac, on FlickrOur exit route to the north:
DSC_2405 by Chris Mac, on FlickrLots of fun to be had over there!
DSC_2409 by Chris Mac, on FlickrMichele with the Black Mount hills behind her to the east:
DSC_2415 by Chris Mac, on FlickrAfter looking over to Aonach Eagach again and discussing the scrambling on it, we were still buzzing remember
DSC_2424 by Chris Mac, on FlickrDSC_2433 by Chris Mac, on FlickrStob na Broige:
DSC_2445 by Chris Mac, on FlickrMunro number 16 for me, Iain and Michele had both climbed the two already:
DSC_2462 by Chris Mac, on FlickrLoch Etive:
DSC_2465 by Chris Mac, on FlickrWe moved along to the rocky bit along from the summit cairn to get a better view down Glen Etive toLoch Etive and the plethora of peaks surrounding it...
DSC_2465 20180630_155456 by Chris Mac, on FlickrBen More and Stob Binnein can be seen peaking out to the south east:
DSC_2466 by Chris Mac, on FlickrThe full ridge, from Stob na Broige to Stob Dearg:
DSC_2504 by Chris Mac, on FlickrTime to head back down now, still a fair bit to go to get back to the car which would take 2 hours from here:
DSC_2510 by Chris Mac, on FlickrCruach Ardrain now visible as we make our way back along to Coire Altruim:
DSC_2516 by Chris Mac, on FlickrAlmost at the path:
DSC_2521 by Chris Mac, on FlickrAt this point we were all running very low on water, it had been a long and hot day with a lot of exertion during the scrambling, not to mention taps aff all along the ridge, the Elgin lads had said the same as we passed them before the final summit! We had all taken extra too but luck would soon be on our side...
DSC_2533 by Chris Mac, on FlickrAs we descended the steep but well made path we soon heard the running water of the Allt Coire Altruim and I spotted a small waterfall, result! We refilled all of our bottles with the excellent water and had a head shower to cool down which felt amazing but not as good as the cold water we chugged down.
Enjoying the view of Stob Coire Raineach as we refuel:
DSC_2539 by Chris Mac, on FlickrFlora:
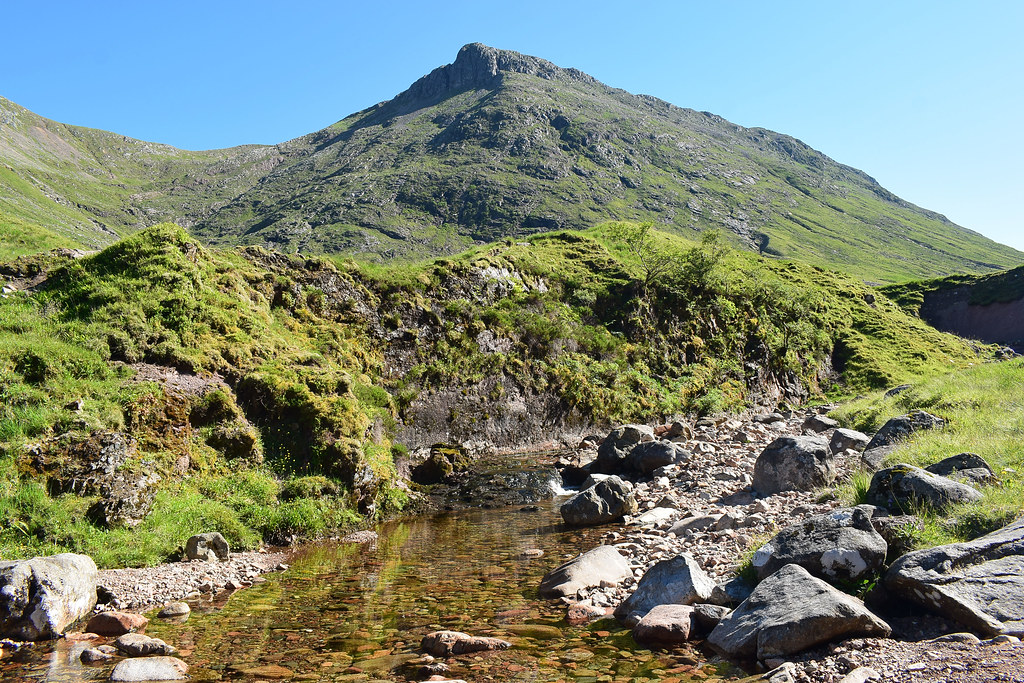
DSC_2549 by Chris Mac, on FlickrCrossing the River Coupall looking back at Stob Coire Altruim and the exit path:
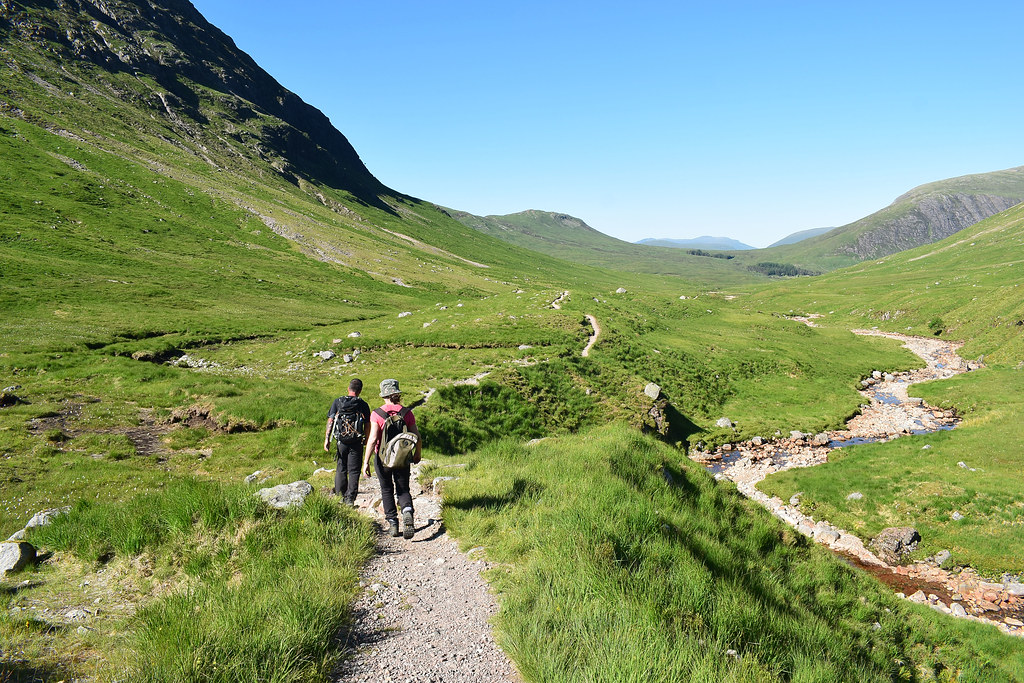
DSC_2566 by Chris Mac, on FlickrWe follow the excellent path, making fast progress along the scenic banks of the river:
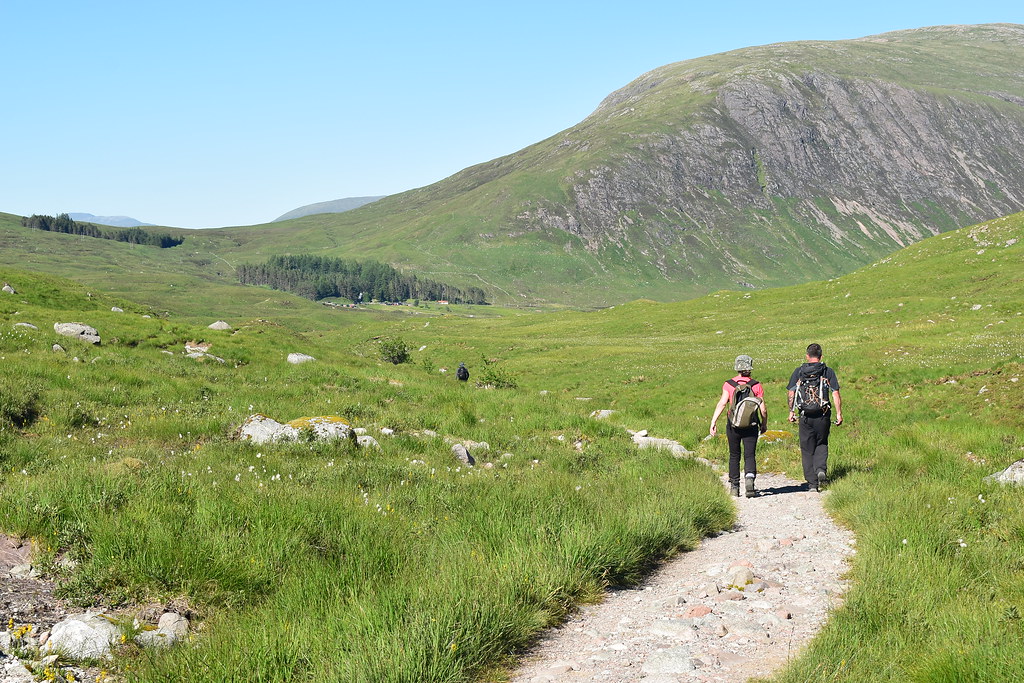
DSC_2570 by Chris Mac, on FlickrWe're soon heading towards Beinn a' Chrulaiste and the car park at Altnafeadh:
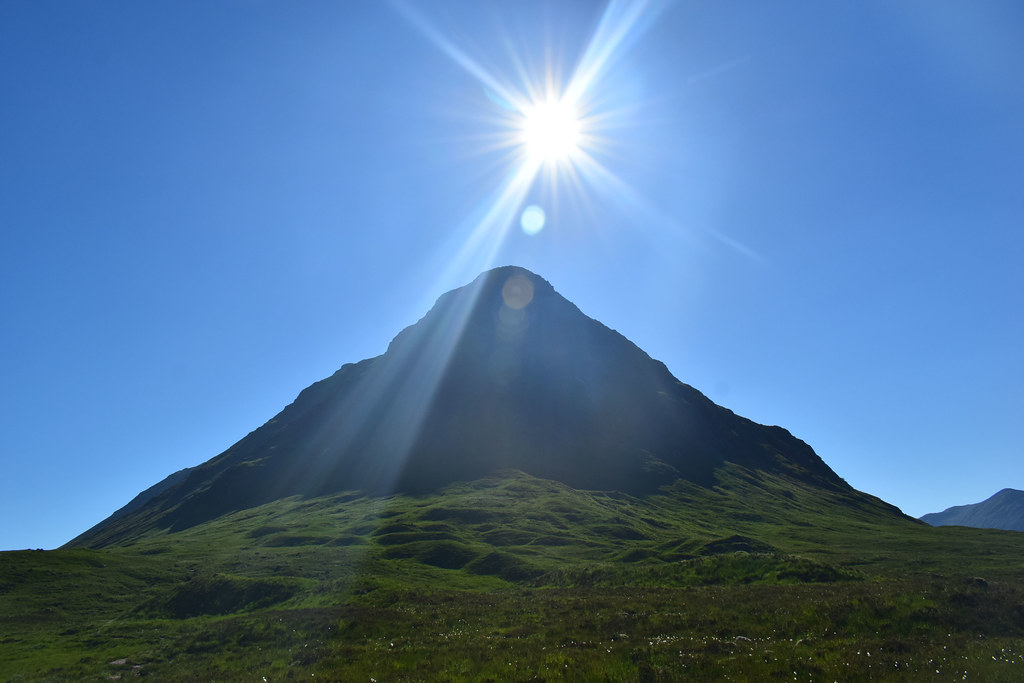
DSC_2580 by Chris Mac, on FlickrThe sun was much further west as 6pm approached, making it bang on 8 hours we had been walking, just the big day out I needed and we had done it in style! The Buachaille Etive Beag doing it's best Stob Dearg impression:
DSC_2590 by Chris Mac, on FlickrAlthough it's around the other side it's still quite strange looking at the steep side of Stob Dearg and thinking we just went up that way via Curved Ridge!!
DSC_2608 by Chris Mac, on FlickrFinal stretch back to Altnafeadh:
DSC_2613 by Chris Mac, on FlickrPanorama of the Big Buachaille:
DSC_2614 20180630_175654 by Chris Mac, on FlickrSo that was us, we had conquered Curved Ridge and the Big Buachaille in style and had one of our best days ouit ever, incredible scrambling, exposure and scenery, top quality ridge walking and views to die for, friendly people and characters all loving the being up the mountains on a glorious day, perfect!
On the drive home we all got exited like children as we spotted our route up and could scarcely believe we had been climbing up it just 6 or 7 hours earlier.
I'm still buzzing from doing it, we made a good team on our first outing together, had plenty to chat about and worked well together when we had to be serious about the scrambling and routefinding. We were all in agreement that if conditions permitted we would never climb Buachaille Etive Mor again by any other route than Curved Ridge and I say that having climbed it for the first time!
Stob Dearg... I think I love you!
DSC_2631 by Chris Mac, on Flickr