
Mullach Mor and A'Cruach (Holy Isle & Arran)
Sub 2000s: A'Chruach (Arran), Mullach Mòr (Holy Island)
Date walked: 01/05/2015
Hill: Mullach Mor (Holy Isle)
Date: Friday 1st May 2015
Company: Myself and John
Distance: 6.9km, Ascent: 460m
Time: 3Hrs
After spending a night based in Lochranza, we drove to Lamlash in order to catch the small ferry to the Holy Isle. Prior to leaving Lochranza, I took some photos of some Red Deer.
Deer at Lochranza:

We arrived in Lamlash with just over an hour to spare as we wanted to be sure of a place on the first ferry. The weather was outstanding throughout the day.
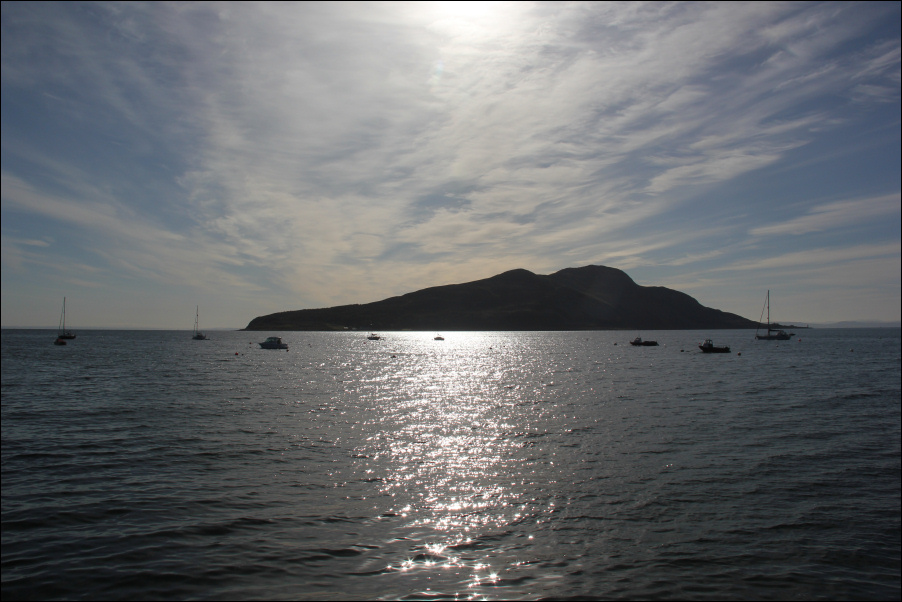
Holy Isle:

Holy Isle from Lamlash:

On reaching the Holy Isle ferry portakabin, I was delighted to see three Mute Swans and one goose standing just outside the portakabin. They didn't seem bothered by my presence, so I took the opportunity to take some close-up photos. I think I got to within about 12" of one of the swans.
Mute Swan at Lamlash:

Mute Swan close-up:
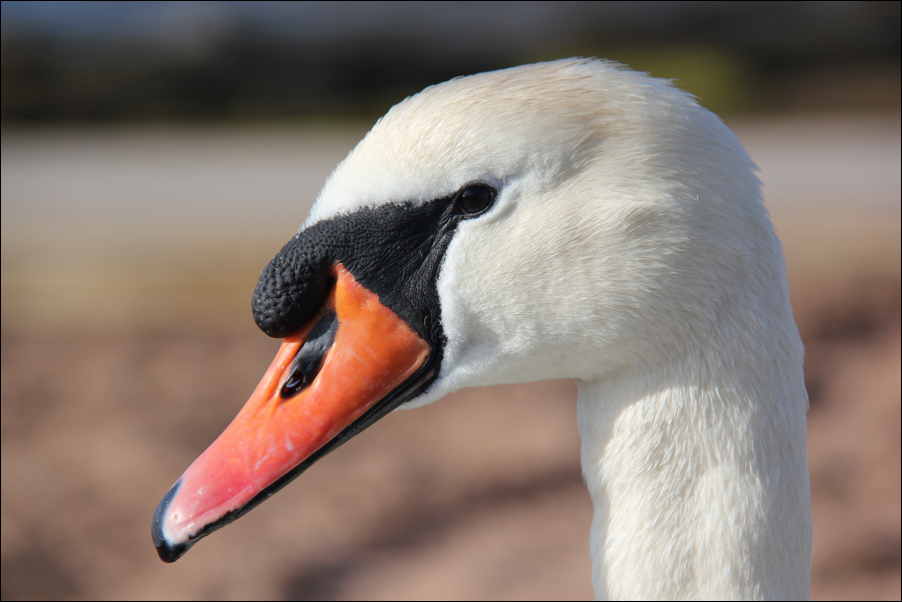
Mute Swan:

One of the swans seemed to be the surrogate parent of the goose. The goose followed one of the swans everywhere it went and seemed to get upset when the swan swam too far away from it.
Holy Isle:
What happened next was even more wonderful. A further eleven Mute Swans swam to the jetty to make fourteen in total. I have not seen so many Mute Swans in one place previously.
More Mute Swans arriving:

At around 10:10, we boarded the small ferry for the short crossing to Holy Isle. The return trip only costs £12.
Holy Isle ferry:
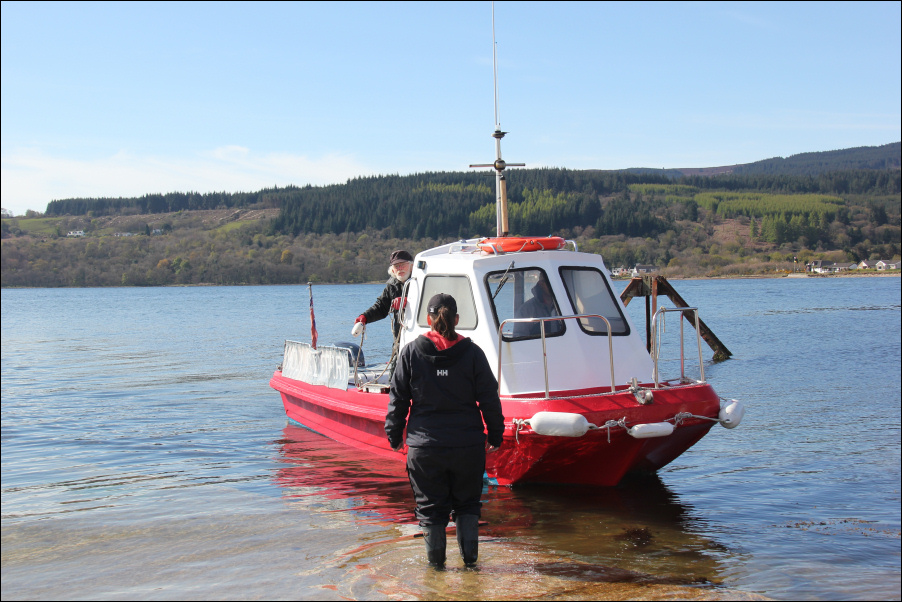
We chatted with the skipper whilst on board and were advised that there would be a ferry coming back at 14:00 and another at 15:00 but no more after that due to the tides. This would give us up to 4.5 hours to explore the island and of course ascend Mullach Mor.
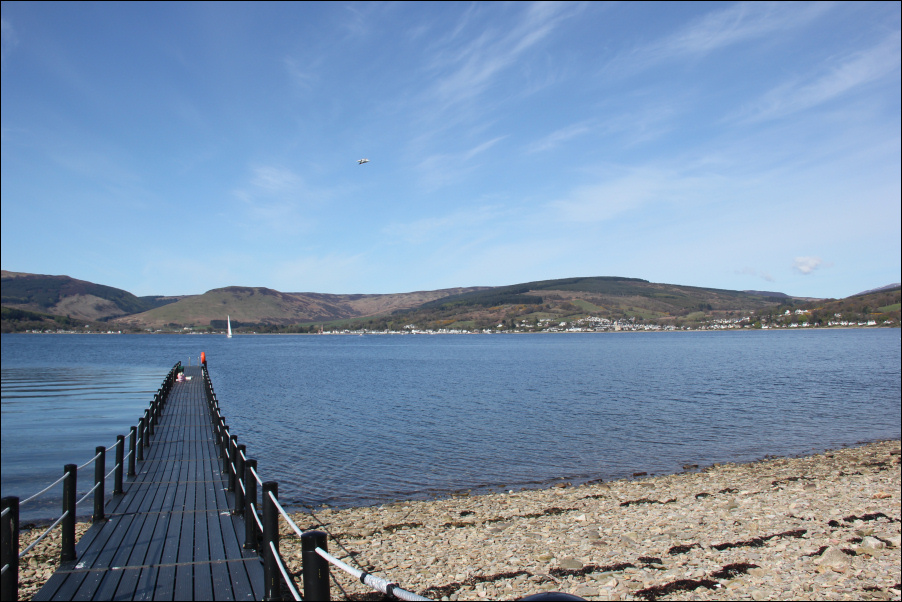
From the boat, the view back towards Lamlash looked almost Alpine.
Looking back to Lamlash from aboard the Holy Isle ferry:

Aboard the Holy Isle ferry, heading for Holy Isle:

We arrived on Holy Isle by 10:30 and were met and greeted on the jetty by a Holy Isle resident from the Tibetan Retreat. We were provided with lots of useful information about Mullach Mor and about things to see on the island including the lighthouses, a cave and Soay Sheep, Eriskay Ponies and wild goats. We were also offered the opportunity to have a cup of tea and a biscuit on our return from the hill.
On the Holy Isle jetty:
Click here to see a map of the route undertaken
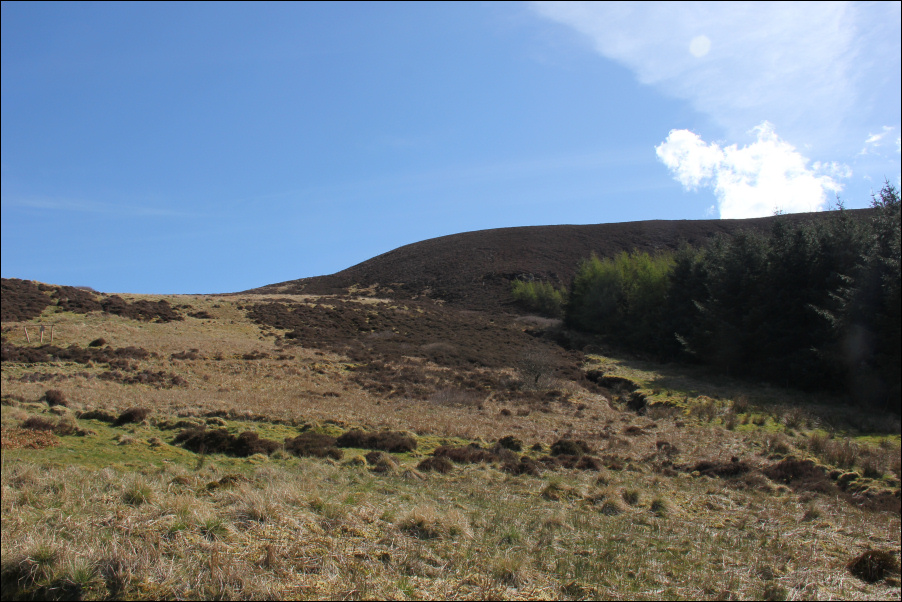
From the jetty, we made our way up a grassy field to the left of the Tibetan Retreat before following a small path up through the forest. The path is waymarked at every junction with little arrows pointing the way. For such a small remote hill, the track is fairly good.
During the ascent, I stopped countless times to take photos looking back towards Arran.
Looking across to Arran during ascent of Mullach Beag:

Looking across to Arran during ascent of Mullach Beag:
Seeing the stupas at the Tibetan Retreat reminded me of Ladakh (which is known as Little Tibet).
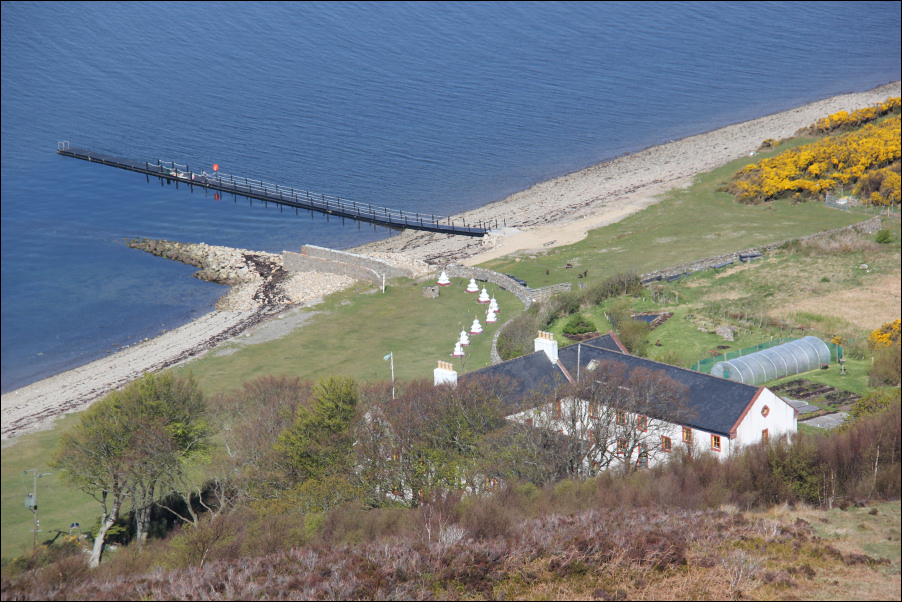
Looking down to the jetty and the Tibetan Retreat:
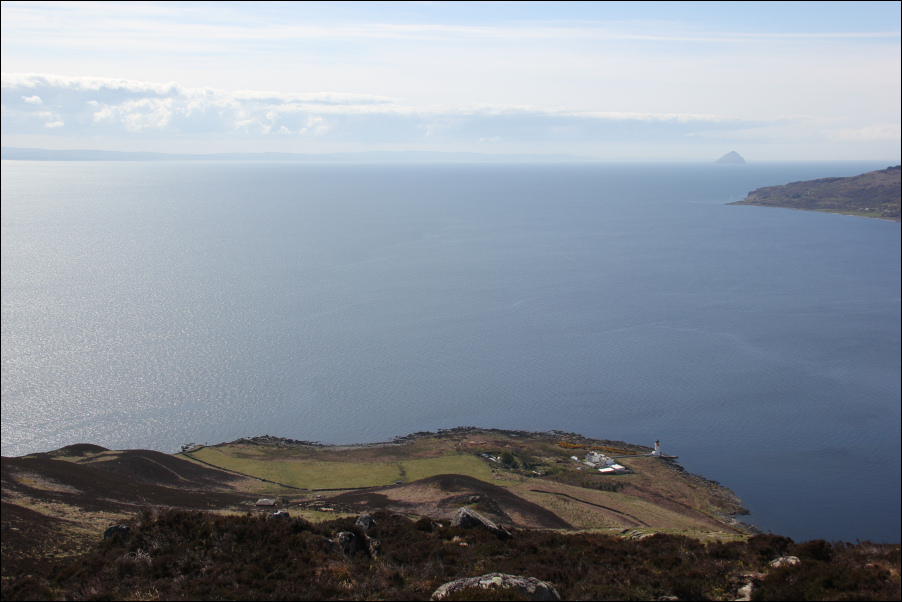
During the ascent of Mullach Beag, Ailsa Craig came into view. I had forgotten that Ailsa Craig was so close to Arran. Seeing Ailsa Craig was therefore a pleasant surprise.
Ailsa Craig coming into view during ascent of Mullach Beag:

It didn't take long to reach the summit of Mullach Beag from which we continued on towards the summit of Mullach Mor.
Looking towards Mullach Mor from the summit of Mullach Beag:

Looking towards Ailsa Craig (zoom):

During the ascent of Mullach Mor we passed two residents carrying out path repair work.
Ascending Mullach Mor:

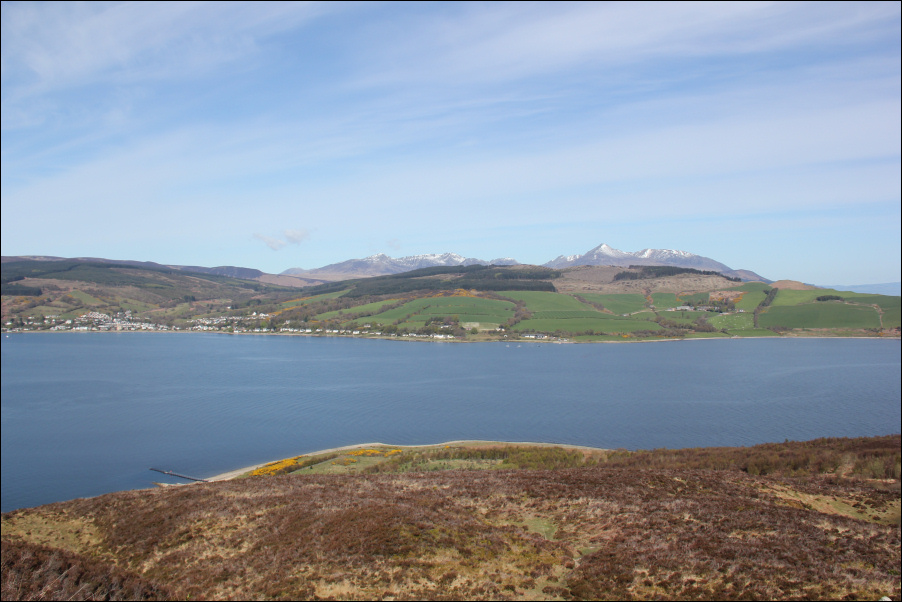
Looking across to Arran:

We reached the summit of Mullach Mor in just under one hour of walking. We spent around ten minutes at the summit savouring the views and taking lots of photos.
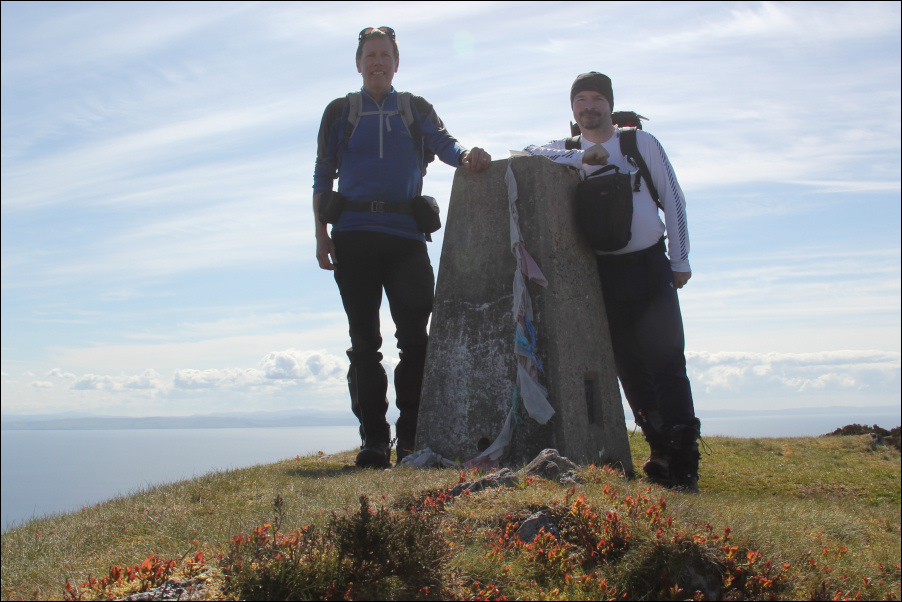
John and myself at the summit of Mullach Mor:
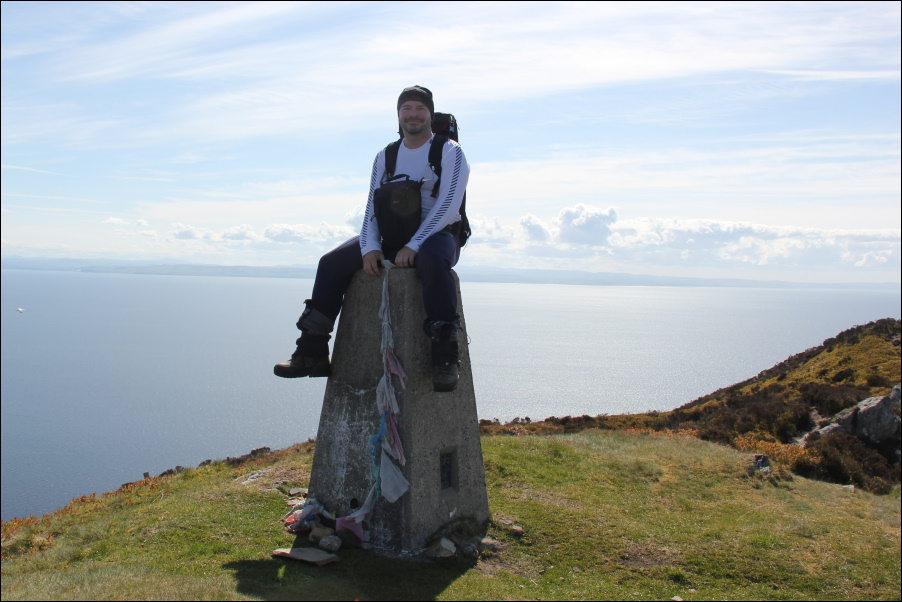
Myself at the summit of Mullach Mor:
Instead of returning the same way, it made much more sense to traverse the hill in order to see the various sites during the return walk along the coastal path.
Descent from Mullach Mor:
Looking back at steep section of descent:

During the descent there was a sign advising to stick to the path and also some ropes to follow. I assume this is to prevent anyone wondering over the very steep side of Creag Liath.
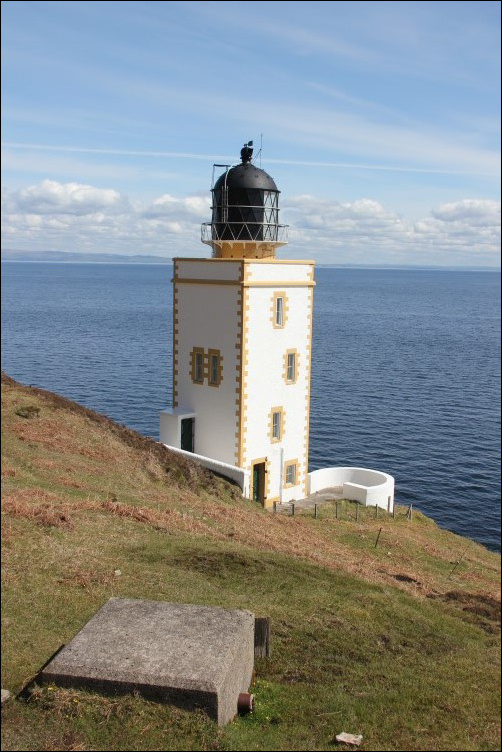
On reaching the base of the hill, we took a short diversion to visit the Holy Island (Outer) lighthouse.
Approaching the Holy Island (Outer) lighthouse:
Lighthouse sign:

Looking up the lighthouse:

We then followed the coastal track back towards the Tibetan Retreat.
On the track leading back to the Tibetan Retreat:
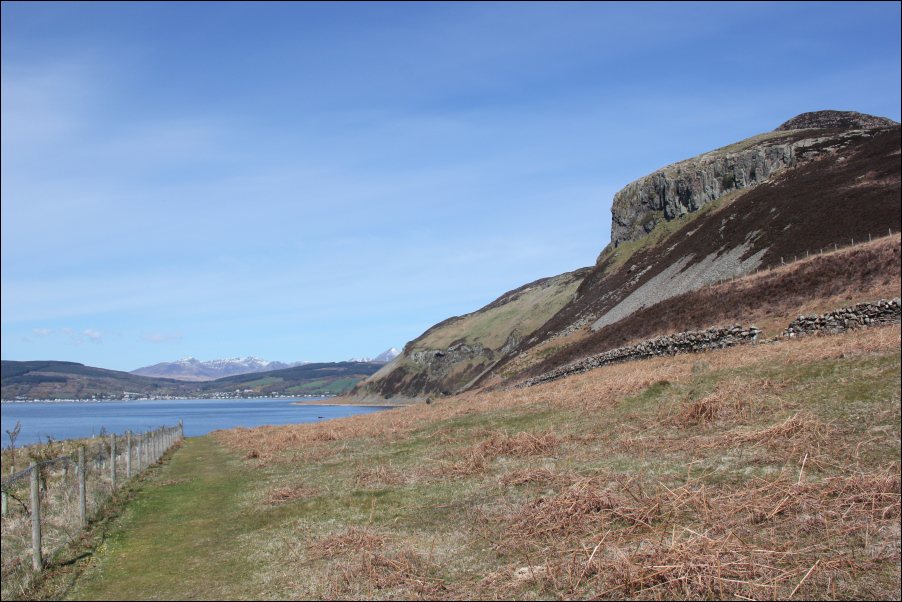
Creag Liath is a very impressive crag. There must be loads of routes on this crag. The crag would appear to be listed on UK Climbing but no routes are listed.
Creag Liath:

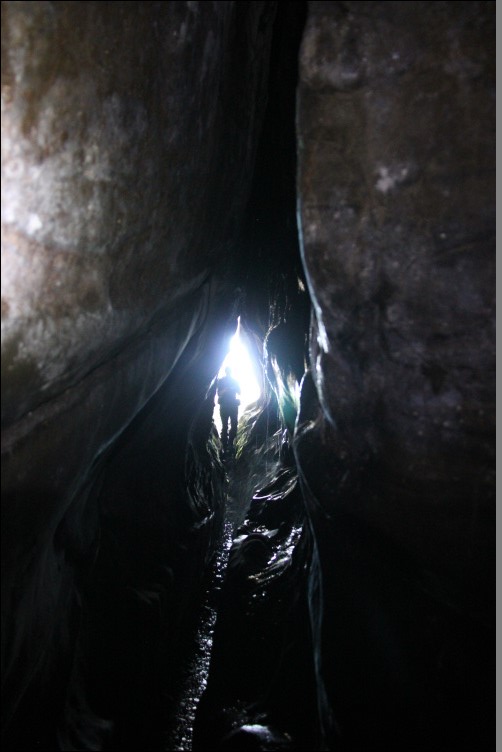
During the walk back along the coastal track, we passed a small cave that I assumed was the one we had been told about.
Small cave:
I got my headtorch out and decided to go as far into the cave as possible. It was fairly narrow and a bit wet inside. Worth a look though.
Looking back to John from inside the narrow cave:
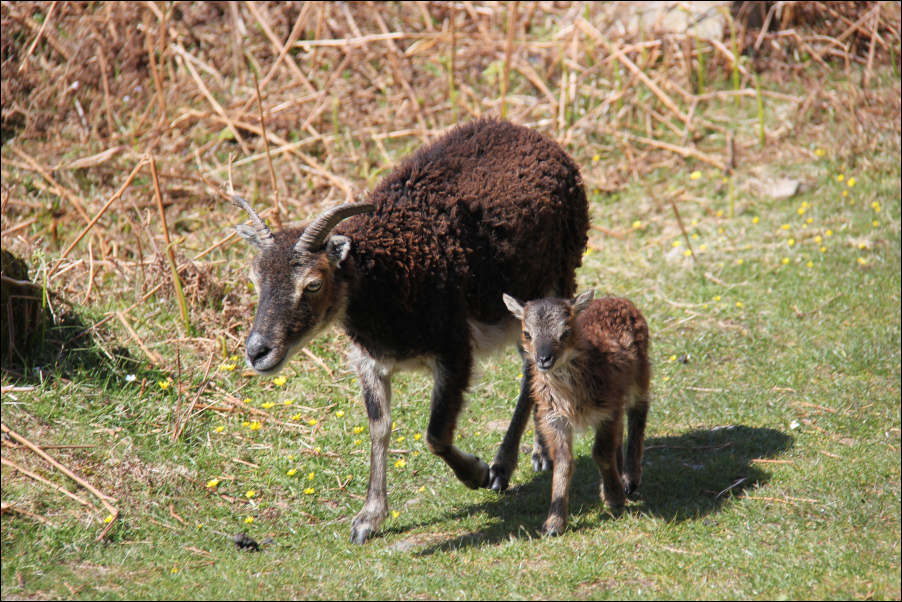
During the walk back we passed several wild goats and numerous Soay Sheep.
A young goat:

We also passed numerous Buddhist paintings, a few of which follow.
Buddhist painting:

Buddhist painting:
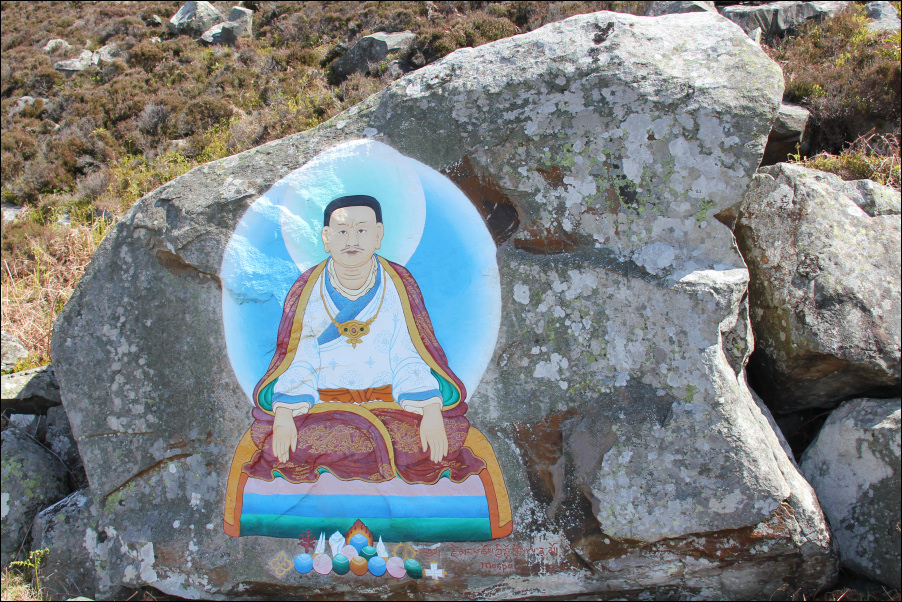
I think the Green Tara painting was the most impressive. The features were scuplted into the rock. A butterfly was sitting on the hand of Green Tara when we arrived but it flew off before I took the photo.
Buddhist painting:

Soay Sheep:
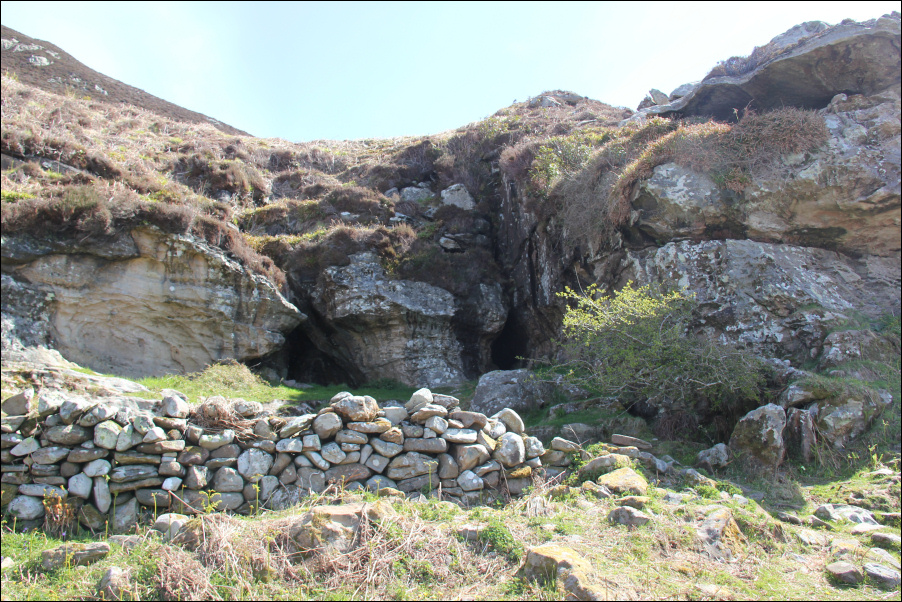
We then came to the large cave which was previously occupied by Saint Molaise. This was the cave that we had been informed about; not the narrow, wet cave!
John inside Saint Molaise cave:

Looking back along the coastal track:

On reaching the Tibetan Retreat we took up the kind offer of tea and biscuits, leaving a donation in return. I also bought some Tibetan prayer flags.
While awaiting the ferry, I sat and watched four Turnstones on the shore. Turnstones have great camouflage.
A Turnstone:

The ferry crossing back to Lamlash was nice too. Lamlash bay is the UK's first 'No Take Zone'. It is apparently against the law to take any sealife, using any means, from this area.
Aboard the Holy Isle ferry heading back to Lamlash:

A Grey Heron at Lamlash:

I was very content with my visit to Holy Isle and ascent of Mullach Mor but it was still fairly early, and the weather was good, so we opted to ascend another small hill.
We drove back to Brodick and then took the B880 to the 234m point for an ascent of A'Cruach.
Hill: A'Cruach
Date: Friday 1st May 2015
Company: Myself and John
Distance: 6km, Ascent: 310m
Time: 1Hr 50Mins
Click here to see a map of the route undertaken
In complete contrast to Mullach Mor, A'Cruach was not good. Completely pathless with heather, bog and peat hags the whole way.
Ascent of Cnoc Dubh:
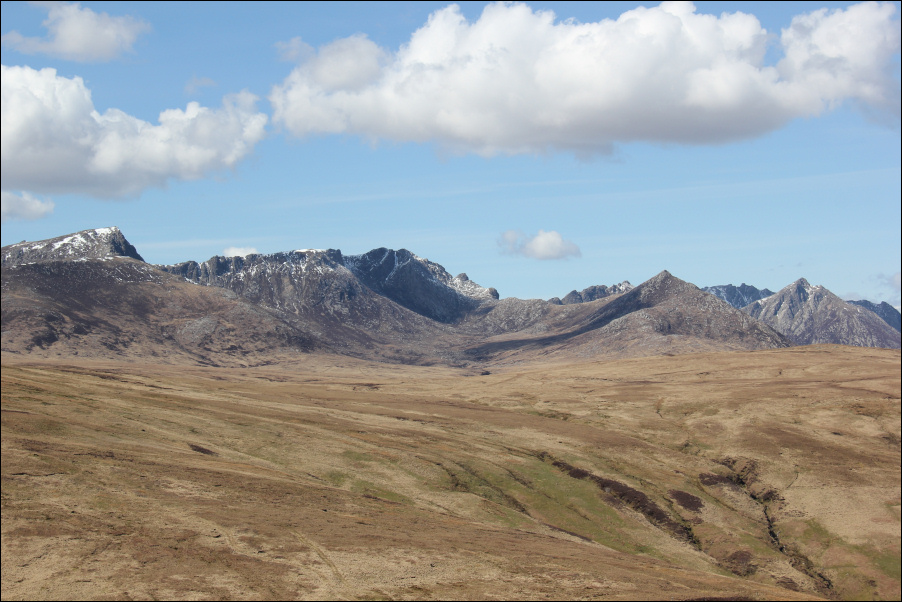
However, A'Cruach's redeeming feature is that it is a fantastic viewpoint for looking across to Beinn Tarsuinn, Cir Mhor, Caisteal Abhail and Goatfell.
Looking across to the Arran Corbetts:
We just headed up towards the top of Cnoc Dubh before continuing on towards A'Cruach.
At the summit of Cnoc Dubh:

I had thought the Cir Mhor rocks would be covered in snow today . I was very envious of several friends who had decided to take the chance of heading for Cir Mhor and who succesfully ascended Sou'Wester Slabs.
There was no snow on the route!Cir Mhor (zoom):

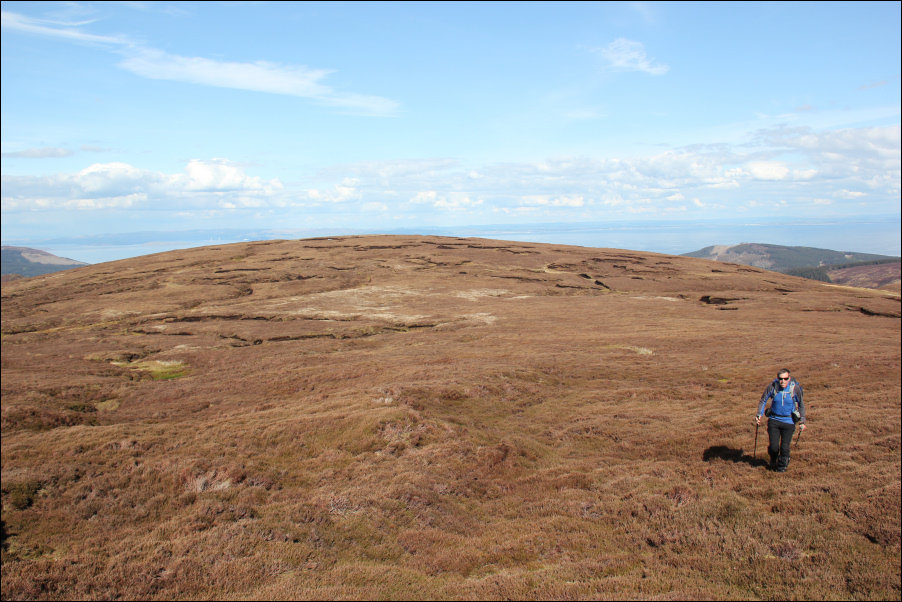
John ascending A'Cruach:
I felt relieved to reach the summit but was not looking forward to returning to the car via the same awful terrain.
At the summit of A'Chruach:

With the exception of the terrain on A'Cruach, this was an outstanding day.
I would highly recommend a visit to Holy Isle if you are ever across visiting Arran. Don't leave it for a poor weather day, as the views from Mullach Mor are great on a good day.
Date: Friday 1st May 2015
Company: Myself and John
Distance: 6.9km, Ascent: 460m
Time: 3Hrs
After spending a night based in Lochranza, we drove to Lamlash in order to catch the small ferry to the Holy Isle. Prior to leaving Lochranza, I took some photos of some Red Deer.
Deer at Lochranza:
We arrived in Lamlash with just over an hour to spare as we wanted to be sure of a place on the first ferry. The weather was outstanding throughout the day.
Holy Isle:
Holy Isle from Lamlash:
On reaching the Holy Isle ferry portakabin, I was delighted to see three Mute Swans and one goose standing just outside the portakabin. They didn't seem bothered by my presence, so I took the opportunity to take some close-up photos. I think I got to within about 12" of one of the swans.
Mute Swan at Lamlash:
Mute Swan close-up:
Mute Swan:
One of the swans seemed to be the surrogate parent of the goose. The goose followed one of the swans everywhere it went and seemed to get upset when the swan swam too far away from it.
Holy Isle:
What happened next was even more wonderful. A further eleven Mute Swans swam to the jetty to make fourteen in total. I have not seen so many Mute Swans in one place previously.
More Mute Swans arriving:
At around 10:10, we boarded the small ferry for the short crossing to Holy Isle. The return trip only costs £12.
Holy Isle ferry:
We chatted with the skipper whilst on board and were advised that there would be a ferry coming back at 14:00 and another at 15:00 but no more after that due to the tides. This would give us up to 4.5 hours to explore the island and of course ascend Mullach Mor.
From the boat, the view back towards Lamlash looked almost Alpine.
Looking back to Lamlash from aboard the Holy Isle ferry:
Aboard the Holy Isle ferry, heading for Holy Isle:
We arrived on Holy Isle by 10:30 and were met and greeted on the jetty by a Holy Isle resident from the Tibetan Retreat. We were provided with lots of useful information about Mullach Mor and about things to see on the island including the lighthouses, a cave and Soay Sheep, Eriskay Ponies and wild goats. We were also offered the opportunity to have a cup of tea and a biscuit on our return from the hill.
On the Holy Isle jetty:
Click here to see a map of the route undertaken
From the jetty, we made our way up a grassy field to the left of the Tibetan Retreat before following a small path up through the forest. The path is waymarked at every junction with little arrows pointing the way. For such a small remote hill, the track is fairly good.
During the ascent, I stopped countless times to take photos looking back towards Arran.
Looking across to Arran during ascent of Mullach Beag:
Looking across to Arran during ascent of Mullach Beag:
Seeing the stupas at the Tibetan Retreat reminded me of Ladakh (which is known as Little Tibet).
Looking down to the jetty and the Tibetan Retreat:
During the ascent of Mullach Beag, Ailsa Craig came into view. I had forgotten that Ailsa Craig was so close to Arran. Seeing Ailsa Craig was therefore a pleasant surprise.
Ailsa Craig coming into view during ascent of Mullach Beag:
It didn't take long to reach the summit of Mullach Beag from which we continued on towards the summit of Mullach Mor.
Looking towards Mullach Mor from the summit of Mullach Beag:
Looking towards Ailsa Craig (zoom):
During the ascent of Mullach Mor we passed two residents carrying out path repair work.
Ascending Mullach Mor:
Looking across to Arran:
We reached the summit of Mullach Mor in just under one hour of walking. We spent around ten minutes at the summit savouring the views and taking lots of photos.
John and myself at the summit of Mullach Mor:
Myself at the summit of Mullach Mor:
Instead of returning the same way, it made much more sense to traverse the hill in order to see the various sites during the return walk along the coastal path.
Descent from Mullach Mor:
Looking back at steep section of descent:
During the descent there was a sign advising to stick to the path and also some ropes to follow. I assume this is to prevent anyone wondering over the very steep side of Creag Liath.
On reaching the base of the hill, we took a short diversion to visit the Holy Island (Outer) lighthouse.
Approaching the Holy Island (Outer) lighthouse:
Lighthouse sign:
Looking up the lighthouse:
We then followed the coastal track back towards the Tibetan Retreat.
On the track leading back to the Tibetan Retreat:
Creag Liath is a very impressive crag. There must be loads of routes on this crag. The crag would appear to be listed on UK Climbing but no routes are listed.
Creag Liath:
During the walk back along the coastal track, we passed a small cave that I assumed was the one we had been told about.
Small cave:
I got my headtorch out and decided to go as far into the cave as possible. It was fairly narrow and a bit wet inside. Worth a look though.
Looking back to John from inside the narrow cave:
During the walk back we passed several wild goats and numerous Soay Sheep.
A young goat:
We also passed numerous Buddhist paintings, a few of which follow.
Buddhist painting:
Buddhist painting:
I think the Green Tara painting was the most impressive. The features were scuplted into the rock. A butterfly was sitting on the hand of Green Tara when we arrived but it flew off before I took the photo.
Buddhist painting:
Soay Sheep:
We then came to the large cave which was previously occupied by Saint Molaise. This was the cave that we had been informed about; not the narrow, wet cave!
John inside Saint Molaise cave:
Looking back along the coastal track:
On reaching the Tibetan Retreat we took up the kind offer of tea and biscuits, leaving a donation in return. I also bought some Tibetan prayer flags.
While awaiting the ferry, I sat and watched four Turnstones on the shore. Turnstones have great camouflage.
A Turnstone:
The ferry crossing back to Lamlash was nice too. Lamlash bay is the UK's first 'No Take Zone'. It is apparently against the law to take any sealife, using any means, from this area.
Aboard the Holy Isle ferry heading back to Lamlash:
A Grey Heron at Lamlash:
I was very content with my visit to Holy Isle and ascent of Mullach Mor but it was still fairly early, and the weather was good, so we opted to ascend another small hill.
We drove back to Brodick and then took the B880 to the 234m point for an ascent of A'Cruach.
Hill: A'Cruach
Date: Friday 1st May 2015
Company: Myself and John
Distance: 6km, Ascent: 310m
Time: 1Hr 50Mins
Click here to see a map of the route undertaken
In complete contrast to Mullach Mor, A'Cruach was not good. Completely pathless with heather, bog and peat hags the whole way.
Ascent of Cnoc Dubh:
However, A'Cruach's redeeming feature is that it is a fantastic viewpoint for looking across to Beinn Tarsuinn, Cir Mhor, Caisteal Abhail and Goatfell.
Looking across to the Arran Corbetts:
We just headed up towards the top of Cnoc Dubh before continuing on towards A'Cruach.
At the summit of Cnoc Dubh:
I had thought the Cir Mhor rocks would be covered in snow today . I was very envious of several friends who had decided to take the chance of heading for Cir Mhor and who succesfully ascended Sou'Wester Slabs.
There was no snow on the route!Cir Mhor (zoom):
John ascending A'Cruach:
I felt relieved to reach the summit but was not looking forward to returning to the car via the same awful terrain.
At the summit of A'Chruach:
With the exception of the terrain on A'Cruach, this was an outstanding day.
I would highly recommend a visit to Holy Isle if you are ever across visiting Arran. Don't leave it for a poor weather day, as the views from Mullach Mor are great on a good day.
Click to mark this as a great report. Register or Login free to be able to rate and comment on reports (as well as access 1:25000 mapping).
Comments: 6
Pillar, Black Crag, Scoat Fell, Steeple and Red Pike
Wainwrights: Pillar, Red Pike (Wasdale), Scoat Fell, SteepleHewitts: Pillar, Pillar - Black Crag, Red Pike (Wasdale), Scoat Fell
Date walked: 18/04/2015
Distance: 18km
Ascent: 1290m
Comments: 7
Views: 8298
Sgor Gaoith, its Tops and great wildlife
Date walked: 18/03/2015
Distance: 19.5km
Ascent: 960m
Comments: 7
Views: 5836
Meall Innis an Loichel and a traverse of Beinn na Muice
Fionas: Beinn na MuiceSub 2000s: Meall Innis an Loichel
Date walked: 14/02/2015
Distance: 11.4km
Ascent: 820m
Comments: 2
Views: 3345
A stunning day on Meall Ghaordaidh
Munros: Meall GhaordaidhDate walked: 17/01/2015
Distance: 10.3km
Ascent: 900m
Comments: 7
Views: 5659
Wishing the sna wiz awa on Creag Each
Fionas: Creag EachDate walked: 16/01/2015
Distance: 9.2km
Ascent: 580m
Comments: 2
Views: 2807
A traverse of Lochnagar (Spittal of Glenmuick to Crathie)
Munros: LochnagarDate walked: 02/01/2015
Distance: 19.5km
Ascent: 970m
Comments: 5
Views: 6471
Aberdeen (a visit to my hame toon)
Date walked: 19/12/2014Distance: 13.1km
Ascent: 125m
Comments: 2
Views: 3673
Five New Donalds above the Megget Reservoir
Donalds: Cramalt Craig, Dollar Law, Greenside LawDate walked: 16/11/2014
Distance: 23.3km
Ascent: 1050m
Comments: 5
Views: 6193
Peterhead Coast
Date walked: 18/10/2014Distance: 11km
Comments: 2
Views: 3110
-
foggieclimber
- Filter reports
- Trips: 7
- Distance: 87.9 km
- Ascent: 5520m
- Munros: 3
- Fionas: 2
- Sub2000s: 3
- Hewitts: 4
- Wainwrights 4
- Trips: 20
- Distance: 281 km
- Ascent: 11765m
- Munros: 3
- Corbetts: 1
- Fionas: 4
- Donalds: 3
- Sub2000s: 5
- Hewitts: 4
- Trips: 33
- Distance: 390.1 km
- Ascent: 21365m
- Munros: 18
- Fionas: 4
- Donalds: 4
- Sub2000s: 15
- Hewitts: 10
- Wainwrights 17
- Trips: 30
- Distance: 247.2 km
- Ascent: 13680m
- Munros: 12
- Corbetts: 1
- Fionas: 5
- Donalds: 8
- Sub2000s: 11
- Hewitts: 28
- Wainwrights 15
- Trips: 27
- Distance: 152 km
- Ascent: 9615m
- Munros: 2
- Corbetts: 12
- Fionas: 10
- Sub2000s: 12
- Hewitts: 9
- Trips: 16
- Distance: 63.5 km
- Ascent: 4740m
- Corbetts: 13
- Fionas: 3
- Sub2000s: 14
- Trips: 8
- Distance: 26 km
- Munros: 1
- Corbetts: 6
- Fionas: 3
- Sub2000s: 1
- Trips: 5
- Munros: 9
- Trips: 1
- Joined: Aug 09, 2009
- Last visited: -
- Total posts: 1041 | Search posts