Summary
This classic stage crosses the Great Wilderness - as the Letterewe and Fisherfield forests are known. There are good paths and tracks apart from a short rough, boggy, pathless section at the high point above Loch Fada. It's possible to cut the stage short by skipping the final approach to Shenavall, but the bothy is large, well-appointed with excellent views.
Grade

Bog Factor

Rating
Distance
Time
(in summer)
Ascent
Terrain
One section of pathless, rough terrain; the rest of the route has decent paths and tracks.
Are you REALLY ready for winter hills?
Hillwalking when there is snow lying requires an ice-axe, crampons and knowledge of how to use them safely. The description here is for summer conditions.
See our Winter Skills page for basic information on the essential skills, techniques and knowledge needed for winter.
Getting there
Start
Kinlochewe.
Public Transport
Kinlochewe is served by buses from Inverness; there is no road access to Shenavall.
Start Grid Ref
NH030618

Stage 1
Leave Kinlochewe by heading east along the pavement adjacent to the A832. Pass the small church and Kinlochewe Lodge before turning left signed for Incheril. Pass the primary school and the buildings at Incheril. Ignore the entrance to the car park on the right, following the footpath sign for Dundonnell, pass in front of a final house and go through a gate onto a track. Follow this alongside the pretty Abhainn Bruachaig river, passing a hydro building before reaching the Heights of Kinlochewe - scattered houses and estate buildings.

Stage 2
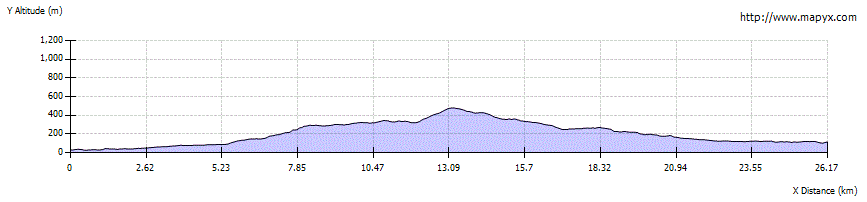
When the track forks head left up a good track that climbs to enter Gleann na Muice. Descend to cross a bridge and climb again still on the track. At the 8km point continue ahead on a narrower path ignoring an ATV track heading steeply uphill to the right. The path undulates with great views opening up of the mountains ahead.

Stage 3
Pass a couple of small lochs - Loch Gleann na Muice and Loch an Sgeireach, before descending towards the southeast end of the much larger Lochan Fada. Before the path reaches the loch look out for a faint path heading NE (right) at the 12km point on the WH map/app. The rough, narrow path heads directly uphill through a couple of boggy areas, there are some tiny cairns marking the route. There are superb views back to Slioch.

Stage 4
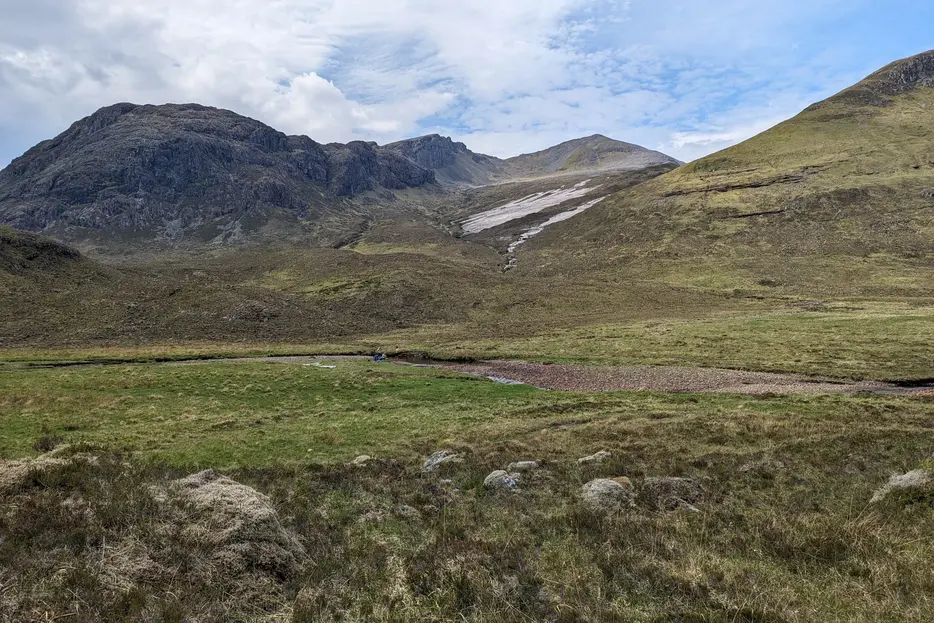
The route pass the west side of Loch Meallan an Fhudair to reach a shoulder marked with a larger cairn and great views of the route ahead. From here there is a section of pathless, rough, boggy terrain although there are sections of path in places. Aim to traverse towards the Bealach na Croise without losing too much height. The first obstable is a crossing of the Allt Coire Mhic Fhearchair, aim just above a couple of waterfalls for the easiest point and then head directly to the Bealach na Croise picking up a path. Navigation on this section can be difficult in poor weather.

Stage 5
Descend the glen before keeping on the path keeping on the west side and well above the Allt Cul Doireachain to head towards Loch an Nid. If water levels are very high it is better to descend directly to the Allt Cul Doireachain from the 16km point in order to try and find a safe crossing point. Otherwise follow the faint path and onto a smaller path which aims to the right to head down and cross the flat ground before the loch and then a crossing of the river (some good campspots here).

Stage 6
On the far side continue ahead to pick up the path and turn left to follow the eastern shore of Loch an Nid. The glistening quartzite slabs on the eastern flanks of Sgùrr Ban look particularly good from here. Follow the path which eventually widens to a track alongside Abhainn Loch an Nid for 5km until a ruin and a confluence with a smaller burn.

Stage 7
Continue ahead on a path to cross the burn to pick up reach a good vehicle track east of a stand of trees in Strath na Sealga. Turn left, pass the trees (a good wild camping spot) and continue deeper into the glen. The path deteriorates after Achneigie before reaching the large bothy at Shenavall.

Stage 8
This is a popular bothy, a favoured start point for the round of the Fisherfield Munros. Thankfully it has plenty of space and good camping spots outside (there is no road access), as well as panoramic views, especially of Beinn Dearg Mòr . The bothy is maintained by volunteers from the Mountain Bothy Association; please help by carrying out any rubbish you find here, and always follow the bothy code when visiting.
Next stage: Shenavall to Inverlael

Route Profile