
 Finding your way in winter means facing challenging weather and shorter daylight hours, but with the right tools you can still enjoy the hills with confidence. David Lintern goes back to basics (again).
“It’s about having good strategies, and sticking to them. Everything you do in these conditions needs to be clear headed, focused and reversible. If it all goes pear shaped you need to be able to backtrack exactly. The very last thing you should do is randomly ‘wander over for a look'”.
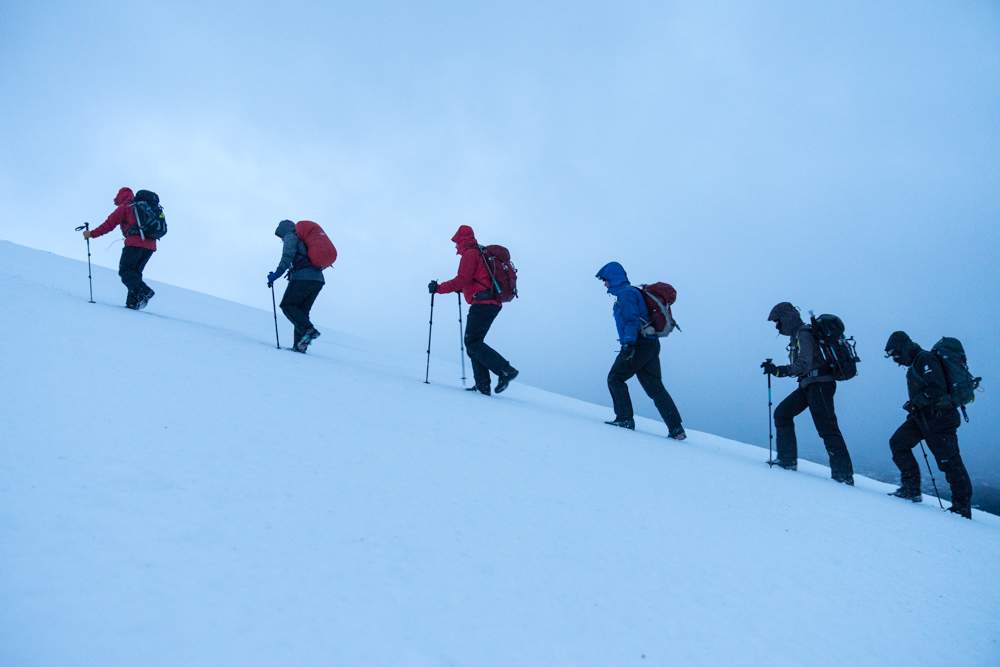
At least I’m pretty sure that’s what she said. I’m standing in a tight circle with a half dozen other aspirant winter navigators at about 700m as the last of Storm Georgina blows itself out to our backs. Heather Morning, mountain safety adviser with national body Mountaineering Scotland and our tireless leader, is shouting above the maelstrom in a voice both assertive and totally unperturbed by the surrounding cacophony. She may be the only one with the blizzard blowing into her face, but anyone with their back full to the wind is being jostled and occasionally, just plain shoved. It’s akin to being in a hostile playground on a first day at a new school… in the dark, in double digits of wind chill below zero.

These are not the sort of conditions that anyone in their right mind would choose to come out in, but that’s precisely the point. That school analogy is also fitting because this is Heather’s classroom and we are her students. Heather calls it ‘a baptism of fire’ for many of the attendees, but while the conditions are utterly real, we are in very capable hands. It’s controlled chaos, a supervised real-world stress test to equip us with the right tools to cope on our own, next time.
This particular one day winter navigation course is a new initiative, begun in the winter of 2017 as a response to accident stats that show navigation errors as making up a quarter of all Mountain Rescue callouts, and 90% of avalanches as human triggered. Our ‘class’ begins in the afternoon and runs through to 9 or 10 in the evening, covering the times when hillgoers are most likely to call Mountain Rescue, caught out in deteriorating conditions or rapidly failing winter light. All of my companions have attended a winter skills course prior to this one, so the focus here is on improving those navigation skills and avoiding another ‘Cairngorm epic’.

A change of plan
The ‘strategies’ that Heather mentioned begin long before we set foot from the meeting point. With winds gusting to 112MPH on the plateau, there is no point in attempting to head into the Northern Corries, where the group would be unable to move and bail options would be limited.
What tools are used to get weather information? MWIS, the Met office mountain forecast, and in our case, the Herriot Watt weather station on Cairn Gorm.
A plan B and C are discussed before Heather settles on the Feshie Hills, with plenty of opportunities to bail if the weather forecast for slowly improving conditions doesn’t materialize, and lots of open ground upon which to practice. It’s another reminder that no matter how far we’ve come to be here, or how keen we are to reach a summit or climb a route, Scotwinter always has the last say. No matter – anywhere above the tree line today will be an adventure!

Prior to going out, we’ve also scoped out which slopes might be avalanche prone. Using the index contours on our map, plus information from the Scottish Avalanche Information Service (SAIS) about wind direction and snow instability, we’ve figured out a circular route avoiding anything high risk. How? As a general rule, the high-risk slopes are lee facing (opposite the wind direction… but based on recent conditions, not just the day in question!) and at an angle between 30-45 degrees. On a 1.25K map, that means the highest risk index contours (the thick, 50m lines) will be 4mm or less, apart. On a 1.50K map, the high-risk slopes would be lee facing and have index contours 2mm or less, apart.
Navigation is not just about going the right way, it’s about evidence based decision making, both before and during the day.
Rehearsing the basics
The walk in to the foot of the route is not a distraction or a waste of time before the main event, but a vital part of the bigger picture. Early on, each of the group notes their own pace – or how many steps in a 100 metres – so we are able to use pacing as a tool to judge distance later, when it’s too dark to note ‘catching features’ like a burn crossing, a tree line, a change in the direction of the path or the camber of the hill.
We’d already learnt Naismith’s Rule back at the meeting point, which gives us a guide for timing: It’s 1 hour for 4 km of travel by foot, meaning 1km every 15 minutes, or 1.5 minutes for each 100ms. Throughout the day (and night) we estimate our timing before beginning each ‘leg’ or section of the route, adding an additional 1 minute for every 10m of ascent to the total. This works side by side with pacing in night navigation.

Navigation by eye in daylight means we can be more reliant on ‘ticking off‘ those features we encounter on the way, but we also note wind speed and direction – what are the clouds and trees doing? – and pay particular attention to snow conditions. We spy a cornice remaining after the thaw, with a fracture in the crown wall. This tells us where the lee slopes are in this area, and that there are weaknesses in the snowpack. It’s all about collecting evidence, says Heather. We’ll need it later, when we can’t see beyond our torch beams.
These tools are even more important when conditions are, like today, less than optimal! It’s a cold, dark and stressful environment and everyone’s concentration is tested. I can barely think straight enough to take photos, and I’m genuinely impressed by my fellow sufferers who all seem to be quite cheerful. They even manage to steer us in roughly the right direction.
No direction home?
Talking of steering… Using the compass, we orientate the map, making sure it’s sitting with the vertical grid lines pointing the right way. We line up the edge of the compass between where we are and where we want to go, with the direction of travel arrow pointing to the latter. We rotate the baseplate to get red north on the plate to match the northings on the map. That gives us our bearing. With ‘red in the bed’ on the compass, we stuff our maps back into our pockets out of the wind, and holding the compass flat in the hand and ahead of us, we walk in the direction of travel, always ensuing that the compass needle sits within the red arrow of the baseplate.
But before we head off, and with the map still in front of us, it’s worth asking some simple questions. Does our bearing fit with what we expected in general terms (say, north easterly)? If it’s wildly different, it’s worth double checking. Another: What would we expect to find on the ground if we miss or go past the target? Would we meet a rising, or falling slope, and does the ground rise or fall to the left or the right. Would we meet a coire edge (careful!)… and so on. These are ‘overshoot features’. It may sound obvious, but under stressful conditions common sense can suffer.
We walk with one person a few metres ahead, with the rest of us following along behind the second in single file. The second in line is also on the bearing, and the leaders rotate each leg so that everyone stays fresh and, in this case, is given plenty of practice. We’re told not to spread out, as people in the periphery of the leader’s vision can result in the group drifting off the bearing. Occasionally, the leader stops to let their compass needle settle again before continuing.
As we progress up the mountain and we leave footprints in the snow, the winter conditions are actually an advantage. We turn 180 degrees and take a ‘back bearing’: Putting the white compass needle in the bed, we check to see if our footsteps are directly in line with the direction of travel? This is fantastic feedback and encourages us to focus on tightening up our accuracy.
As we turn around after taking a back bearing, we’re warned to give the compass needle time to settle again. Even a degree or two of deviation over a long distance could lead us astray, and without obvious catching features (it’s now pitch black, save for light from our head torches catching billowing snow) we might drop into the wrong glen or head up the wrong slope.

Putting it all together
These are the basic tools of successful travel in the winter mountains. None is infallible, but together they give us a reasonable indication of where we are, and some structure to base our next decision on.
Our evening in the Feshie Hills was a case in point. Gaining a feature called ‘the notch’ took several minutes longer than anticipated. This was probably due to darkness arriving in earnest and the weather worsening, as we contoured slightly over uneven and rocky ground. It was an object lesson in trusting oneself to an accurate bearing. I for one was wavering.
After a long slog up Carn Bàn Mòr, we struggled to find the summit. Once again, we stuck to our bearings and then ‘boxed out’ the area, so we were able to retrace our steps if needed. We never did quite find this blunt top, and time dictated we needed to descend. Scotwinter wins again, perhaps… but safe to say by the end of the evening everyone was a better navigator than when they started, so our real objective was achieved.
There are other tricks in the bag, too. Taking a bearing on a linear feature – a burn, for example. Using water features in winter at higher altitudes is plagued with difficulty (they will be under snow), but it can be useful in some cases. Measuring ‘Slope Aspect’: Sending a partner up or down a slope and taking a bearing on them can also help you narrow the field when it comes to relocation.
If you are misplaced or disorientated in a hoolie on an evening blacker than Satan’s armpit, things can fall apart pretty quickly. Then, as Heather gently warned us, is not the time to get all touchy feely about your plans. Stay calm, work out a structured plan of action to get off the hill, get a bearing, start pacing and timing the next leg, asking yourself which catching feature you hope to emerge from the dark. Repeat until you are better informed.
Be prepared, not scared
The old arguments – paper versus digital mapping – surface on social media with tedious regularity, but it’s a non-debate, and the accident stats prove it.
In any conditions, but especially in winter, we’d be fools not to have every tool to hand. We’d also be crazy to rely on any one single tool to solve our all navigation problems on its own. Attach your map and compass to your jacket with cord, have a GPS in your pack and a mapping app on your phone. Don’t expect the map not to get blown away, the compass to survive a drop or your phone battery to last the hour in frostbite conditions. Expect and plan for redundancy, and avoid disappointment (or worse) when it happens.

Most of all, know how to use all of the above. New research by Ramblers Scotland suggests 23% of the young people they asked have concerns over safety and getting lost. If that sounds like you, or if some or any of the above article is gobbledygook or felt alarmist, make it a lifegoal this year to get some navigation training. There’s no shame in it, it’s great fun learning with others, and there’s a real sense of achievement when you get it right. Join a walking group, hassle your school or college to get some outdoor learning onto the curriculum. The course I’ve described is excellent but there are many others, and any of them will be a great start. And go out specifically with the aim of practicing your navigation skills – this can be done at lower levels and in poor weather, when you’d rather not be high in the hills. Even for this not-so-wise old hand, my winter navigation refresher was a genuine eye opener.
Walkhighlands and Mountaineering Scotland are again running a series of one-day navigation courses this summer – booking details here.
Many guides also offer navigation courses as well as winter skills and bespoke guiding – in addition to the guides listed here check out the local guides for each Scottish area by scrolling to the bottom of the page.